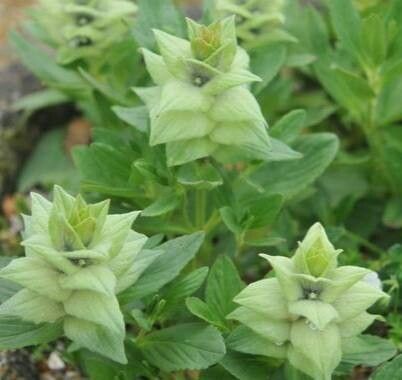
Hello, fellow plant lovers! If you’re anything like me, you’ve probably admired the beautiful, robust foliage and those delightful little flower spikes of Ajuga lupulina. It’s a fantastic groundcover, isn’t it? That rich, bronze-green color really pops in the garden, and it’s surprisingly tough. The best part? Propagating it is a wonderfully rewarding way to multiply that beauty for free! Don’t worry if you’re new to this; Ajuga is quite forgiving, making it a great plant to start your propagation journey with. Let’s get our hands a little dirty!
The Best Time to Start
The sweet spot for propagating Ajuga lupulina is definitely late spring to early summer. This is when the plant is actively growing and has plenty of healthy, flexible stems that are more eager to root. You can also try division in early spring as soon as the soil can be worked, but for stem cuttings, summer is your prime time.
Supplies You’ll Need
Gathering your supplies beforehand makes the process so much smoother. Here’s what you’ll want to have on hand:
- Sharp pruning shears or a clean knife: For taking clean cuttings.
- Potting mix: A mix designed for cuttings or seed starting is ideal. It should be light and well-draining. I often use a blend of peat moss, perlite, and a little compost.
- Small pots or trays: Clean ones, please! About 3-4 inches in diameter work well.
- Rooting hormone (optional but recommended): This gives your cuttings a helpful boost.
- Plastic bags or a propagator: To create a humid environment.
- Watering can or spray bottle: For gentle watering.
- Labels or markers: To keep track of what you’ve planted and when.
Propagation Methods
Ajuga is a champion at self-propagation, but we can give it a nudge! Here are my go-to methods:
1. Stem Cuttings: This is my favorite for Ajuga.
- Step 1: Find a healthy, non-flowering stem. Look for one that’s flexible but not overly woody.
- Step 2: Using your sharp shears, cut a piece of stem about 4-6 inches long. Make your cut just below a leaf node (where a leaf meets the stem).
- Step 3: Gently remove the lower leaves, leaving just a few at the top. This prevents them from rotting when buried.
- Step 4: If you’re using rooting hormone, dip the cut end into it. Just a light dusting is usually enough.
- Step 5: Fill your pots with the prepared potting mix. Make a small hole with your finger or a pencil.
- Step 6: Insert the cutting into the hole, ensuring the leaf nodes you bared are below the soil surface. Gently firm the soil around the stem.
- Step 7: Water thoroughly but gently.
- Step 8: Cover the pot with a plastic bag or place it in a propagator to maintain humidity. Poke a few holes in the bag for ventilation. Place it in a bright spot, but out of direct sunlight, which can scorch tender cuttings.
2. Division: This is super straightforward and perfect for established clumps.
- Step 1: Gently dig up an established clump of Ajuga.
- Step 2: Carefully tease apart the roots and stems into smaller sections. Each division should have a good amount of roots and several healthy shoots.
- Step 3: Replant these divisions directly into your garden or into pots with fresh potting mix.
- Step 4: Water them well and keep them consistently moist for the first few weeks.
The “Secret Sauce” (Pro Tips)
Here are a few little tricks I’ve picked up over the years:
- Don’t let the leaves touch the water: If you choose to root cuttings in water (which is a bit trickier for Ajuga than from soil), make sure only the stem is submerged. Any submerged leaves are a fast track to rot.
- Bottom heat is a game-changer: If you can, place your pots on a heating mat designed for plants. This gentle warmth from below encourages root formation much faster than ambient room temperature alone.
- Mist, don’t drench: When your cuttings are under plastic, resist the urge to water constantly. A light misting with your spray bottle every few days, or when the soil surface starts to look dry, is usually sufficient. Too much moisture can lead to fungal diseases.
Aftercare & Troubleshooting
Once you see new growth emerging from your cuttings, that’s a fantastic sign they’ve rooted!
- Gradually Acclimatize: If you used a plastic bag or propagator, start by removing it for a few hours each day to let the young plants get used to drier air.
- Keep it Moist: Continue to water your rooted cuttings when the top inch of soil feels dry. They’re still developing their root systems and need consistent moisture.
- Potting Up: Once the new plants have a good root system (you can gently wiggle them or check if roots are peeking out of the drainage holes), you can pot them up into slightly larger containers or plant them directly into their permanent garden spot.
The most common problem you might encounter is rot. This usually happens if the environment is too wet and not well-ventilated, or if you’ve used the wrong kind of soil. If a cutting looks limp and mushy, sadly, it’s likely a goner. Don’t be discouraged; just try again with fresh material and a little more attention to drainage and airflow.
A Encouraging Closing
Propagating plants is such a wonderful journey of patience and observation. Seeing those tiny roots emerge, and then a new plant unfurl its first set of leaves, is incredibly satisfying. Don’t be afraid to experiment, and remember that not every attempt will be a success, but each one teaches you something new. Happy propagating, and enjoy the bounty of your garden!
Resource:
https://identify.plantnet.org/k-world-flora/species/Ajuga%20lupulina%20Maxim./data