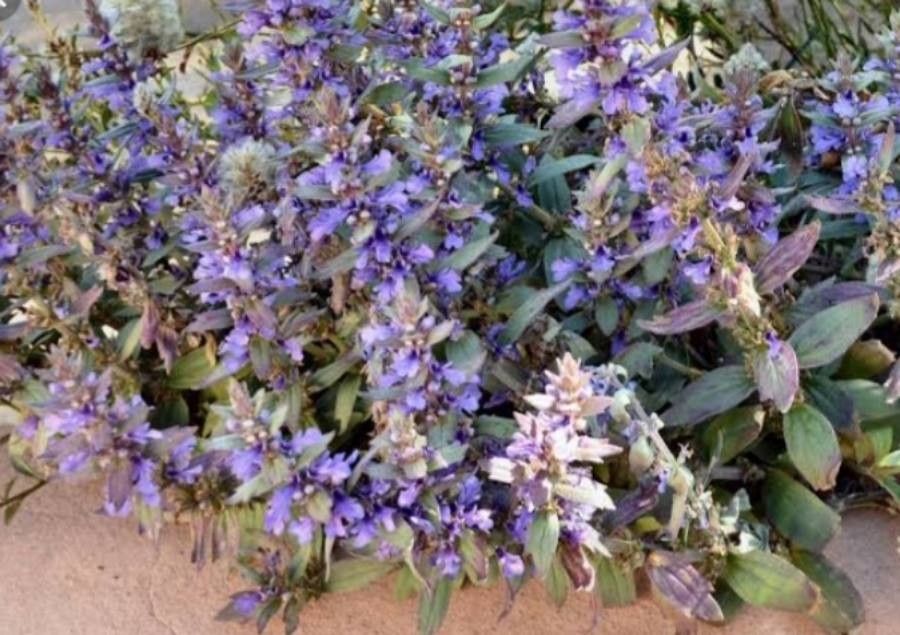
Hello fellow garden enthusiasts! It’s me, your guide through the wonderful world of growing things. Today, we’re diving into a plant that I absolutely adore: Ajuga australis. You know it, right? That gorgeous, low-growing carpet of foliage, often adorned with delicate spikes of blue or purple flowers in spring. It’s a fantastic groundcover, happy in sun or some shade, and just generally a breeze to keep looking good.
If you’re looking for a rewarding gardening project, propagating Ajuga australis is a fantastic idea. Not only do you get more of this beautiful plant for free, but it’s also wonderfully straightforward. I’d say it’s a great plant for beginners looking to get their hands dirty with propagation. You’ll feel like a pro in no time!
The Best Time to Start
For the highest success rate with propagating Ajuga australis, I find late spring to early summer is truly the sweet spot. This is when the plant is actively growing, and the new stems are still somewhat flexible, making them ideal for cuttings. You can also have success with division in early spring as the plant wakes up from dormancy.
Supplies You’ll Need
Gathering your tools beforehand makes the whole process smoother. Here’s what I recommend:
- A clean, sharp pruning shear or craft knife
- Rooting hormone (gel or powder – totally up to you!)
- A well-draining potting mix (I like a 50/50 blend of perlite and peat moss, or a commercial seed-starting mix)
- Small pots or a seed tray with good drainage
- A clear plastic bag or propagator lid
- Watering can with a fine rose or a spray bottle
Propagation Methods
Let’s get down to the nitty-gritty! Ajuga australis is generous and can be propagated in a couple of easy ways.
1. Stem Cuttings: My Go-To
This is my favorite method for Ajuga, yielding the most plants with minimal fuss.
- Select your stems: Look for healthy, non-flowering stems. You want stems that are a few inches long, with several sets of leaves.
- Make the cut: Using your sharp pruners or knife, carefully cut a stem just below a leaf node (where a leaf meets the stem). Aim for cuttings about 3-4 inches long.
- Prepare the cutting: Gently remove the lower leaves, leaving just a couple of sets at the top. This prevents them from rotting when buried.
- Apply rooting hormone: Dip the cut end of the stem into your rooting hormone. Tap off any excess.
- Plant them up: Fill your small pots or tray with your prepared potting mix. Make a small hole with your finger or a pencil.
- Insert the cutting: Place the hormone-coated end of the cutting into the hole and firm the soil gently around it.
- Water gently: Water the soil lightly to settle it around the cuttings.
- Create a humid environment: Cover the pots with a clear plastic bag or a propagator lid. This is crucial for keeping humidity high, which helps the cuttings develop roots before they dry out. Place them in bright, indirect light.
2. Division: Quick and Easy
If your Ajuga plant has become a bit of a monster and is looking crowded, division is a simple way to get more plants and give your existing clump a refresh.
- Dig it up: Carefully dig up the entire plant, trying to disturb the roots as little as possible.
- Separate the clumps: Gently pull or use your hands (or a trowel if it’s really tough) to separate the root ball into smaller sections. Each section should have both roots and shoots.
- Replant: Replant the divisions immediately in their new homes, whether that’s back in the ground, into pots, or for propagating them further. Water them in well.
The “Secret Sauce” (Pro Tips)
Here are a few little tricks I’ve picked up over the years that can really boost your success rate:
- Don’t let those lower leaves touch the soil! I know I mentioned it above, but it’s worth repeating. Any leaves in contact with damp soil are a one-way ticket to rot. Keep them clean and dry.
- A touch of warmth helps. If you have a moment, placing your cuttings on a propagation mat or in a warm spot can significantly speed up root development. It mimics that lovely summer soil temperature.
- Observe, don’t poke. Resist the urge to constantly pull up your cuttings to check for roots. Wait at least three to four weeks. You’ll often see new top growth, which is a clear sign they’ve rooted.
Aftercare & Troubleshooting
Once your Ajuga cuttings start to show signs of life – usually new leaves unfurling – it’s time to start weaning them off their humid environment. Gradually remove the plastic bag or propagator lid over a few days to acclimate them to normal humidity. Keep the soil consistently moist but not waterlogged.
The most common problem you might encounter is rot. This usually happens if the cuttings are kept too wet or don’t have enough air circulation. If you see a cutting turning mushy and black, unfortunately, it’s best to discard it to prevent any spread. Overwatering is the usual culprit.
A Little Patience Goes a Long Way
Propagating plants is just like nurturing any other part of your garden – it requires a little patience and a lot of love. Don’t be discouraged if not every single cutting takes. The beauty of Ajuga australis is its abundance, so a few successes will give you plenty to work with. Enjoy the process, learn from it, and soon you’ll have a lovely carpet of Ajuga spreading through your garden or as beautiful gifts for friends. Happy growing!
Resource:
https://identify.plantnet.org/k-world-flora/species/Ajuga%20australis%20R.Br./data