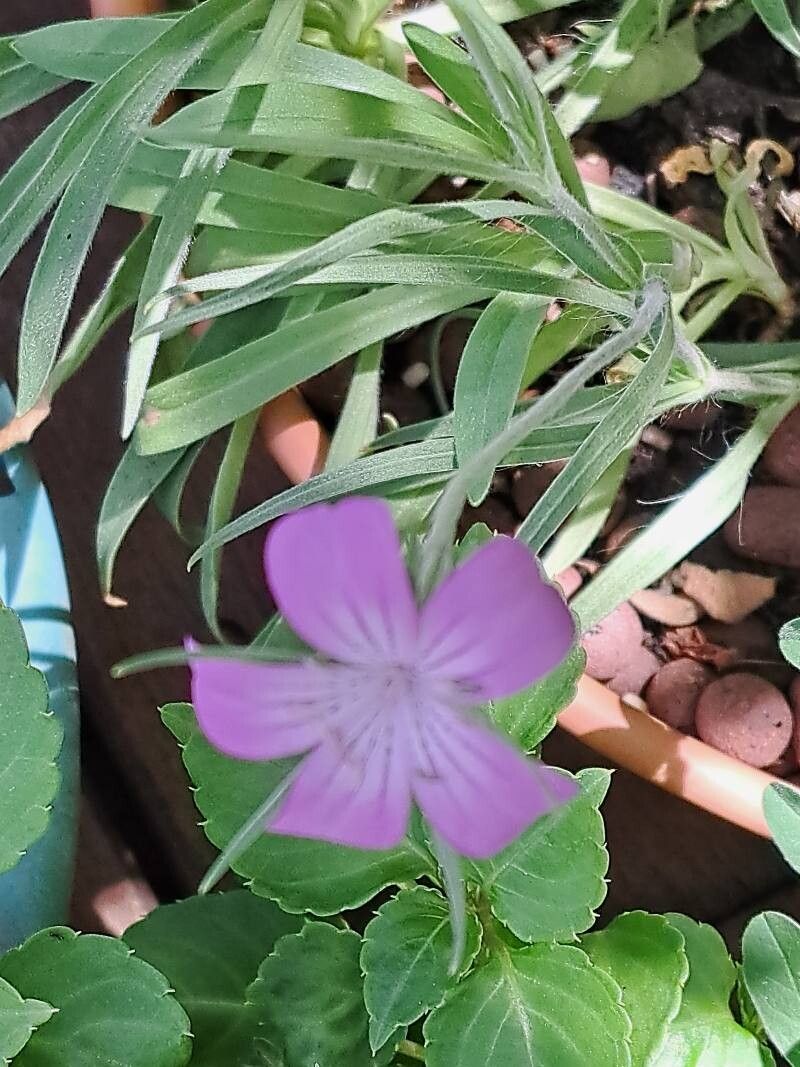
Hello, fellow garden enthusiasts! I’m so excited to chat with you today about Agrostemma brachylobum, also known charmingly as the Mediterranean campion. If you’re looking for a cut flower with a delicate, yet striking presence in your garden, you simply must get to know this beauty. Its soft pink, ruffled blooms are like little whispers of romance, and believe me, having a patch of these to snip for bouquets is pure joy.
Now, if you’re new to the propagation game, don’t fret. Agrostemma brachylobum is relatively forgiving. I’d say it’s a moderately easy plant to get started with, especially if you follow a few key steps. The immense satisfaction of watching your own little seedlings emerge or taking cuttings that blossom into full plants is truly worth the small effort.
The Best Time to Start
For the highest success rates with Agrostemma brachylobum, I always reach for my propagation tools in late spring or early summer. This is when the plant is actively growing and has good energy reserves. You’ll be looking for new, non-woody growth that’s still a bit flexible. If you’re collecting seeds, harvest them in late summer or early fall after the flowers have faded and the seed pods have dried.
Supplies You’ll Need
Here’s a little stash you’ll want to have on hand:
- Sterile potting mix: A light mix, something like a seed-starting mix or a blend of peat moss and perlite works beautifully. It needs to drain well!
- Small pots or trays: Clean ones are a must to avoid any nasties.
- Sharp pruning shears or a clean knife: For taking precise cuttings.
- Rooting hormone (optional but recommended): This really gives your cuttings a boost. Gel or powder works fine.
- Plastic bags or propagation domes: To keep humidity up around your cuttings.
- Watering can with a fine rose: Gentle watering is key.
- Labeling stakes: So you don’t forget what you’ve planted where!
Propagation Methods
Agrostemma brachylobum is quite amenable to a few methods. I primarily use stem cuttings and seed propagation.
1. Stem Cuttings
This is my go-to for multiplying my favorite varieties quickly.
- Select your stem: Look for a piece of new growth, about 4-6 inches long. Gently bend it – if it snaps cleanly, it’s good. Avoid anything woody or flimsy.
- Make the cut: Using your clean shears, make a clean cut just below a leaf node (where a leaf attaches to the stem).
- Prepare the cutting: Gently remove the lower leaves. You want to expose at least two nodes. If the leaves are large, you can even cut them in half to reduce water loss.
- Dip in rooting hormone: If you’re using it, dip the cut end into the rooting hormone, tapping off any excess.
- Plant your cutting: Make a hole in your prepared potting mix with a pencil or your finger. Gently insert the cutting so that at least one leaf node is below the surface. Firm the soil around it.
- Water gently: Water the pot thoroughly but softly.
- Create a humid environment: Cover the pot with a plastic bag secured with a rubber band or place it under a clear propagation dome. Make sure the leaves don’t touch the plastic if possible. Place it in a bright spot, but out of direct, harsh sunlight.
2. Seed Propagation
This is also very rewarding and gives you a chance to see lots of plants emerge!
- Sow your seeds: Fill your pots or trays with moistened seed-starting mix. You can sow seeds indoors about 6-8 weeks before your last frost, or directly outdoors in the spring once the danger of frost has passed.
- Spacing is key: Sow seeds about ¼ inch deep and space them a few inches apart.
- Water gently: Mist the surface of the soil until it’s moist.
- Provide warmth and light: Keep the pots in a warm spot (around 65-70°F is ideal). Once seedlings emerge, a bright location is essential. Avoid direct sun initially.
- Thinning: When the seedlings have a couple of sets of true leaves, thin them out to about 8-12 inches apart if direct sowing, or pot them into individual pots if they’ve sprouted in a tray.
The “Secret Sauce” (Pro Tips)
Here are a couple of things I’ve learned over the years that really make a difference:
- Bottom Heat is Magic: For stem cuttings, I find placing the pots on a gentle heat mat significantly speeds up root development. It mimics the warmth that’s usually found underground and encourages those roots to form faster. Just a low setting is all you need.
- Patience with the Pots: When you’ve taken cuttings, resist the urge to constantly pull them out to check for roots! You can gently tug on a cutting – if there’s resistance, you likely have roots. Otherwise, try to wait at least 3-4 weeks before you become too concerned.
Aftercare & Troubleshooting
Once you see roots forming (you might see new growth, or feel that resistance when gently pulling), it’s time to transition your little ones.
- Acclimate your cuttings: If they’ve been under a dome, gradually remove the cover over a few days to let them adjust to room humidity.
- Watering needs: Continue to water them when the top inch of soil feels dry. They’ll need consistent moisture but don’t want to be waterlogged.
- Transplanting: Once your seedlings are a few inches tall and have a good root system, you can transplant them into larger pots or directly into their permanent garden spot.
- Watch for rot: The most common problem you’ll encounter is rot. This usually happens from overwatering or poor drainage. If you see a cutting go limp and mushy, it’s often too late, so focus on preventing it with good watering practices and well-draining soil. Another sign of stress can be yellowing leaves, which might mean too much or too little water, or not enough light.
So there you have it! Propagating Agrostemma brachylobum is a journey, and like all good gardening adventures, it’s about learning as you go. Be patient with yourself and your new green babies. Enjoy the process, and soon you’ll be surrounded by these delightful blooms! Happy gardening!
Resource: