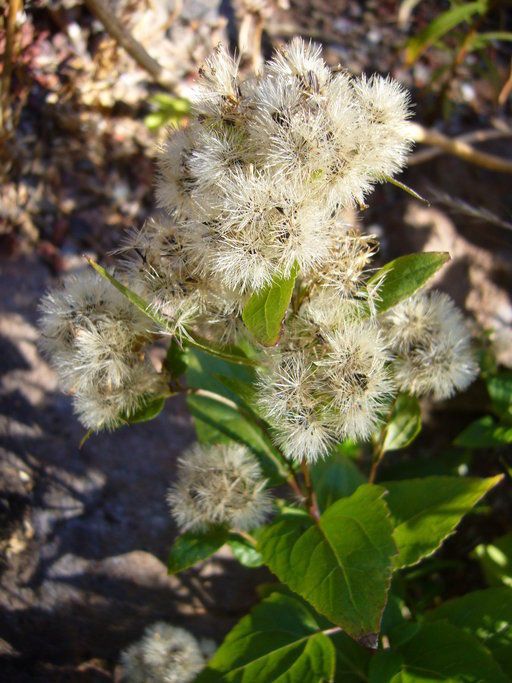
Oh, hello there! Pull up a chair and let’s chat about a garden gem that truly makes my heart sing: Ageratina occidentalis. You might know it better by its common names, like Western Ageratina, but whatever you call it, its delicate white blooms and lovely green foliage are simply irresistible. And the best part? You can easily bring more of this beauty into your garden by propagating it yourself! It’s a truly rewarding experience, and I think you’ll find it’s quite approachable, even for those just dipping their toes into the world of plant propagation.
The Best Time to Start
When it comes to coaxing new life from your existing plants, timing is everything. For Ageratina occidentalis, I’ve found the late spring or early summer to be the sweet spot. This is when the plant is in a vigorous growth phase, and its stems are still relatively soft and easy to work with. Starting now means your new cuttings have plenty of time to establish themselves before the cooler weather arrives.
Supplies You’ll Need
Gathering your tools before you begin makes the whole process flow so much smoother. Here’s what I like to have on hand:
- Sharp Pruning Shears or a Craft Knife: Clean, sharp tools are essential for making clean cuts that heal well.
- Rooting Hormone (Optional but Recommended): This can give your cuttings a helpful boost. I prefer the powder form.
- Well-Draining Potting Mix: A good blend for cuttings usually includes equal parts peat moss or coco coir, perlite, and a bit of compost.
- Small Pots or Seedling Trays: Clean pots are a must to prevent disease.
- Watering Can or Spray Bottle: For gentle watering.
- Plastic Bags or a Propagator: To maintain humidity around your cuttings.
Propagation Methods
Let’s get our hands dirty! For Ageratina occidentalis, I find stem cuttings to be the most reliable and straightforward method.
- Select Your Source: Look for healthy, new growth on your established plant. You want stems that are somewhat flexible but not too leggy. Aim for pieces that are about 4-6 inches long.
- Take the Cutting: Using your sharp shears or knife, make a clean cut just below a leaf node. Leaf nodes are those little bumps on the stem where leaves emerge; this is where the roots will want to form.
- Prepare the Cutting: Gently remove the lower leaves from the cutting, leaving just a few at the top. If the leaves are particularly large, I sometimes like to snip them in half to reduce water loss.
- Apply Rooting Hormone (If Using): Dip the cut end of the stem into your rooting hormone powder, tapping off any excess.
- Plant Your Cuttings: Lightly moisten your potting mix. Then, create a small hole with your finger or a pencil and insert the cut end of the stem. Gently firm the soil around the stem to ensure good contact.
- Water Gently: Water the soil lightly. You want it moist, but not waterlogged.
- Create a Humid Environment: Cover the pot or tray with a clear plastic bag, or place it inside a propagator. This humidity is crucial for preventing the cuttings from drying out before they can root. You can fashion a mini-greenhouse by securing a plastic bag over the pot with a rubber band. Make sure the leaves aren’t touching the sides of the bag too much.
The “Secret Sauce” (Pro Tips)
Now, for a couple of little tricks I’ve picked up over the years that can really make a difference:
- Bottom Heat is Your Friend: If you have a seedling heat mat, placing your pots on it can significantly speed up root development. That gentle warmth encourages root growth from below. It’s like giving your cuttings a little spa treatment!
- Don’t Be Afraid to Refresh: Sometimes, if a cutting looks a bit sad and leggy, I will gently recut the stem end and re-dip it in rooting hormone. It’s a small step, but it can sometimes revive a struggling cutting.
Aftercare & Troubleshooting
Once you start seeing tiny white roots emerging from the drainage holes, or new growth appearing at the top, congratulations! Your cuttings have taken. At this point, you can gradually acclimate them to less humid conditions by opening the plastic bag a little more each day over a week or so. Continue to keep the soil consistently moist but not soggy.
The most common issue you might encounter is rot. If you see your cuttings turning mushy or black, it’s usually a sign of too much moisture and poor air circulation. If you catch it early, you can try to remove the affected parts and repot in fresh, drier mix. Sometimes, sadly, a cutting just doesn’t make it, and that’s okay! It’s all part of the learning process.
A Little Encouragement
Seeing a new plant sprout from a tiny cutting is one of gardening’s greatest rewards. Be patient with your new Ageratina occidentalis – nature works on its own timeline. Enjoy the process, learn from each step, and soon you’ll have a whole garden full of these lovely, airy blooms! Happy propagating!
Resource: