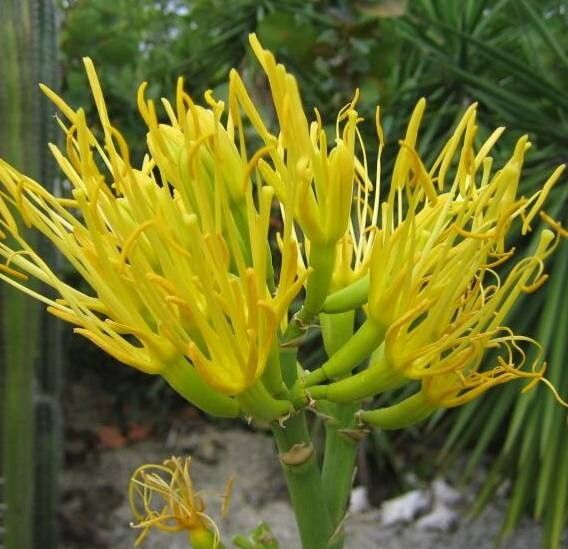
Hello fellow garden enthusiasts! Today, I want to chat about a plant that’s captured my heart over the years: Agave caribaeicola. There’s something so undeniably striking about its architectural form and elegant, upright leaves. They bring a touch of the tropics right to your doorstep, or even your patio! And the best part? Growing new ones from your existing plant is incredibly rewarding. It’s a fantastic way to fill your garden beds, share with friends, or simply expand your own collection.
Now, for the big question: is it easy for beginners? I’d say Agave caribaeicola is moderately easy. It’s not quite as fool-proof as some succulents, but with a little care and attention, you’ll do wonderfully. The key is understanding its needs, which we’ll get to!
The Best Time to Start
My favorite time to propagate these beauties is when they’re actively growing. This usually means late spring through early summer. You’ll see the plant putting out new growth, and that energy is exactly what we want to harness. A plant that’s well-hydrated and ready to push out new life is your best bet for success.
Supplies You’ll Need
Before we dig in, let’s gather our tools:
- Sharp, clean pruning shears or a knife: We want clean cuts to prevent disease.
- Rooting hormone (optional but recommended): This gives your cuttings a little boost.
- Well-draining potting mix: This is crucial! A cactus and succulent mix is perfect, or you can create your own by blending potting soil with perlite or pumice (about 50/50).
- Small pots or containers: To house your new babies. Make sure they have drainage holes.
- Gloves: Agave can have sharp edges! Better safe than sorry.
- A small trowel or dibbler: For making holes in the soil.
Propagation Methods
Agave caribaeicola is primarily propagated through offsets, also known as pups. These adorable little baby agaves emerge from the base of the mother plant.
Here’s how you do it:
- Assess your mother plant: Look for pups that are at least a few inches tall and have some small, emerging roots of their own. You want them to be substantial enough to survive on their own.
- Gently loosen the soil: Use your trowel to carefully dig around the base of the offset, loosening the soil where it attaches to the parent plant.
- Make a clean cut: Using your sharp shears or knife, carefully cut the offset away from the mother plant. Try to get as much of the root if possible, but don’t stress if you can’t. A clean separation is more important.
- Let it cure: This is a super important step! You’ll notice a fresh wound where you cut it. Place the offset in a dry, shaded spot for 2-3 days. This allows the cut end to callous over, forming a protective dry layer. This prevents rot when you plant it.
- Plant your offset: Once the cut has calloused, you can plant it. Lightly dampen your well-draining potting mix. Make a small hole in the center of your pot with your dibbler or finger.
- Add rooting hormone (if using): Dip the calloused end of the offset into your rooting hormone, tapping off any excess.
- Nestle it in: Place the offset into the hole in the soil, firming the soil gently around its base so it stands upright. Don’t bury it too deep; just enough to keep it stable.
- Water sparingly: Wait about a week after planting before you water for the first time. Then, water lightly. You want the soil to be slightly moist, not soggy.
The “Secret Sauce” (Pro Tips)
- Don’t overwater initially. This is the number one killer of new succulent propagations. Think of it like giving a newborn baby only a few sips – they don’t need much right away. The offset has stored water and energy from the parent plant.
- Avoid direct sunlight at first. While the mature agave loves sun, your baby plants are delicate. They need bright, indirect light as they establish their root systems. Too much sun can scorch those tender new leaves.
- A touch of bottom heat can speed things up. If you have a seedling heat mat, placing your pots on it can really encourage root development. It mimics the warmth of spring and summer.
Aftercare & Troubleshooting
Once you see new growth appearing – a sure sign that roots are forming – you can gradually increase watering. Water thoroughly when the soil is dry, allowing excess water to drain away. You can also slowly introduce it to more direct sunlight.
The most common problem you’ll encounter is rot. This usually happens from overwatering or not letting the cutting cure properly. If you see your offset looking mushy, wilting, or turning black at the base, it’s likely rot. Unfortunately, there’s not much to do once rot sets in, so prevention is key! Keep an eye out for any signs of pests too, though they’re less common with agaves.
A Encouraging Closing
Growing new agaves from offsets is a wonderfully rewarding journey. It takes a little patience, but watching those little pups take root and grow into their own magnificent forms is pure garden joy. Be patient with the process, celebrate every bit of progress, and most importantly, enjoy the wonderful world of plants! Happy gardening!
Resource:
https://identify.plantnet.org/k-world-flora/species/Agave%20caribaeicola%20Trel./data