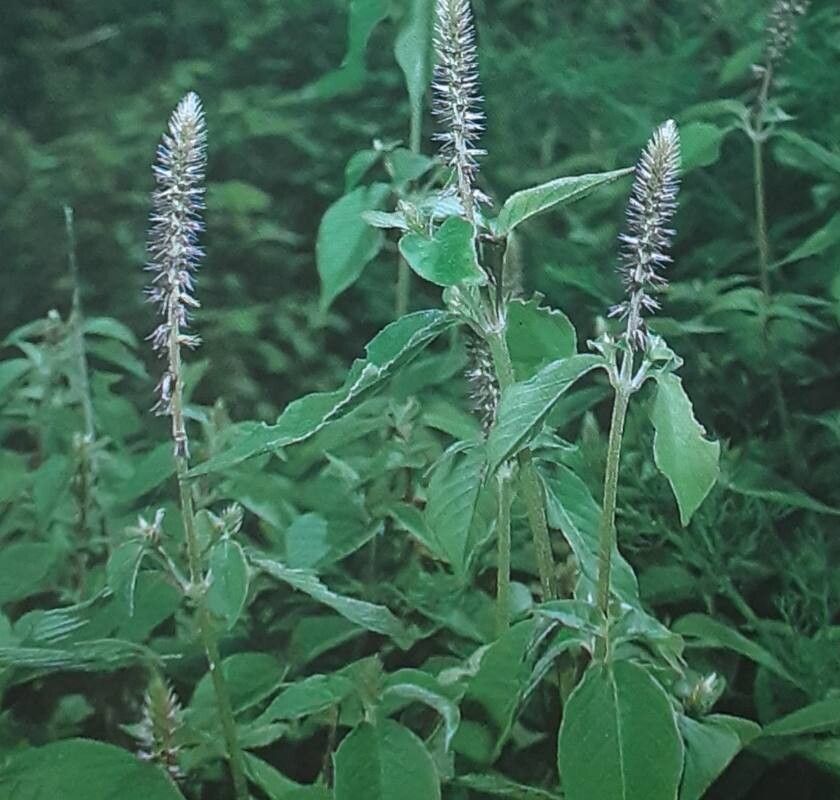
Hello fellow plant lovers! Today, we’re diving into the wonderfully textured world of Achyranthes aspera, sometimes called Prickly Chaff Flower. I’ve always been drawn to its unique, architectural beauty – those upright spires of foliage and intriguing flowers add such character to any garden. And the best part? It’s surprisingly rewarding to propagate, even if you’re just starting your green-thumb journey. Don’t be intimidated; we’ll walk through it together.
The Best Time to Start
For the highest success rate with Achyranthes aspera, I find the late spring or early summer is truly the sweet spot. This is when the plant is actively growing, full of vigor, and has plenty of energy to put into forming new roots. You’ll want to select stems that are current season’s growth, not too woody, but also not flimsy and new. Think of it as striking when the iron is hot, horticulturally speaking!
Supplies You’ll Need
Here’s what you’ll want to have on hand before you get started:
- Sharp pruning shears or a clean knife: For making precise cuts.
- Rooting hormone (optional but recommended): This will give your cuttings a real boost. Look for one that’s specifically for stem cuttings.
- Potting mix: A well-draining mix is crucial. I like to use a blend of peat moss or coco coir, perlite, and a bit of compost. You want it to hold some moisture but not become waterlogged.
- Small pots or trays: Clean containers are a must to prevent disease.
- Watering can or spray bottle: For gentle watering.
- Plastic bag or propagator: To create a humid environment.
- Small labels: To keep track of what you’ve planted!
Propagation Methods
Achyranthes aspera is quite amenable to propagation by stem cuttings. It’s my go-to method, and I think you’ll find it works well for you too.
- Take Your Cuttings: Find a healthy, vigorous stem. Using your sharp pruning shears or knife, make a clean cut just below a leaf node (where a leaf attaches to the stem). Aim for cuttings that are about 4-6 inches long.
- Prepare the Cuttings: Gently remove the lower leaves from the cutting, leaving just a few at the very top. This prevents them from rotting in the soil. If you’re using rooting hormone, dip the cut end of the stem into the powder or gel, tapping off any excess.
- Potting Up: Fill your clean pots with your prepared potting mix. Make a small hole in the center of the soil with your finger or a pencil.
- Insert the Cuttings: Carefully place the cut end of each cutting into the hole. Gently firm the soil around the base of the stem to ensure good contact.
- Water Gently: Water thoroughly but gently until you see water draining from the bottom of the pot. You don’t want to disturb the cuttings.
- Create Humidity: Cover the pot with a clear plastic bag, securing it around the rim with a rubber band or tape. Alternatively, you can use a propagator lid. This creates a mini-greenhouse effect, keeping the humidity high, which is essential for cuttings to root.
The “Secret Sauce” (Pro Tips)
Here are a couple of tricks I’ve learned over the years that really make a difference:
- Don’t let those top leaves touch direct water: When you water your newly potted cuttings, make sure the remaining leaves aren’t sitting in a puddle. If they are, gently wipe them dry. They need air circulation to prevent fungal issues.
- Bottom heat is your friend: If you have the space, placing your pots on a gentle heat mat can significantly speed up the rooting process. It mimics the warmth of spring soil and gives those root initials a comforting nudge. Just keep the mat on a low setting; you don’t want to cook your cuttings!
Aftercare & Troubleshooting
Once your cuttings are planted and have their plastic hats on, place them in a bright spot out of direct sunlight. Over the next few weeks, check the soil moisture regularly. You want it to be consistently moist but not soggy. If the soil surface looks dry, give it a light misting or a gentle watering.
The real sign of success is when you start to see new growth emerging from the top of the cutting. This usually happens within 3-6 weeks. You can also give a very gentle tug on the cutting; if you feel resistance, it means roots have formed.
Now, what if things don’t go as planned? The most common issue you might encounter is rot. If you see the stem turning dark and mushy, it’s a sign of too much moisture and poor air circulation. Unfortunately, a rotted cutting is usually a goner. The best way to combat this is to ensure excellent drainage in your potting mix and don’t overwater. You can also try lifting the plastic bag for an hour or two each day to allow for some air exchange, especially if you notice condensation building up heavily.
A Gentle Closing
Propagating Achyranthes aspera is a beautiful way to expand your collection of these unique plants, and it’s a truly satisfying process. Be patient with your little cuttings; gardening is a journey, and sometimes it takes a little time. Enjoy watching those tiny roots develop and soon you’ll have new plants to share or to add even more character to your own garden. Happy propagating!
Resource:
https://identify.plantnet.org/k-world-flora/species/Achyranthes%20aspera%20L./data