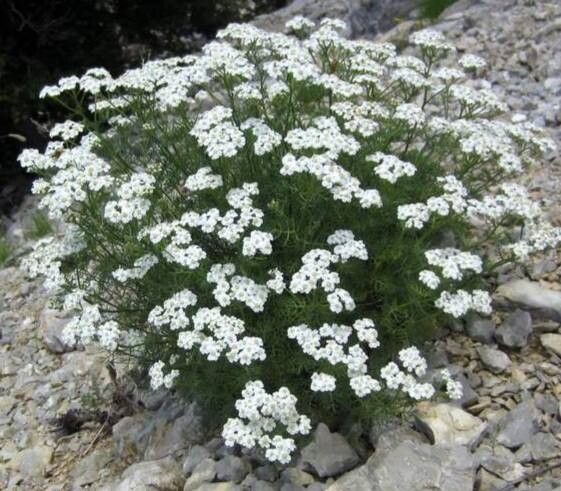
Oh, hello there! Come in, come in. Grab a mug of something warm, won’t you? I’m so glad you’re interested in Achillea clusiana. That fluffy, delicate flower head, so charming and refined. It’s a real treasure in the garden, isn’t it? And the best part? You can easily multiply your own patch! Propagating yarrow, especially this lovely clusiana variety, is a truly rewarding experience. It’s definitely one of those plants that’s quite forgiving, even for beginners. So, no need to be nervous – we’ll get you surrounded by beautiful yarrow in no time.
The Best Time to Start
For the highest success rate with Achillea clusiana, I find that late spring or early summer is the sweet spot. You want to catch the plant when it’s actively growing, but before it gets too tall and leggy. The new growth from this period is usually the most vigorous. Think of it as picking your best succulent shoots, full of life and ready to get going.
Supplies You’ll Need
Gathering your supplies beforehand makes the whole process so much smoother. You won’t need a whole lot, thankfully:
- Sharp pruning shears or a clean knife: Disinfection is key, so have some rubbing alcohol handy.
- A well-draining potting mix: A good blend of peat moss, perlite, and a bit of compost works wonders. You can also buy specific seed-starting or cutting mixes.
- Small pots or trays: Clean containers with drainage holes are a must.
- Rooting hormone (optional but helpful): This isn’t strictly necessary for yarrow, but it can give your cuttings a real boost.
- A watering can or spray bottle: For gentle watering.
- A plastic bag or a propagator lid: To create a humid environment.
Propagation Methods
Achillea clusiana is wonderfully versatile, and I often use a few different techniques.
Stem Cuttings
This is my go-to method.
- Take your cuttings: In late spring or early summer, look for healthy, non-flowering stems. Using your clean shears, cut pieces about 4-6 inches long. Make the cut just below a leaf node (where the leaves attach to the stem). This is where roots typically emerge.
- Prepare the cuttings: Gently remove the leaves from the bottom half of each cutting. You want at least two leaf nodes buried in the soil. If any flower buds have formed, pinch them off. They just drain energy.
- Dip in rooting hormone (optional): If you’re using rooting hormone, dip the cut end into it. Tap off any excess.
- Plant the cuttings: Fill your small pots with the well-draining potting mix. Make a small hole in the center of the soil with your finger or a pencil. Insert the prepared cutting into the hole, ensuring at least one leaf node is below the soil surface. Gently firm the soil around the cutting.
- Water and cover: Water the soil gently until it’s moist but not waterlogged. Pop a plastic bag over the pot or place it into a propagator, ensuring the leaves don’t touch the plastic if possible. This creates a mini-greenhouse effect.
- Place in indirect light: Find a bright spot that doesn’t get direct, harsh sun.
Division
This is for when your established clumps get a bit crowded.
- Dig up the plant: In early spring, before it starts new growth, or in early autumn after flowering, carefully dig up your Achillea clusiana plant.
- Separate the clumps: Gently use your hands, or a clean spade if it’s a large clump, to break the root ball apart into smaller sections. Each section should have some roots and a few healthy shoots.
- Replant: Immediately replant the divisions in their new homes, whether that’s back in the garden or into pots. Water them in well.
The “Secret Sauce” (Pro Tips)
Here are a few things I’ve learned over the years that can really make a difference:
- Don’t let the leaves touch the water: If you opt for water propagation, which is possible but less reliable for yarrow, make sure only the bottom of the stem is submerged. Floating leaves will just rot and can take your cutting down with them.
- Bottom heat is your friend: While not strictly necessary, placing your pots on a heat mat provides a gentle warmth to the soil. This encourages faster root development, especially if your home is a bit on the cool side. I’ve seen cuttings take off twice as fast with a little bottom warmth.
- Patience with the soil: When you’re preparing your cuttings, don’t be tempted to over-water the soil. It should be consistently moist, like a wrung-out sponge, not soggy. Too much water is the quickest way to invite fungal issues.
Aftercare & Troubleshooting
Once your cuttings have developed roots (you can gently tug on them – if there’s resistance, they’ve rooted!), it’s time to gradually acclimate them to more normal conditions.
- Remove the plastic bag: Over a few days, slowly open up the bag or propagator lid to let in more air.
- Move to brighter light: Once they’re fully un-covered, they can handle more direct morning sun.
- Water regularly: Keep the soil consistently moist as they establish.
- Watch for rot: The most common sign of failure is mushy, black stems, often at the soil line. This is usually a sign of overwatering. If you see this, don’t despair – try to remove the affected parts and let the remaining soil dry out a bit more before watering again. Sometimes, cuttings just don’t make it, and that’s part of the process too!
A Encouraging Closing
So there you have it! Propagating Achillea clusiana is a wonderful way to fill your garden with more of its sunny charm. Don’t worry if every single cutting doesn’t take. Gardening is all about experimentation and learning. Just be patient, enjoy the process of nurturing these little green shoots, and soon you’ll be admiring your own beautiful patches of clusiana yarrow. Happy planting!
Resource:
https://identify.plantnet.org/k-world-flora/species/Achillea%20clusiana%20Tausch/data