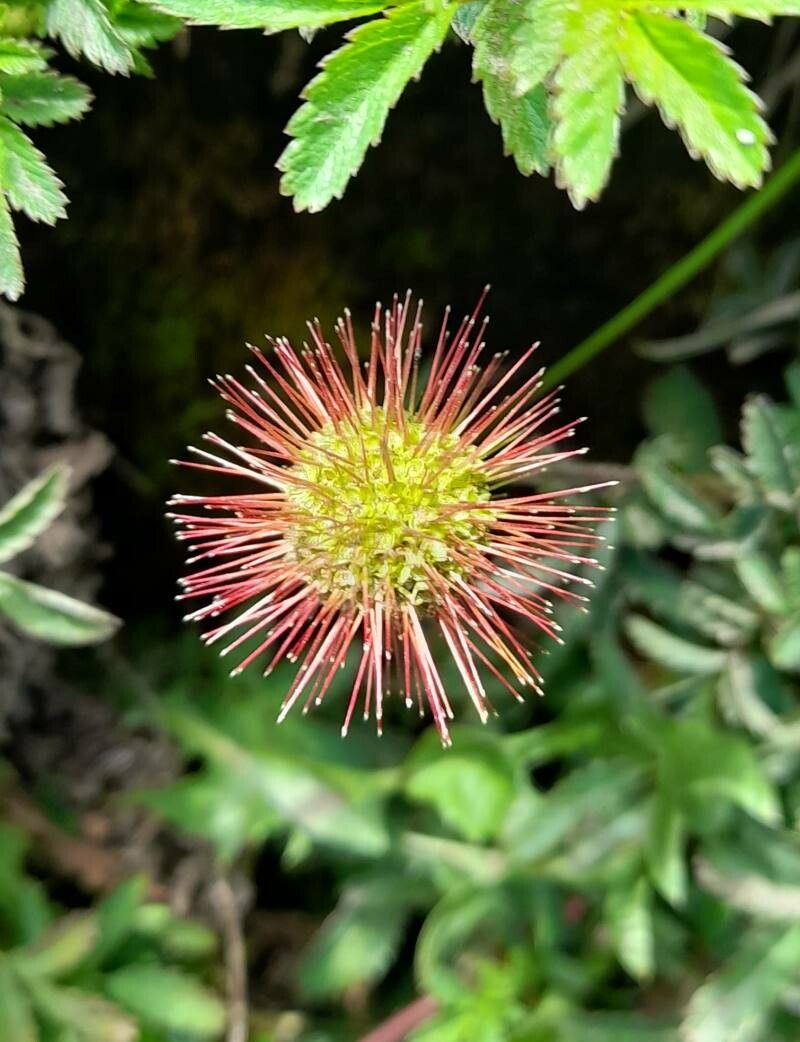
Oh, Acaena ovalifolia! It’s such a delight to have this little groundcover gracing my garden. Those lovely, almost silvery-green leaves with their delicate reddish stems create such a charming, textured carpet. And the tiny, burr-like flowers are a sweet surprise! The best part? It’s absolutely rewarding to see your own little clumps of Acaena expand and fill in bare spots.
For beginners, I think you’ll find Acaena ovalifolia to be quite forgiving. It’s not an overly fussy plant, which makes it a joy to propagate.
The Best Time to Start
When it comes to giving your Acaena the best shot at success, spring and early summer are your golden windows. This is when the plant is actively growing and has plenty of energy reserves. You’re looking for healthy, new growth that isn’t too woody. Think of the supple, young stems that are easy to bend but not floppy.
Supplies You’ll Need
Here’s what I usually have on hand when I’m ready to get propagating this beauty:
- Clean, sharp pruning shears or a craft knife: For making clean cuts.
- Rooting hormone (optional but recommended): A little boost can work wonders.
- Small pots or trays: Clean ones are a must to avoid disease.
- Well-draining potting mix: A blend of peat or coir, perlite, and a bit of compost is perfect. You want it to drain freely, not stay soggy.
- Watering can with a fine rose: For gentle watering.
- Plastic bags or a propagator lid: To create a humid environment.
Propagation Methods
Acaena ovalifolia is wonderful because it’s quite adaptable. Division is often the easiest for established clumps, but stem cuttings are also very effective.
Method 1: Division (My Favorite for Established Plants)
This is where you take an existing plant and carefully split it into smaller sections, each with its own roots and shoots.
- Gently dig up your Acaena plant. Try to keep as much of the root ball intact as possible.
- Loosen the soil around the roots. This is where you’ll see where the plant is naturally dividing.
- Use your hands or a clean trowel to carefully pull or cut the plant into sections. Each section should have a good portion of roots and at least one healthy shoot.
- Replant the divisions immediately. Give them a good drink of water and place them in a shady, sheltered spot for a few days to recover.
Method 2: Stem Cuttings (Great for Expanding)
This method involves taking small pieces of stem and encouraging them to form roots.
- Select non-flowering, healthy stems. Look for stems that are about 3-4 inches long.
- Make a clean cut just below a leaf node. This is a crucial spot where roots are likely to form. Use your sharp shears or knife.
- Remove the lower leaves. Leave just a couple of leaves at the top to help with photosynthesis.
- Dip the cut end into rooting hormone (if using). Tap off any excess.
- Insert the cutting into your prepared potting mix. Make a small hole with a pencil or your finger first, then gently firm the soil around the stem. We want about half of the cutting to be in the soil.
- Water gently to settle the soil.
- Cover the pot or tray with a plastic bag or propagator lid. This creates a mini-greenhouse.
The “Secret Sauce” (Pro Tips)
Over the years, I’ve learned a few little tricks that seem to make all the difference.
- Don’t let the lower leaves touch the potting mix in cuttings. This is a common culprit for rot. If a leaf is too low and might dip into the soil, just pinch it off.
- Bottom heat is your friend for cuttings. If you have a heat mat, placing your tray of cuttings on it can dramatically speed up root development. It mimics the warmth of spring soil.
- When dividing, a little stress is okay, but not too much. Don’t leave newly divided plants baking in the sun. They need a little time to regroup in a protected spot.
Aftercare & Troubleshooting
Once your Acaena has rooted (you’ll see this by new growth appearing or a gentle tug on the cutting not coming free), it’s time to treat it like a little baby plant.
- Gradually acclimate your rooted cuttings to open air. If they’ve been under cover, lift the bag or lid for a few hours each day, increasing the time until they’re no longer covered.
- Keep the soil consistently moist but not waterlogged. This is key. Soggy soil is the enemy and can lead to rot, which is the most common sign of failure. You might see the leaves turn yellow or mushy.
- Once they have a good root system, you can transplant them. Move them to slightly larger pots or directly into their permanent garden spots.
And there you have it! Propagating Acaena ovalifolia is a wonderfully satisfying way to fill your garden or share these charming plants with friends. Be patient, enjoy the process of watching new life emerge. Happy gardening!
Resource:
https://identify.plantnet.org/k-world-flora/species/Acaena%20ovalifolia%20Ruiz%20&%20Pav./data