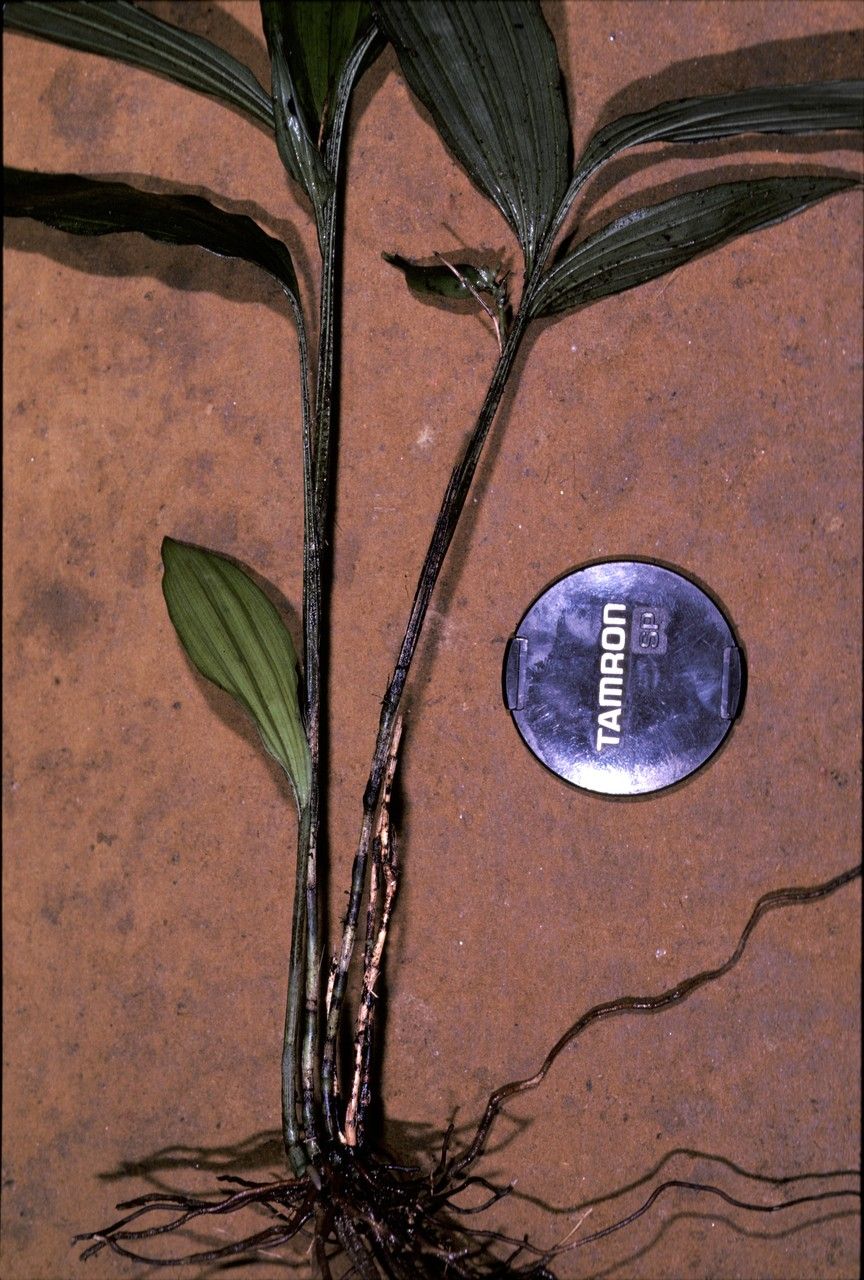
Hello fellow plant lovers! Today, we’re diving into the wonderful world of a truly unique orchid: Palmorchis pabstii. This isn’t your typical dainty bloom. Palmorchis pabstii offers an almost jungle-like exuberance with its upright, cane-like stems, often adorned with striking, elongated leaves. It’s a real statement piece in any collection, and let me tell you, coaxing a new plant into existence from an existing one is an incredibly satisfying journey. Now, to be perfectly honest, Palmorchis pabstii isn’t the absolute easiest plant to propagate for total beginners. It requires a little attention to detail, but with my guidance, I’m confident you’ll be successful.
The Best Time to Start
The absolute sweet spot for propagating Palmorchis pabstii is during its active growing season. Think of it as spring and early summer. During these months, the plant is full of vigor, energy, and readily producing new growth. This means any cuttings or divisions you take will have a much better chance of rooting and establishing themselves. Waiting until the plant has truly woken up after its dormancy is key to not stressing it unnecessarily.
Supplies You’ll Need
Gathering your tools beforehand makes the whole process smoother. Here’s what I usually have on hand:
- Sharp, sterilized pruning shears or a clean knife: A clean cut is crucial to prevent disease.
- Well-draining potting mix: I like a blend of orchid bark, perlite, and a bit of sphagnum moss. You want good airflow around the roots.
- Small pots or propagation trays: Ensure they have drainage holes.
- Rooting hormone (optional but recommended): This can give your cuttings a significant boost.
- Clear plastic bags or a small propagation dome: To create a humid environment.
- Sphagnum moss or perlite: For divison projects or adding extra humidity.
- Labels and a marker: To keep track of your propagations and their dates.
Propagation Methods
Palmorchis pabstii is most commonly propagated through division or stem cuttings. Both methods are effective, and you can decide which suits you best based on your plant’s current size and shape.
Division: For Mature Plants
If your Palmorchis pabstii has become quite bushy and has multiple pseudobulbs or growth points clustered together, division is your best bet.
- Gently remove the plant from its pot. Be careful not to damage the roots. If it’s stuck, a gentle squeeze around the pot can help.
- Carefully tease apart the root ball. You want to separate the mature plant into sections, each with at least one healthy pseudobulb and some roots. You might need to use your fingers or a sterilized tool to gently help them separate. Resist the urge to be too rough; patience is your friend here!
- Inspect the divisions. Ensure each section has healthy roots and at least one new growth point. Remove any damaged or dead parts.
- Pot each division. Plant them in new pots with your fresh, well-draining mix. It’s a good idea to plant them at the same depth they were previously growing.
- Water lightly. Don’t drench them, just enough to settle the mix around the roots.
Stem Cuttings: For Younger Growth
If you have a plant with long, upright stems, taking cuttings can be a rewarding way to create new plants.
- Identify healthy stems. Look for stems that are at least 6-8 inches long and look robust.
- Make clean cuts. Using your sterilized shears, cut the stem into sections, each with at least two leaf nodes. You can trim off any very long leaves to reduce water loss.
- Prepare the cuttings. You can lightly dust the cut ends with rooting hormone.
- Plant the cuttings. Insert the cut end of each stem section about an inch deep into your potting mix. You want the nodes to be either just above or just below the surface.
- Create humidity. Water the mix lightly and then cover the pot with a clear plastic bag or place it in a propagation dome. This traps moisture and helps the cuttings root.
The “Secret Sauce” (Pro Tips)
Now, for a couple of tricks I’ve learned over the years that really make a difference:
- Don’t drown your cuttings! While humidity is crucial for stem cuttings, the potting mix should be kept evenly moist, not soggy. Too much water will quickly lead to rot, and no one wants that. You can err on the side of slightly drier rather than waterlogged.
- Bottom heat is your best friend. If you can, place your propagation pots on a gentle heating mat. Orchids, and especially their roots, love a bit of warmth to encourage quick establishment. It mimics their natural environment and significantly speeds up the rooting process.
Aftercare & Troubleshooting
Once your Palmorchis pabstii cuttings or divisions have been potted, keep them in a bright spot with indirect light. Avoid direct sun, which can scorch delicate new growth. Continue to maintain that high humidity, especially for cuttings.
You’ll know your propagations are successful when you see new growth emerge – a little leaf unfurling or a tiny root peeking out of a drainage hole. This usually takes anywhere from a few weeks to a couple of months, so don’t get discouraged if it’s not immediate!
The most common issue you’ll run into is rot. If your cuttings turn mushy, black, or develop dark spots, it’s usually a sign of too much moisture. If this happens, remove the affected parts immediately, ensure good air circulation, and let the potting mix dry out a little more between waterings. For divisions, if you see mushy roots, it’s often a sign of overwatering or poor drainage.
A Little Patience Goes a Long Way
Propagating plants, especially something as special as Palmorchis pabstii, is a journey of patience and observation. Don’t be discouraged if your first attempt isn’t perfect. Every plant is a learning experience. Celebrate the successes, learn from the challenges, and most importantly, enjoy the process of nurturing life from your existing green treasures. Happy gardening!
Resource:
https://identify.plantnet.org/k-world-flora/species/Palmorchis%20pabstii%20Veyret/data