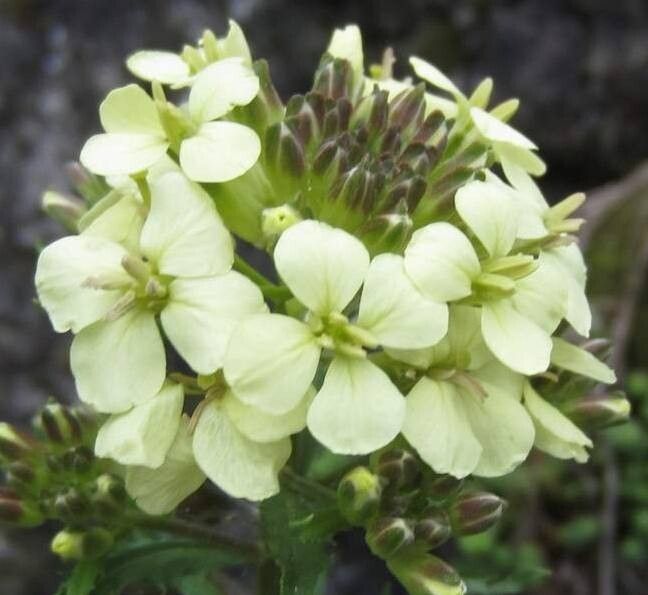
Hello fellow garden enthusiasts! Today, we’re diving into the wonderful world of Erysimum witmannii, also known as Witmann’s Wallflower. If you’re a fan of those cheerful, often fragrant blooms that can burst with color for months on end, you’re in for a treat. This lovely plant offers spikes of beautiful flowers that can bring joy to any sunny border or container garden. And the best part? Propagating it yourself is incredibly rewarding. It’s a fantastic way to fill your garden with more of these beauties or to share them with friends. For beginners, I’d say Erysimum witmannii is moderately easy to propagate. A little patience and the right approach will have you well on your way!
The Best Time to Start
For the highest success rate with Erysimum witmannii, late spring to early summer is your sweet spot. This is when the plant is actively growing, and the stems have developed enough to be firm but not woody. You want to take cuttings from healthy, vigorous new growth. Waiting until after the main flush of spring flowering has passed is usually ideal.
Supplies You’ll Need
Gathering your tools beforehand makes the whole process smoother. Here’s what I recommend:
- Sharp pruning shears or a clean, sharp knife: For making clean cuts.
- Rooting hormone powder or gel: This isn’t strictly essential for Erysimum but it can give young cuttings a helpful boost.
- Potting mix: A well-draining mix is crucial. I like to use a blend of equal parts peat moss or coco coir, perlite, and a bit of compost. You can also buy specific seed starting or propagation mixes.
- Small pots or seed trays: Clean ones, please!
- Plastic bags or a propagator: To create a humid environment for the cuttings.
- Watering can or misting bottle: For gentle watering.
- Labels and a marker: So you don’t forget what you planted where!
Propagation Methods
Let’s get our hands dirty! Stem cuttings are my go-to for Erysimum witmannii.
Stem Cuttings:
- Select Your Cuttings: Head out to your ‘Witmann’s Wallflower’ and identify some healthy, non-flowering shoots. Look for stems that are about 4-6 inches long. They should be firm but still flexible.
- Make the Cut: Using your clean shears or knife, make a clean cut just below a leaf node. A leaf node is where a leaf emerges from the stem. This is where the magic of root formation often happens. Remove the lower leaves from the cutting, leaving just a few at the top.
- Apply Rooting Hormone (Optional but Recommended): Dip the cut end of the stem into your rooting hormone powder or gel. Swirl off any excess.
- Plant Your Cuttings: Fill your small pots with your prepared well-draining potting mix. Moisten the mix thoroughly before you begin. Make a small hole in the center of the pot with your finger or a pencil.
- Insert the Cuttings: Gently place the bottom part of the cutting into the hole, ensuring the leaf nodes you removed are buried in the soil. Firm the soil gently around the base of the cutting to ensure good contact.
- Create a Humid Environment: Water the pots lightly. Then, place the pots inside a plastic bag, sealing it loosely with a twist tie or rubber band. If you have a propagator, use that. This helps maintain the humidity the cuttings need to prevent drying out while they develop roots.
- Placement: Place the pots in a bright spot that doesn’t receive direct, scorching sunlight. A warm, but not hot, location is best.
The “Secret Sauce” (Pro Tips)
Now for a couple of little tricks I’ve picked up over the years that can really make a difference.
- Bottom Heat is Your Friend: If you have a heated propagator mat or can place your pots on a sunny windowsill above a radiator (not too close, of course!), gentle bottom heat can significantly speed up root development. It mimics the warmth of spring soil.
- Don’t Overwater the Cuttings: While they need moisture, soggy soil is the enemy. It can lead to rot. If you’re using the plastic bag method, you’ll find you don’t need to water very often. Check the soil moisture by gently pressing down on it. If it springs back and feels damp, it’s usually okay.
Aftercare & Troubleshooting
Once your cuttings have been planted, the waiting game begins! This is where patience truly pays off.
- Rooting Time: You’ll typically see signs of rooting within 3-6 weeks. You can gently tug on a cutting after about a month. If there’s resistance, you likely have roots! You might also see new little leaves starting to emerge.
- First Signs of Life: Congratulations when you see those new leaves! At this point, you can gradually acclimate your new plants to normal conditions. Start by opening the plastic bag for a few hours each day, then remove it entirely.
- Repotting: Once your new plants are well-rooted and have developed a decent amount of foliage, you can pot them up into larger containers with fresh, good-quality potting soil.
- Troubleshooting: The most common issue you might encounter is rot. This is usually caused by overwatering or poor drainage. If a cutting looks wilted and mushy at the base, it’s likely rotted. Unfortunately, there’s not much you can do for a rotted cutting. Prevention is key: use a well-draining mix and avoid overwatering. If your cuttings simply refuse to root after several months, they might not have been healthy enough to begin with, or the conditions weren’t quite right. Don’t be discouraged; just try again!
A Encouraging Closing
So there you have it – a straightforward guide to propagating your own Erysimum witmannii. Remember, gardening is a journey, and propagation is a fantastic part of it. Be patient with your little plant babies, observe them closely, and don’t be afraid to experiment. The joy of watching a tiny cutting transform into a thriving plant is truly unparalleled. Happy propagating, and enjoy the beautiful blooms you’ll surely create!
Resource:
https://identify.plantnet.org/k-world-flora/species/Erysimum%20witmannii%20Zaw./data