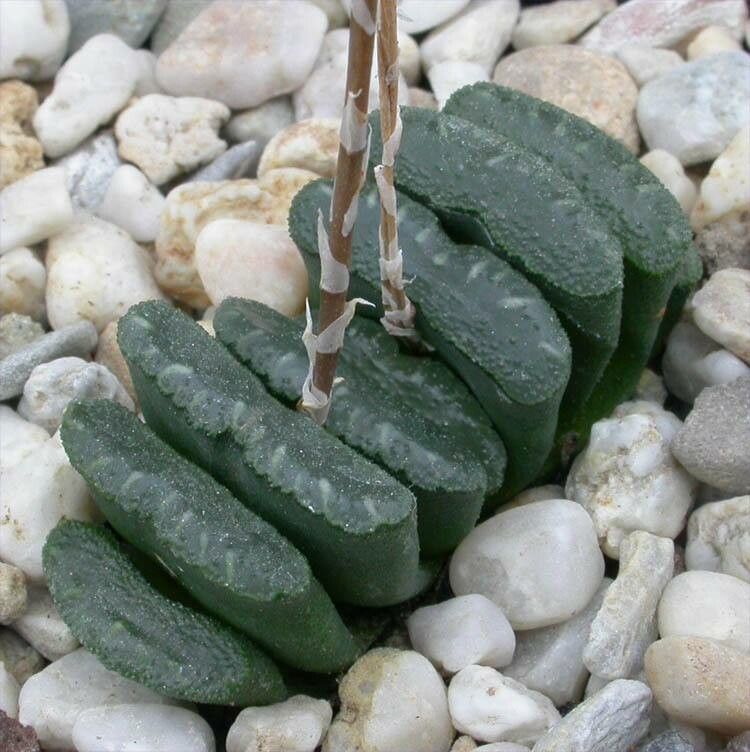
Oh, Haworthia truncata! If you’ve ever had the pleasure of gazing upon these architectural beauties, you know exactly why they capture our hearts. Their plump, windowed leaves, like tiny jade sculptures, are just so…utterly charming. And the idea of growing more of them yourself? Pure gardening joy!
Now, I know what you might be thinking: “Is this one of those notoriously tricky succulents?” Well, let’s chat about that. Haworthia truncata can be a little more reserved with their propagation efforts compared to some of their more enthusiastic cousins. But don’t let that deter you! With a bit of patience and the right approach, you can absolutely have success. It’s a rewarding challenge, and the feeling when you see those first new roots emerge is just something special.
The Best Time to Start
I’ve found that the sweet spot for propagating Haworthia truncata is during their active growing season. For most of us, this means late spring through early summer. The plants are energetic, pumping out new growth and generally more receptive to taking root. Trying to propagate when they’re dormant, usually in the cooler months, is like asking someone to run a marathon after a long nap – they’re just not in the mood!
Supplies You’ll Need
To give your little Haworthia babies the best start, gather these essentials:
- Well-draining potting mix: Think cactus and succulent mix, or create your own by blending potting soil with perlite or pumice (about a 50/50 ratio works well).
- Sterilized sharp knife or pruning shears: We want clean cuts to prevent nasty infections.
- Potting containers: Small pots or even seedling trays with drainage holes are perfect.
- Rooting hormone (optional but recommended): This can give your cuttings a helpful boost.
- Spray bottle: For gentle watering.
- Acknowledge your patience: This is a crucial, albeit intangible, tool!
Propagation Methods
Haworthia truncata are best propagated using leaf cuttings or offsets (baby plants that grow from the base). Division is less common for the species itself but works well for clump-forming varieties.
Leaf Cuttings
This is where the magic really happens, though it requires a bit of finesse.
- Select a healthy leaf: Look for a plump, mature leaf at the base of the plant.
- Make a clean cut: Using your sterilized knife or shears, gently twist or cut the leaf away from the main stem. Aim for a clean break that includes a tiny sliver of the mother plant’s stem tissue where the leaf was attached. This is where the magic happens!
- Allow it to callus: This is perhaps the most critical step. You must let the cut end dry out and form a protective callus. Place the leaf cutting in a dry, airy spot away from direct sun for 2-5 days, or until the cut end is completely dry and sealed. This prevents rot from setting in.
- Plant it up: Once callused, gently place the callused end just into your well-draining soil mix. You don’t need to bury it deeply; just have it make contact with the soil.
- Wait and mist: Keep the soil lightly moist, but not wet. A light misting with your spray bottle every few days is usually sufficient. Avoid overwatering at all costs!
Offsets (Pups)
If your Haworthia truncata has started forming little baby plants around its base, you’re in luck! This is usually the most straightforward method.
- Gently unearth the offset: Carefully remove the parent plant from its pot. Gently brush away the soil around the base to expose the offset.
- Separate the offset: Using your sterilized knife or shears, carefully cut the offset away from the parent plant. Try to get a bit of root attached if possible.
- Allow to callus (briefly): If you separated it cleanly and it looks a bit “wet,” let the cut end callus for a day or two as you would with a leaf cutting.
- Pot it up: Plant the offset in its own small pot filled with your well-draining mix.
- Water sparingly: Water lightly after potting, and then only when the soil is dry to the touch.
The “Secret Sauce” (Pro Tips)
Here are a couple of things I’ve learned over the years that can really make a difference:
- Never let the cut leaf touch standing water. If you’re trying water propagation (which I rarely recommend for truncata due to rot risk), ensure the leaf is suspended so only the very tip of the stem is near the water, not actually submerged. For soil propagation, a very light misting is key; no soaking!
- Consider bottom warmth. Haworthias love a bit of gentle warmth when they’re trying to root. Placing your pots on a seedling heat mat set to a low temperature (around 70-75°F or 21-24°C) can significantly speed things up and encourage root development. Just be sure the soil surface doesn’t dry out too quickly from the heat.
Aftercare & Troubleshooting
Once you see signs of life – a tiny root emerging or a new nub of growth – give yourself a pat on the back!
- Gradual watering: As roots develop, you can start watering a little more deeply, but always allow the soil to dry out between waterings. Think of it as giving them a good drink, then letting them quench their thirst.
- Bright, indirect light: Keep your new propagations in a bright spot that doesn’t get scorching direct sun. Too much sun can scorch those delicate new leaves.
- Rot is the enemy: The most common problem you’ll encounter is rot. This usually happens from overwatering or not allowing the cuttings to callus properly. If a leaf cutting turns mushy and black, unfortunately, it’s a goner. Remove it immediately to prevent it from affecting other cuttings. Don’t be discouraged; it happens to the best of us! Sometimes, a leaf might shrivel up; this is often a sign it’s trying to form roots.
A Encouraging Closing
Growing Haworthia truncata from cuttings or offsets is a journey, not a race. Be patient. Celebrate the small victories. And most importantly, enjoy the process of nurturing these miniature wonders. You’ve got this! Happy propagating!
Resource:
https://identify.plantnet.org/k-world-flora/species/Haworthia%20truncata%20Schönland/data