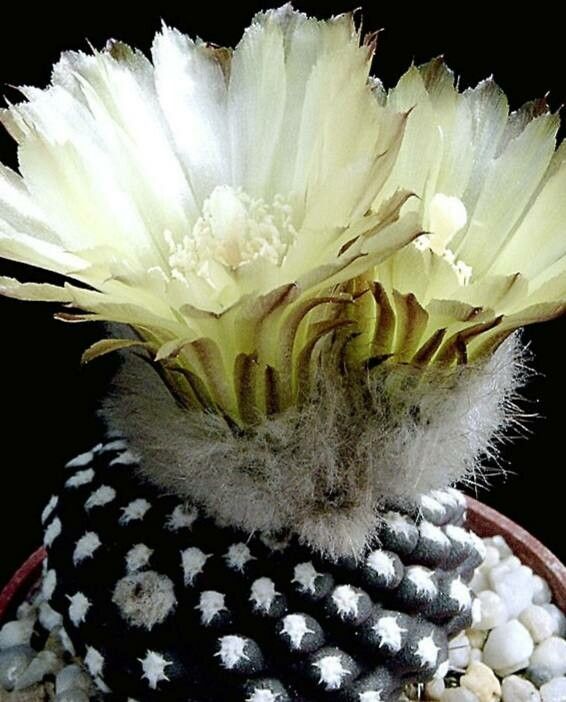
Hello, fellow plant lovers! Gather ’round, grab your favorite mug, and let’s talk about a truly special cactus: Eriosyce fankhauseri. This beauty, with its intricate spines and often stunning flower displays, is a real showstopper. Bringing a new Eriosyce fankhauseri into your collection through propagation is incredibly satisfying. It’s a chance to share a piece of this wonderful plant and witness life begin anew. Now, a little heads-up: while not a complete beginner’s cactus, propagating Eriosyce fankhauseri is definitely achievable with a little care and patience. Think of it as a rewarding challenge for the curious gardener.
When to Get Your Hands Dirty
The absolute best time to start propagating your Eriosyce fankhauseri is during its active growing season. For most of us, that means late spring through early summer. You’ll see the strongest growth and the best chance for roots to form quickly then. Starting too late in the season means your new plants might not establish themselves before cooler weather arrives, making them more vulnerable.
Your Propagation Toolkit
Before we dive in, let’s make sure you have everything you need to set yourself up for success.
- Well-Draining Cactus Potting Mix: This is non-negotiable! I like to use a blend of coarse sand, perlite, and a good quality cactus soil. About a 1:1:1 ratio usually does the trick. You can also buy pre-made cactus mix.
- Sharp, Clean Pruning Shears or a Knife: Sterilize them with rubbing alcohol to prevent any disease transmission.
- Rooting Hormone (Optional but Recommended): This can give your cuttings a helpful boost. Choose a powder or gel formulation.
- Small Pots or Seedling Trays: Clean ones, please! Small is good; we don’t want too much soil for those tiny roots to manage.
- Inert Material for Drainage: Small pebbles or gravel for the bottom of pots if your mix isn’t quite airy enough.
- Watering Can with a Fine Rose or a Spray Bottle: For gentle watering.
- Labels and a Marker: You’ll thank me later when you have multiple little cacti sprouting!
Let’s Get Propagating: Stem Cuttings
This is my go-to method for Eriosyce fankhauseri. It’s reliable and gives you a good number of potential new plants.
- Identify Which Stem to Take: Look for a healthy, mature stem that looks like it could easily be separated. Sometimes, these plants naturally produce offsets or baby cactus that you can gently remove. If you need to take a cutting from the main body, aim for a section at least an inch or two long.
- Make the Cut: Using your sterilized sharp tool, make a clean cut. Try to get a smooth surface.
- Allow It to Callus: This is CRITICAL. Don’t be tempted to plant it right away! Place the cutting in a warm, dry, well-ventilated spot for several days to a week, or even longer. You’ll see the cut end dry up and form a callus – a tough, leathery scar. This prevents rot when you eventually plant it.
- Prepare Your Pots: Fill your small pots with your prepared cactus mix. Make a small indentation in the center for the cutting.
- Apply Rooting Hormone (Optional): If you’re using rooting hormone, dip the callused end of your cutting into the powder or gel. Gently tap off any excess.
- Planting: Carefully insert the callused end of the cutting into the soil of your prepared pot. It doesn’t need to be super deep, just enough to stand upright. You can use small stones to help support it if needed.
The “Secret Sauce”: My Insider Tips
Over the years, I’ve learned a few tricks that make a big difference.
- The Right Amount of Airflow is Key: Once your cuttings are planted, don’t cover them tightly with plastic. While some succulents appreciate a humid environment, cacti, especially when trying to root, can be very prone to rot. Good air circulation is your best friend. Place them in a bright spot out of direct sun, and let them breathe.
- Bottom Heat is a Game Changer: If you have a heated propagator or simply can place your pots on top of a gently warming mat (like one used for seedlings), give it a go. This consistent, gentle warmth from below truly encourages root development. It mimics what happens naturally in their native climates and gives your cuttings a much-needed kickstart.
- Resist the Urge to Water Constantly: This is the hardest one for many! When you first plant your callused cuttings, I recommend waiting at least a week before the first watering. Then, water very sparingly. Only water when the soil has dried out completely. Overwatering is the number one killer of propagations.
Aftercare and What to Watch For
Once your cuttings have been in their pots for a few weeks, you might start to see signs of life!
Signs of Success: The most obvious sign is new growth. This could be a tiny new tip emerging or a slight plumping up of your cutting. After a month or two, you can very gently tug on your cutting. If you feel resistance, congratulations, you have roots! You can then start watering a little more regularly, but still allow the soil to dry out between waterings.
Troubleshooting: The biggest challenge is rot. If you see the cutting turning mushy, brown, or black from the bottom up, it’s likely rotted. Unfortunately, this is usually a sign that it’s too late. This is almost always due to too much moisture and not enough airflow. If you catch it early, you might be able to cut away the rotted part and try to re-callus the healthy section, but it’s a long shot.
Keep Growing!
Propagating Eriosyce fankhauseri is a journey, not a race. There will be times when it feels slow, and yes, sometimes things don’t work out. But when you see those tiny roots form and that first little sprout emerge, it’s pure magic. Be patient with your plants, and most importantly, enjoy the process of nurturing something new into existence. Happy propagating!
Resource: