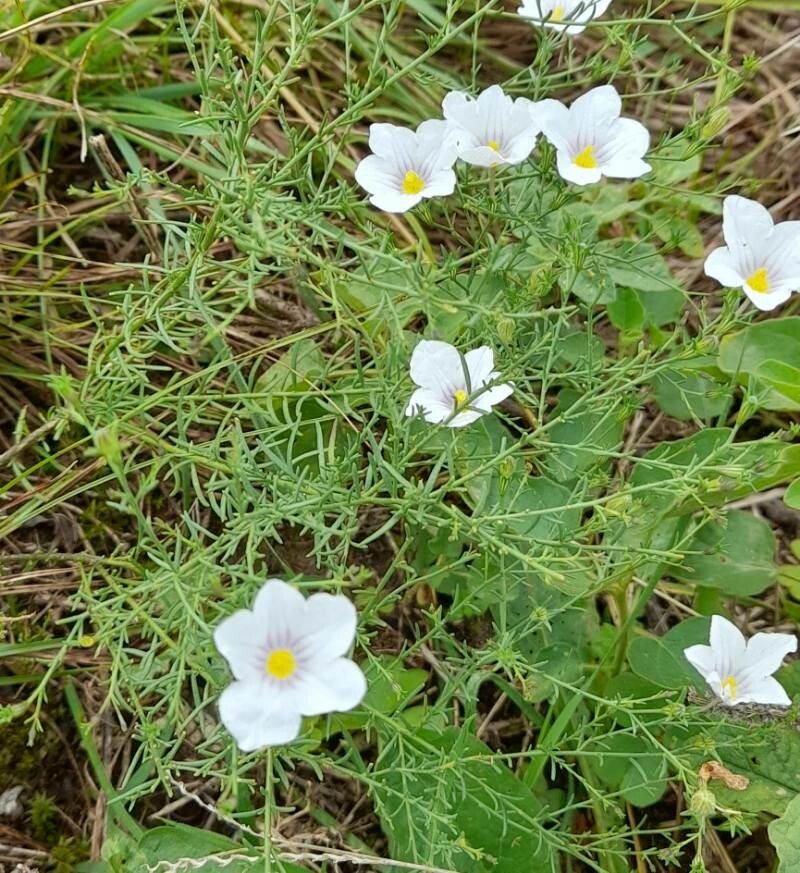
Oh, hello there! Come on in, grab a mug. It’s always lovely to chat about plants, isn’t it? Today, we’re diving into the delightful world of Nierembergia linariifolia, often called Cup Flower for its charming, delicate blooms. If you’ve ever admired these lovely little plants spilling over pots or weaving through borders, you might be wondering how to get more of them. Well, I’ve got good news for you: propagating Nierembergia is absolutely doable, and it’s one of those deeply satisfying gardening activities that really makes you feel connected to your plants. For beginners, I’d say it’s moderately easy. It requires a bit of attention, but the rewards are well worth it.
The Best Time to Start
The absolute sweet spot for propagating Nierembergia linariifolia is in the late spring or early summer. This is when the plant is actively growing and has plenty of healthy, new shoots to work with. You want to take cuttings from stems that are firm and green, not woody, and definitely not flowering. Think of it as borrowing a bit of that vibrant, youthful energy!
Supplies You’ll Need
Here’s what I like to have on hand when I’m propagating:
- Sharp Pruning Shears or Scissors: Clean cuts are key to healthy healing.
- Rooting Hormone (Powder or Gel): This is a fantastic booster, though you can sometimes get away without it. I usually keep a little jar handy.
- Well-Draining Potting Mix: A seed starting mix or a blend of equal parts peat moss (or coco coir) and perlite works beautifully. This prevents soggy feet, which is a big no-no for cuttings.
- Small Pots or Seedling Trays: Clean containers are essential to prevent disease. Small ones are perfect for starting out.
- Plastic Bags or a Clear Lid: To create a humid environment for your cuttings.
- Water Mister: For keeping things moist.
- Labels and a Pen: So you don’t forget what you planted where!
Propagation Methods
My go-to method for Nierembergia linariifolia is stem cuttings. It’s reliable and gives you a good chance of success.
- Take Your Cuttings: On a mild day, select a healthy stem that’s about 4-6 inches long. Using your sterilized shears, make a clean cut just below a leaf node. A leaf node is where a leaf attaches to the stem; this is where roots are most likely to form. Aim to take several cuttings, as not all of them might take.
- Prepare the Cuttings: Gently remove the lower leaves from the stem, leaving just the top two or three sets of leaves. This helps prevent fungal issues and reduces water loss. If the leaves are quite large, you can even snip them in half.
- Apply Rooting Hormone: Dip the cut end of each stem into your rooting hormone, tapping off any excess. This isn’t strictly mandatory, but it does give your cuttings a significant advantage.
- Plant Your Cuttings: Fill your small pots or trays with your prepared potting mix. Make a small hole with a pencil or your finger in the center of the soil. Carefully insert the cut end of the stem into the hole, and gently firm the soil around it. Make sure the leaf nodes you removed are below the soil surface.
- Create a Humid Environment: Water the soil thoroughly until it’s evenly moist. Then, gently mist the leaves of the cuttings. Cover the pot or tray with a clear plastic bag or a lid. This traps humidity, which is crucial for preventing the cuttings from drying out before they develop roots. Pop the pot or tray in a bright spot, but out of direct sunlight.
The “Secret Sauce” (Pro Tips)
Here are a few things I’ve learned over the years that make a real difference:
- Bottom Heat is Your Friend: While not entirely essential, placing your pots on a gentle heat mat can significantly speed up the rooting process. It mimics the warmth of spring and encourages root development from below. Just be careful not to overheat them; a barely warm surface is perfect.
- Don’t Let Those Leaves Touch the Water: If you’re experimenting with water propagation (which can also work for Nierembergia, though I find cuttings in soil more reliable long-term), make sure no leaves are submerged. Only the stem should be in the water. Submerged leaves will rot and can take your whole cutting down with them.
- Patience with the Potting Mix: Resist the urge to overwater after planting your cuttings. The goal is moist, not soggy. Overwatering is the quickest way to introduce rot and ruin your efforts. A light misting now and then is usually enough, especially with the protective cover.
Aftercare & Troubleshooting
Once your cuttings have been in their humid little house for a few weeks, you might start to see new leaf growth. This is a good sign! You can also gently tug on a cutting; if there’s resistance, roots have formed. At this point, you can gradually introduce them to more light and ventilation by opening the plastic bag a little more each day over a week or so. Once they seem established, you can transplant them into slightly larger pots.
The most common sign of failure is wilting and browning, often followed by rot. This is usually a sign of:
- Too much water: The soil is waterlogged.
- Not enough humidity: The cuttings dried out before they could root.
- Too much direct sun: They got scorched.
If a cutting looks like it’s headed south, don’t despair. Take it out, check the stem for softness or mould, and if you can salvage a bit of firm stem, try again! Sometimes it just takes a few tries to get it right.
A Little Encouragement
Propagating plants is a journey, and like any good journey, it has its learning curves. Embrace the process, observe your little cuttings, and learn from each attempt. Soon enough, you’ll have a whole troop of beautiful Nierembergia ready to bloom and brighten your garden. Happy propagating!
Resource:
https://identify.plantnet.org/k-world-flora/species/Nierembergia%20linariifolia%20Graham/data