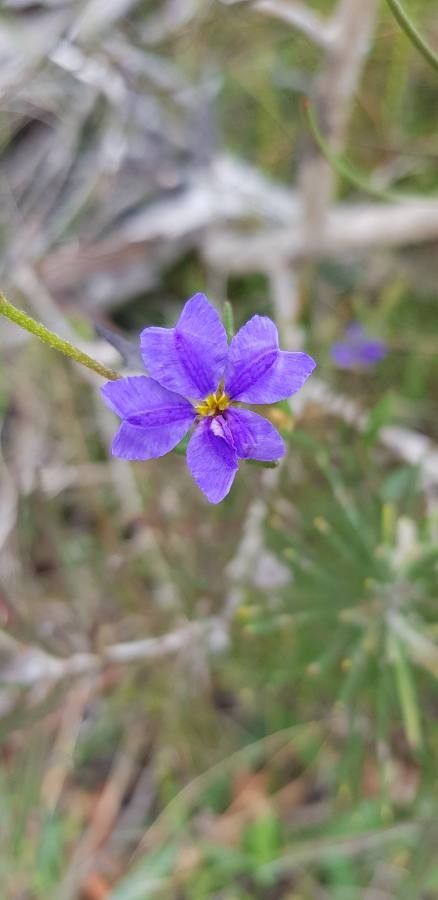
Hello, fellow plant lovers! Today, we’re diving into the wonderful world of propagating Dampiera lindleyi. If you, like me, adore its delicate, star-shaped blue flowers and trailing habit, you’re in for a treat. There’s something incredibly satisfying about coaxing a brand-new plant into existence from just a piece of the mother plant. And while Dampiera lindleyi might seem a tad particular, I’ve found it to be quite manageable once you get the hang of it. It’s a lovely project for those looking to stretch their propagation wings a bit!
The Best Time to Start
For the most bang for your propagation buck, I find late spring to early summer to be the prime time. That’s when the plant is actively growing, fresh and vigorous. You want to take cuttings from stems that are healthy and have a good amount of life in them, rather than old, woody bits. Think of it as taking cuttings from a plant that’s just had a really good meal and is ready to share its energy.
Supplies You’ll Need
Gathering your tools beforehand makes the whole process smoother. Here’s what I usually have on hand:
- Sharp, clean pruning shears or a craft knife: For making clean cuts. A dull tool can tear the stem, which is a recipe for disaster.
- Small pots or seed trays: Preferably with drainage holes!
- Well-draining potting mix: I like a mix of equal parts perlite and peat moss, or a good quality seed-starting mix. You want something airy that won’t hold too much moisture.
- Rooting hormone (optional but recommended for Dampiera lindleyi): A powder or gel form will do. It’s like a little energy boost for your cuttings.
- A plastic bag or propagation dome: To create a humid environment for your cuttings.
- Watering can or spray bottle: For gentle watering.
Propagation Methods
The most reliable way to get new Dampiera lindleyi plants is through stem cuttings. It’s straightforward and incredibly rewarding.
- Take Your Cuttings: Select a healthy, non-flowering stem. Using your sharp pruning shears, cut a piece that’s about 4-6 inches long. Make your cut just below a leaf node (where a leaf attaches to the stem).
- Prepare the Cuttings: Gently remove the leaves from the lower half of the cutting. Your goal is to have at least one or two leaf nodes bare, so you have good spots for roots to emerge. You can leave the top leaves intact, though you might want to pinch off any flower buds you see to redirect the plant’s energy into root development.
- Dip in Rooting Hormone (if using): Lightly moisten the cut end of the stem, then dip it into your rooting hormone, tapping off any excess. This coating helps encourage root formation.
- Plant Your Cuttings: Fill your small pots or seed tray with your prepared potting mix and water it lightly. Make a small hole in the center of each pot with your finger or a pencil. Carefully insert the prepared cutting into the hole, ensuring the bare nodes are buried. Gently firm the soil around the stem.
- Create a Humid Environment: Water the soil gently again. Then, cover the pot with a plastic bag or place it under a clear propagation dome. This traps moisture and humidity, which is crucial for cuttings to root. You can secure the bag with a rubber band.
- Placement: Place your pots in a bright location that receives indirect sunlight. Avoid direct sun, as it can scorch the delicate cuttings.
The “Secret Sauce” (Pro Tips)
Here are a couple of tricks I’ve learned over the years that really help Dampiera lindleyi thrive during propagation:
- Bottom Heat is Your Friend: While not strictly essential, placing your potted cuttings on a gentle heat mat can significantly speed up root development. It mimics the warmth you’d find in the soil during the growing season and really encourages those roots to get going. Just make sure the mat isn’t too hot – you don’t want to cook your cuttings!
- Don’t Drown Them! This is a big one. While humidity is key, overly wet soil is the quickest way to invite rot. Water only when the top inch of soil feels dry to the touch. It’s better to err on the side of too dry than too wet. If you’re using a plastic bag, you’ll find you don’t need to water very often.
Aftercare & Troubleshooting
Once your cuttings have been planted for about 3-4 weeks, you can gently tug on them. If you feel resistance, congratulations, you’ve got roots!
- Gradual Acclimation: As soon as you see roots, it’s time to gradually introduce them to less humid conditions. Open the plastic bag a little each day, or lift the lid of your propagation dome for increasing periods. This helps them adjust to normal room humidity.
- First Repotting: Once the new plant has developed a decent root system and you see new growth, it’s ready for its first small pot. Use your regular potting mix.
- Watch for Rot: The most common sign of failure is wilting and mushy stems. This is usually a sign of overwatering and poor drainage. If a cutting looks like it’s going south, it’s often best to catch it early and discard it to prevent any potential issues from spreading. Sometimes, a cutting simply doesn’t take, and that’s okay! It’s part of the gardening journey.
A Gentle Encouragement
See? It’s not as daunting as it might seem! Propagation is a learning process, and every gardener has had cuttings that didn’t make it. Be patient, enjoy the feel of the soil in your hands, and take pride in every new seedling that emerges. Happy propagating, and may your Dampiera lindleyi bring you years of blue floral joy!
Resource:
https://identify.plantnet.org/k-world-flora/species/Dampiera%20lindleyi%20de%20Vriese/data