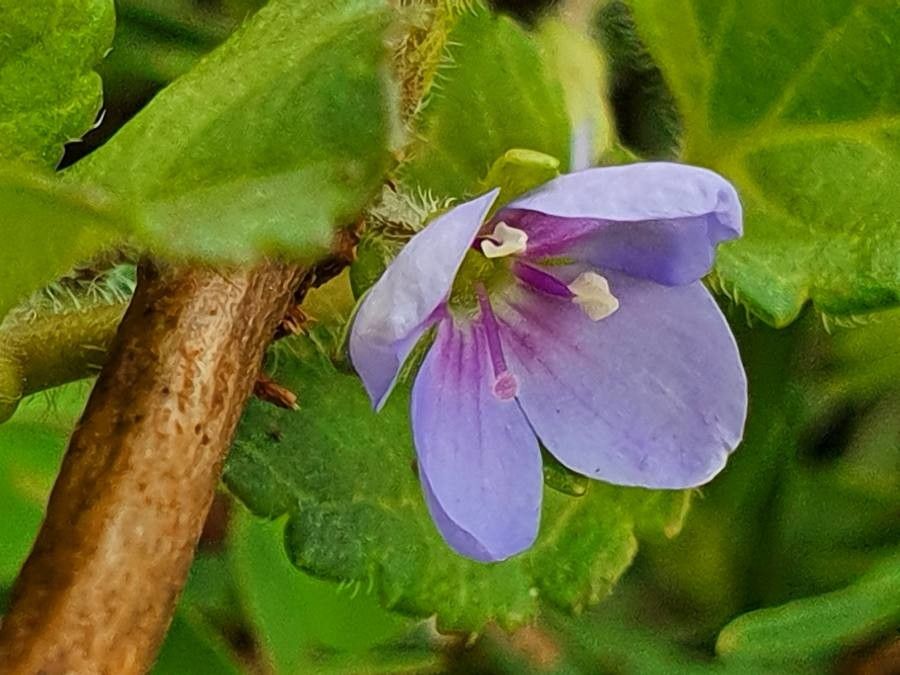
Hello fellow garden enthusiasts! Today, we’re diving into the delightful world of Veronica abyssinica, often known as the creeping speedwell. If you’re looking for a charming, low-growing perennial with lovely spikes of blue flowers that just begs to fill in those tricky corners of your garden, you’ve come to the right place.
There’s something so deeply satisfying about coaxing a new plant from a parent. It’s like giving life a little nudge, and with Veronica abyssinica, it’s a wonderfully approachable project. Don’t let the fancy botanical name fool you; this plant is quite forgiving, making it a joyful starter plant for those new to propagation. Getting more of these beauties for free? Well, that’s just the gardener’s dream, isn’t it?
The Best Time to Start
For Veronica abyssinica, my absolute favorite time to propagate is late spring to early summer. This is when the plant is actively growing after winter and has plenty of healthy new shoots to work with. You want to catch it at the peak of its vigor – that’s when it’s most receptive to new beginnings.
Supplies You’ll Need
To set yourself up for success, gather these essentials:
- Sharp pruning shears or a clean knife: For making neat cuts. Dull tools can bruise the stems.
- Small pots or trays: With drainage holes, of course!
- A good quality potting mix: I like a blend of seed starting mix and perlite. This provides excellent drainage, which is crucial.
- Rooting hormone (optional but recommended): A powdered or gel form can give your cuttings a helpful boost.
- A watering can or spray bottle: For gentle watering.
- A plastic bag or propagator: To create a humid environment for your cuttings.
- Labels: To keep track of what you’ve planted and when.
Propagation Methods
Veronica abyssinica is wonderfully adaptable, but I find stem cuttings to be the most straightforward and successful method for this particular plant.
-
Take Your Cuttings: In late spring or early summer, carefully select healthy, non-flowering shoots. Look for stems that are about 3-4 inches long. Use your sharp pruners to make a clean cut just below a leaf node. This is the point where leaves sprout from the stem, and it’s where roots are most likely to form.
-
Prepare the Cuttings: Gently remove the lower leaves from the cutting, leaving just two or three at the very top. This prevents them from rotting in the soil. If you’re using rooting hormone, dip the cut end into it, tapping off any excess.
-
Plant Your Cuttings: Fill your small pots or trays with your prepared potting mix. Make a small hole with your finger or a pencil. Insert the cut end of your Veronica cutting into the hole, ensuring the leaf nodes where you removed leaves are below the soil surface. Gently firm the soil around the stem.
-
Create a Humid Environment: Water the soil lightly. Then, place the pots inside a plastic bag or cover them with a propagator lid. This traps moisture and creates the humid microclimate that cuttings love. Set them in a bright spot with indirect light. We don’t want them scorched by direct sun!
The “Secret Sauce” (Pro Tips)
Here are a couple of my tried-and-true tricks that really make a difference:
- Pre-moisten your soil: Before you even take your cuttings, make sure your potting mix is evenly moist but not waterlogged. This gives your cuttings a good start and reduces the stress of initial watering.
- Don’t overcrowd: Give your cuttings a little breathing room. If they’re packed too tightly, it can promote fungal growth. Better to have a few happy cuttings than a tray of sad ones.
- Bottom heat is your friend: If you happen to have a propagator with a heat mat, it can significantly speed up the rooting process. Veronica roots are quite happy with a little warmth from below.
Aftercare & Troubleshooting
Once your cuttings are planted, the key is to maintain consistent moisture. Check the soil regularly – it should always feel damp to the touch, like a wrung-out sponge. If the soil is drying out, give it a gentle watering or mist. Keep the humidity up by ensuring the plastic bag or propagator lid is sealed.
You’ll know your Veronica is rooting when you see new leaf growth appearing from the top. This usually takes anywhere from 2 to 4 weeks. Once roots have developed and you see a good bit of new growth, you can begin to acclimate them to normal air by gradually opening the bag or propagator lid over a few days. Then, it’s time to transplant them into slightly larger pots or directly into their garden beds!
Now, what if things aren’t going as planned? The most common issue is rot. This usually happens if the soil is too wet and there isn’t enough air circulation. If you see a cutting turning mushy or black at the base, it’s likely a goner. Don’t despair! Just remove it, check the moisture levels in the remaining pots, and perhaps increase ventilation slightly. Sometimes, it’s just a matter of trying again.
So there you have it! Propagating Veronica abyssinica is a rewarding and relatively simple process. Be patient, enjoy the little victories, and before you know it, you’ll have a whole new colony of these charming blue beauties to adorn your garden. Happy propagating!
Resource:
https://identify.plantnet.org/k-world-flora/species/Veronica%20abyssinica%20Fresen./data