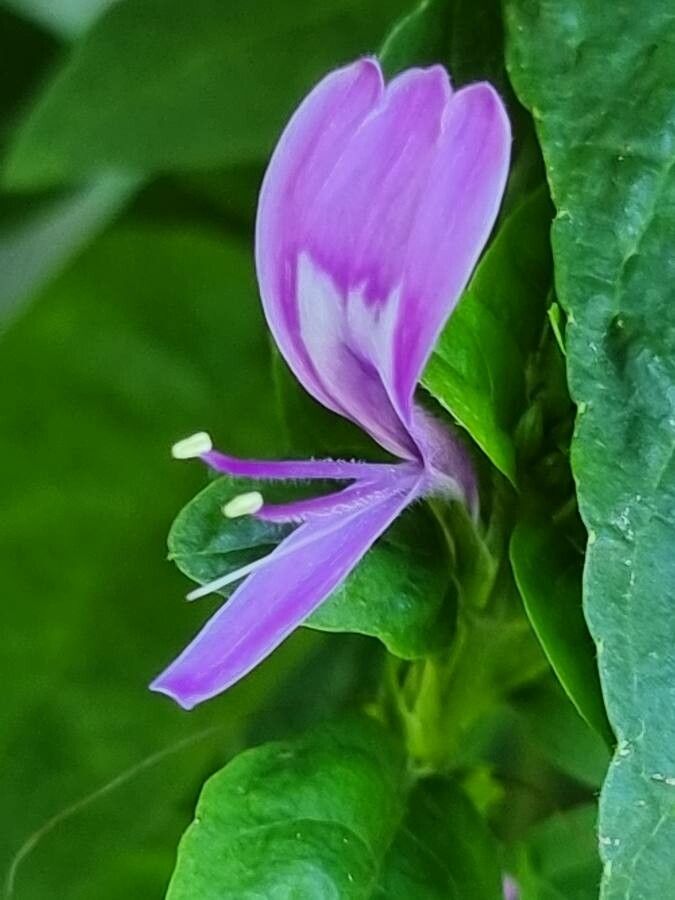
Oh, hello there! Pull up a chair. I’m so glad you’re curious about Dicliptera brachiata. This little charmer, also known as Paraguayan Water-Hyssop, is just a delight in the garden. Its delicate, often pink or lavender flowers bring a gentle flutter to borders and containers, attracting all sorts of beneficial insects. And the best part? It’s a wonderfully rewarding plant to propagate. You’ll find it’s quite forgiving, making it a great choice even if you’re just dipping your toes into the world of plant starting.
The Best Time to Start
For the highest chance of success with Dicliptera brachiata, I always recommend spring or early summer. This is when the plant is actively growing and has plenty of energy to put into developing new roots. Starting from healthy, vigorous parent plants during their peak growing season is key. You can also take cuttings in late summer, but you might have a slightly longer wait for them to establish before cooler weather sets in.
Supplies You’ll Need
Here’s what I like to have on hand before I get started:
- Sharp Pruning Shears or a Clean Knife: For making clean cuts.
- Small Pots or Seed Trays: With drainage holes, of course!
- A Good Quality Potting Mix: I usually use a light, well-draining mix. A blend of peat moss, perlite, and a bit of compost works wonders. You can even buy ready-made seed starting mixes.
- Rooting Hormone (Optional but Recommended): Especially for stem cuttings. It gives them a helpful boost.
- A Spray Bottle: For gentle misting.
- Clear Plastic Bags or a Small Greenhouse: To create a humid environment.
- Watering Can or Gentle Stream: For watering at the base.
Propagation Methods
There are a couple of ways to get new Dicliptera brachiata plants, and both are quite straightforward.
1. Stem Cuttings: My Go-To Method
This is probably the easiest and most reliable way to multiply your Dicliptera brachiata.
- Step 1: Take Your Cuttings. In spring or early summer, look for healthy, non-flowering stems. Using your clean shears, take cuttings that are about 4-6 inches long. Make your cut just below a leaf node (where a leaf attaches to the stem). This is where the magic happens!
- Step 2: Prepare the Cuttings. Gently remove the lower leaves from the cutting, leaving just a couple of leaves at the top. This prevents them from rotting in the soil and encourages the plant to focus its energy on rooting.
- Step 3: Apply Rooting Hormone (If Using). Dip the cut end of the stem into your rooting hormone powder or gel. A little goes a long way.
- Step 4: Plant Your Cuttings. Fill your small pots or trays with your prepared potting mix. Make a small hole in the center of the soil with a pencil or your finger. Insert the cutting into the hole and gently firm the soil around it.
- Step 5: Water and Cover. Water the soil gently until it’s evenly moist. Then, cover the pots with a clear plastic bag or place them in a small greenhouse. This traps moisture and creates that essential humid environment.
2. Water Propagation: A Visual Treat
This method is satisfying because you can see the roots develop!
- Step 1: Take Cuttings. Follow the same steps as above for taking and preparing your stem cuttings.
- Step 2: Place in Water. Instead of potting soil, place the cuttings in a jar or glass of clean water. Make sure to remove any leaves that would fall below the waterline. This is crucial to prevent rot.
- Step 3: Find a Bright Spot. Place the jar in a bright, indirect light location. Change the water every few days to keep it fresh. You should start to see tiny white roots emerge from the nodes in a couple of weeks.
- Step 4: Pot Up When Rooted. Once the roots are about an inch long, you can carefully transplant them into pots filled with your well-draining potting mix. Treat them as you would newly planted stem cuttings.
The “Secret Sauce” (Pro Tips)
Here are a few extra bits of wisdom that have helped me over the years:
- Bottom Heat is Your Friend: If you find your cuttings are taking a while to root, consider placing your pots on a gentle heat mat. This warmth mimics spring soil temperatures and really encourages speedy root development.
- Don’t Overwater! This is the most common mistake. While humidity is important, soggy soil is a death sentence. Feel the soil – it should be moist, not waterlogged. If you can squeeze water out of it, it’s too wet.
- Label Everything! Seriously, I can’t tell you how many times I’ve forgotten which pot contains which plant, especially when I’m starting a lot of things at once. A simple plant label or even a marker on the pot is a lifesaver.
Aftercare & Troubleshooting
Once you see good root development (you can gently tug on a cutting – if it resists, it’s rooted!), it’s time for a bit more attention.
- Acclimatize: Gradually remove the plastic cover over a few days. Start by taking it off for an hour or two, then longer, until the plant is used to the regular humidity.
- Watering: Water your new plant when the top inch of soil feels dry. Always water at the base to keep the leaves dry.
- Light: Gradually introduce your new plants to brighter light, but avoid direct, harsh sunlight until they are well-established.
What if things go wrong? The most common issue is rot. If your cuttings turn mushy and black, it’s usually a sign of too much moisture and poor drainage. If you spot this early, try to remove the affected cutting immediately and allow the soil in other pots to dry out more. Don’t be discouraged if a few don’t make it. Even seasoned gardeners have the occasional setback.
Happy Propagating!
Starting new plants from cuttings is such a satisfying journey. It’s a wonderful way to expand your garden and share the beauty of Dicliptera brachiata with friends. Be patient with your little propagations; they’re working hard to grow. Enjoy the process, and happy gardening!
Resource:
https://identify.plantnet.org/k-world-flora/species/Dicliptera%20brachiata%20Spreng./data