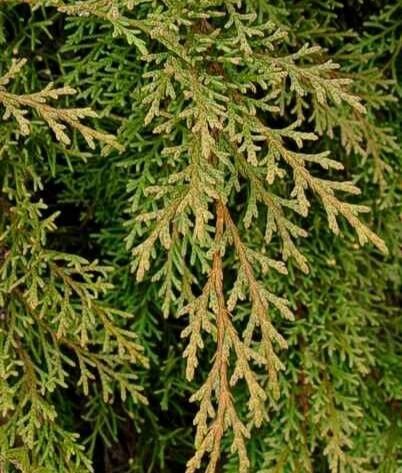
Hey there, fellow garden lovers! I’m so excited to chat with you today about a truly delightful plant: Microbiota decussata, often called Siberian Carpet or Russian Cypress. If you love low-growing, evergreen groundcovers that add texture and year-round interest to your beds, this is the plant for you. They’re just gorgeous, forming dense mats of finely textured foliage that can really soften hardscaping or fill in shady corners.
And the best part? Propagating them is a really rewarding process. You get to watch new life emerge from a piece of your beloved plant, and then you have more of these beauties to share or plant elsewhere! For beginners, I’d say yes, Microbiota decussata is quite approachable for propagation. It’s not one of those finicky plants that throws a tantrum if you look at it wrong. With a little patience and a few good practices, you’ll be successful.
The Best Time to Start
The sweet spot for propagating Microbiota decussata is late spring to early summer. This is when the plant is actively growing, and the new shoots have matured enough to be used for cuttings but are still flexible. You’re looking for stems that are slightly firm, not so soft and floppy that they’ll wilt instantly, but not so woody that they’ll be hard to root. Think of it as striking when the plant is feeling energetic and ready to make new life.
Supplies You’ll Need
Here’s what you’ll want to have on hand before you get started:
- Sharp Pruning Shears or a Knife: Clean cuts are crucial to prevent disease. I prefer a good, sharp bypass pruner for clean snips.
- Rooting Hormone: While not strictly mandatory, a rooting hormone powder or gel can significantly boost your success rate, especially for woody cuttings.
- Well-Draining Potting Mix: A mix of equal parts peat moss or coco coir and perlite or coarse sand works beautifully. You want something that allows water to drain quickly but still retains a bit of moisture.
- Small Pots or Trays: Clean containers with drainage holes are a must. Small ones are perfect for cuttings.
- Plastic Bags or a Humidome: This is for creating a mini-greenhouse effect to keep your cuttings from drying out.
- A Spray Bottle: For misting your cuttings.
- Water: For cleaning up and for watering.
Propagation Methods
For Microbiota decussata, stem cuttings are your best bet. It’s straightforward and yields excellent results.
Stem Cuttings:
- Take Your Cuttings: Select healthy, non-flowering stems from your mature plant. Using your sharp pruning shears, take cuttings that are about 4–6 inches long. Make your cut just below a leaf node (where the leaves attach to the stem), as this is where roots are most likely to form.
- Prepare the Cuttings: Gently remove the lower leaves from the bottom 2–3 inches of each cutting. This prevents them from rotting when buried in the soil. You can also gently scrape a small sliver of bark off the bottom inch of the stem on one side, which can encourage rooting.
- Apply Rooting Hormone: Dip the cut end of each prepared stem into your rooting hormone. Tap off any excess.
- Plant Your Cuttings: Fill your small pots or trays with your well-draining potting mix. Make a small hole in the center of the mix with a pencil or your finger. Insert the bottom of the cutting into the hole, making sure the leaf nodes you removed are below the soil line. Gently firm the soil around the cutting.
- Water and Cover: Water the soil gently but thoroughly, allowing excess water to drain. Then, cover the pots with a clear plastic bag or place them in a humidome to maintain high humidity. Ensure the plastic doesn’t touch the leaves of the cuttings.
The “Secret Sauce” (Pro Tips)
Now, for a couple of my personal tried-and-true tricks that make all the difference:
- Don’t Let the Leaves Touch Anything Wet for Too Long: When you water, do it thoroughly. But after that, if you see standing water that doesn’t drain out, empty it. For your cuttings, try to keep the foliage dry, especially if they’re in a humid environment. Moisture on the leaves, combined with warmth, can encourage fungal diseases. Misting the air around them is better than directly drenching the leaves.
- Consider Bottom Heat: For woody cuttings like these, a gentle warmth from below can really speed up root formation. If you have a propagation mat, placing your pots on it can be a game-changer. It mimics the warmth of the soil in summer and encourages those roots to wake up and grow. You don’t want it hot, just pleasantly warm to the touch.
Aftercare & Troubleshooting
Once your cuttings are planted, place them in a spot that gets bright, indirect light. Avoid direct, hot sun, which can scorch them. Keep the soil consistently moist but not waterlogged. This is where that plastic bag or humidome is your friend – it reduces the need for frequent watering by trapping moisture.
You’ll know your cuttings have rooted when you see signs of new growth or when you gently tug on a cutting and feel resistance. This can take anywhere from 4 to 8 weeks, sometimes longer.
The most common issue you’ll encounter is rot. If you see stems turning black and mushy, it’s usually a sign of too much moisture and not enough air circulation. If this happens, try to remove the affected cuttings immediately and let the remaining ones dry out a bit more between waterings. If you’ve applied too much rooting hormone, that can also contribute to rot, so always tap off the excess!
A Encouraging Closing
Propagating plants is a journey, and sometimes it requires a little patience. Don’t get discouraged if not every cutting takes. Each plant is a unique venture, and the process of nurturing new life is incredibly satisfying. So, gather your supplies, take those cuttings, and enjoy watching your Microbiota decussata family grow. Happy gardening!
Resource:
https://identify.plantnet.org/k-world-flora/species/Microbiota%20decussata%20Kom./data