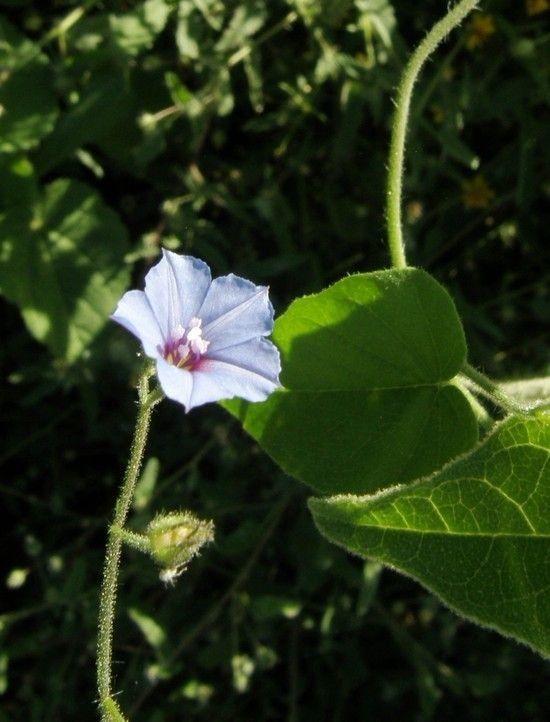
Oh, Jacquemontia evolvuloides! What a beauty. Seeing those bright, funnel-shaped flowers unfurl, often a lovely sky blue or sometimes a soft lavender, just makes me happy. It’s a plant that brings a touch of the tropics and a cheerful disposition to any garden or pot. And the best part? You can easily create more of these little sunbeams yourself! If you’re new to the gardening scene, don’t fret. Propagating Jacquemontia evolvuloides is quite rewarding and, thankfully, not overly fussy.
The Best Time to Start
For the highest success rates, I always recommend starting your propagation efforts during the active growing season. Think late spring through mid-summer. This is when the plant has plenty of energy to put into developing new roots. You’re essentially tapping into its natural vigor.
Supplies You’ll Need
Here’s a little kit to get you started:
- Sharp Pruning Shears or a Clean Knife: For taking clean cuttings.
- Rooting Hormone (Optional, but recommended): A powder or gel that encourages root development.
- Well-Draining Potting Mix: I typically use a blend of equal parts potting soil, perlite, and a bit of coco coir. This mimics the free-draining conditions this plant loves.
- Small Pots or Trays: Clean containers are key to preventing disease.
- Watering Can or Spray Bottle: For gentle watering.
- Plastic Bag or Humidity Dome: To create a mini greenhouse effect.
Propagation Methods
Let’s dive into how you can grow more of these beauties!
Stem Cuttings: This is my go-to method for Jacquemontia evolvuloides.
- Take the Cuttings: Look for healthy, non-flowering stems. Using your sharp shears, take cuttings that are about 4-6 inches long. Make sure each cutting has at least two sets of leaves. Cut just below a leaf node (the point where a leaf attaches to the stem).
- Prepare the Cuttings: Gently remove the lower leaves from the cutting, leaving just the top set or two. This prevents them from rotting in the soil. If you’re using rooting hormone, dip the cut end into the powder or gel, tapping off any excess.
- Plant the Cuttings: Fill your small pots with your well-draining potting mix. Moisten the mix thoroughly. Then, make a hole with your finger or a pencil and insert the cutting, ensuring the leaf nodes are buried. Gently firm the soil around the stem.
- Provide Humidity: Water the soil gently. Then, cover the pot with a plastic bag or a humidity dome. Poke a few small holes in the bag for ventilation, or slightly prop open the dome. This keeps the humidity high around the cuttings, which is crucial for root formation. Place the pots in a bright location, but out of direct, harsh sunlight.
Water Propagation (An Alternative): You can also try rooting cuttings directly in water.
- Prepare Cuttings: Follow steps 1 and 2 from the stem cutting method.
- Place in Water: Fill a clean jar or glass with water. Place the prepared cuttings in the water, ensuring the leaf nodes are submerged but the leaves themselves are not touching the water.
- Observe and Change Water: Place the jar in a bright spot, away from direct sun. Change the water every few days to keep it fresh and prevent bacterial growth. You should start to see roots forming within a few weeks. Once the roots are about an inch long, you can transplant them into potting mix.
The “Secret Sauce” (Pro Tips)
Here are a few little tricks I’ve learned over the years that really make a difference:
- Bottom Heat is Your Friend: If you’re serious about cuttings, consider using a seedling heat mat. This gentle warmth from below encourages root development much faster. Just place your pots on top of the mat.
- Don’t Overwater! This is probably the most common mistake with cuttings. You want the soil to be consistently moist, but not soggy. Soggy soil is a fast track to rot, and nobody wants that.
- Patience is a Virtue (and a Secret Weapon): Sometimes, cuttings take their sweet time. Don’t be discouraged if you don’t see immediate results. Keep them consistently moist, provide good light, and give them time.
Aftercare & Troubleshooting
Once you see new growth appearing on your cuttings and feel a little resistance when gently tugging them (a sign of roots!), it’s time for more regular care.
- Acclimatize: Gradually remove the plastic bag or dome over a few days to help the new plant adjust to normal humidity levels.
- Watering: Water when the top inch of soil feels dry.
- Light: Continue to provide bright, indirect light.
- Transplanting: Once the roots have filled the pot, you can transplant your new Jacquemontia into a slightly larger container or its permanent garden spot.
The main thing to watch out for is rot. If your cutting turns black and mushy, or if it seems to be collapsing without rooting, it’s likely due to too much moisture and not enough air circulation, or perhaps a bit too much heat without adequate drainage. Just discard the affected cutting and try again, adjusting your watering and ventilation.
A Little Encouragement
Propagating plants is a wonderful way to connect with nature and expand your garden for free! It’s a process of observation and a little bit of faith. Don’t be afraid to experiment, and enjoy the magic of watching a tiny cutting transform into a beautiful new plant. Happy propagating!
Resource: