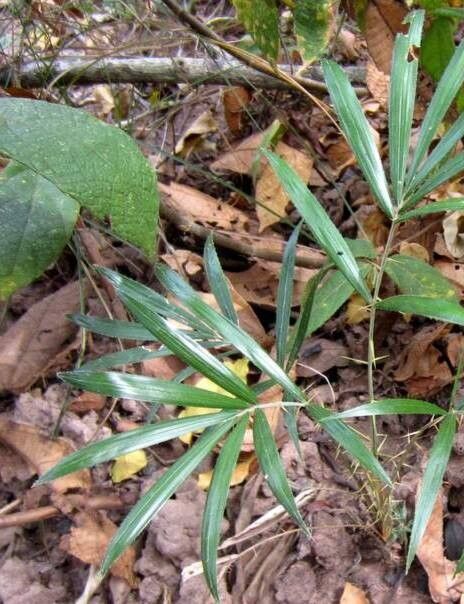
Hey there, fellow garden enthusiasts! Today, we’re diving into the wonderful world of Calamus muelleri, often called the Australasianweet flag or simply Sweet Flag. If you’re drawn to plants with lush, arching foliage and a subtly sweet fragrance when bruised, you’re going to love this one. Getting more of these beauties for free? That’s just pure gardening joy, isn’t it? Fortunately, propagating Calamus muelleri is a pretty straightforward process, even if you’re just starting out with your green thumb.
The Best Time to Start
For the highest success rates, I always recommend spring for propagating Calamus muelleri. This is when the plant is actively growing and has a good reserve of energy. You can also have success in early summer, as long as you can provide consistent warmth and moisture. Avoid propagation during the heat of summer or the dormancy of winter.
Supplies You’ll Need
Here’s what you’ll want to have on hand before you get started:
- Sharp Pruning Shears or a Knife: Clean, sharp tools are key to making clean cuts that heal well.
- Well-Draining Potting Mix: I like a mix of peat moss, perlite, and a bit of compost. Avoid anything too heavy that might hold too much moisture.
- Small Pots or Seed Trays: Clean pots are important to prevent disease.
- Rooting Hormone (Optional but Recommended): This gives your cuttings a helpful boost.
- Watering Can with a Fine Rose or Spray Bottle: For gentle watering.
- Labels and a Marker: So you don’t forget what you’ve propagated!
Propagation Methods
The most reliable way to propagate Calamus muelleri is through division. It’s also quite forgiving with stem cuttings, especially if you’re patient.
Division
This is by far the easiest and most successful method for Calamus muelleri.
- Choose Your Plant: Select a mature, healthy clump of Calamus muelleri in its pot or in the ground.
- Gently Remove the Clump: If it’s in a pot, tip it out carefully. If it’s in the ground, dig around the base and lift the entire clump.
- Loosen the Soil and Roots: Gently shake off excess soil. You’ll see the plant naturally wants to divide into sections, each with its own roots and shoots.
- Separate the Divisions: Use your hands or a clean trowel to carefully pull apart sections. Aim for divisions that have at least a few shoots and a good chunk of roots attached. Don’t worry if a few roots break; it’s part of the process.
- Pot Up Your New Plants: Fill your clean pots with your well-draining potting mix. Make a little well in the center and place your new division in it. The top of the root ball should be about an inch below the rim of the pot.
- Water Thoroughly: Water gently but deeply until water runs out of the drainage holes. This helps settle the soil around the roots.
Stem Cuttings
While division is king, cuttings can also work wonderfully.
- Take Cuttings: In spring or early summer, use your sharp pruners to take stem cuttings that are about 4-6 inches long. Make the cut just below a leaf node (where the leaf attaches to the stem).
- Prepare the Cuttings: Remove the lower leaves, leaving just the top few. If the leaves are quite large, you can even cut them in half to reduce water loss.
- Apply Rooting Hormone (Optional): Dip the cut end of the stem into rooting hormone, tapping off any excess.
- Plant the Cuttings: Fill small pots with your moistened potting mix. Make a hole with a pencil or your finger and insert the cutting, ensuring the leaf nodes are below the soil line. Gently firm the soil around the stem.
- Water Gently: Mist the cuttings lightly or water very gently.
The “Secret Sauce” (Pro Tips)
Here are a couple of tricks I’ve learned over the years that really make a difference:
- Keep it Humid: Calamus muelleri loves moisture. For cuttings, I always use a clear plastic bag or a propagation dome over the pots to create a mini-greenhouse effect. This helps prevent the cuttings from drying out while they develop roots. Just make sure to vent it daily to prevent mold.
- Consider Bottom Heat: Especially for cuttings, placing your pots on a gentle heat mat can significantly speed up root formation. It mimics the warmth of spring soil and gives those little roots a cozy environment to grow in.
Aftercare & Troubleshooting
Once your divisions or cuttings have rooted (you can gently tug on them – if there’s resistance, they’ve established!), it’s time to treat them like young plants.
- Watering: Keep the soil consistently moist but not waterlogged. As they grow, you can gradually acclimate them to slightly drier conditions, but never let them completely dry out.
- Light: Provide bright, indirect light. Too much direct sun can scorch young leaves.
- Patience is Key: Rooting can take several weeks to a few months, so don’t get discouraged if you don’t see immediate results.
The most common problem you’ll encounter is rot, usually due to overwatering and poor drainage. If you see your cuttings wilting, turning mushy, or developing black spots, it’s likely a sign of too much moisture. In this case, you might need to remove the affected parts and ensure better air circulation and drainage.
A Encouraging Closing
Growing more of your favorite plants is a truly rewarding experience. It connects you to the natural cycle and gives you a wonderful sense of accomplishment. So, gather your supplies, get your hands in the soil, and enjoy the process of propagating your Calamus muelleri. Be patient, observe your new plants, and before you know it, you’ll have beautiful new clumps to share or enjoy in your own garden. Happy growing!
Resource:
https://identify.plantnet.org/k-world-flora/species/Calamus%20muelleri%20H.Wendl./data