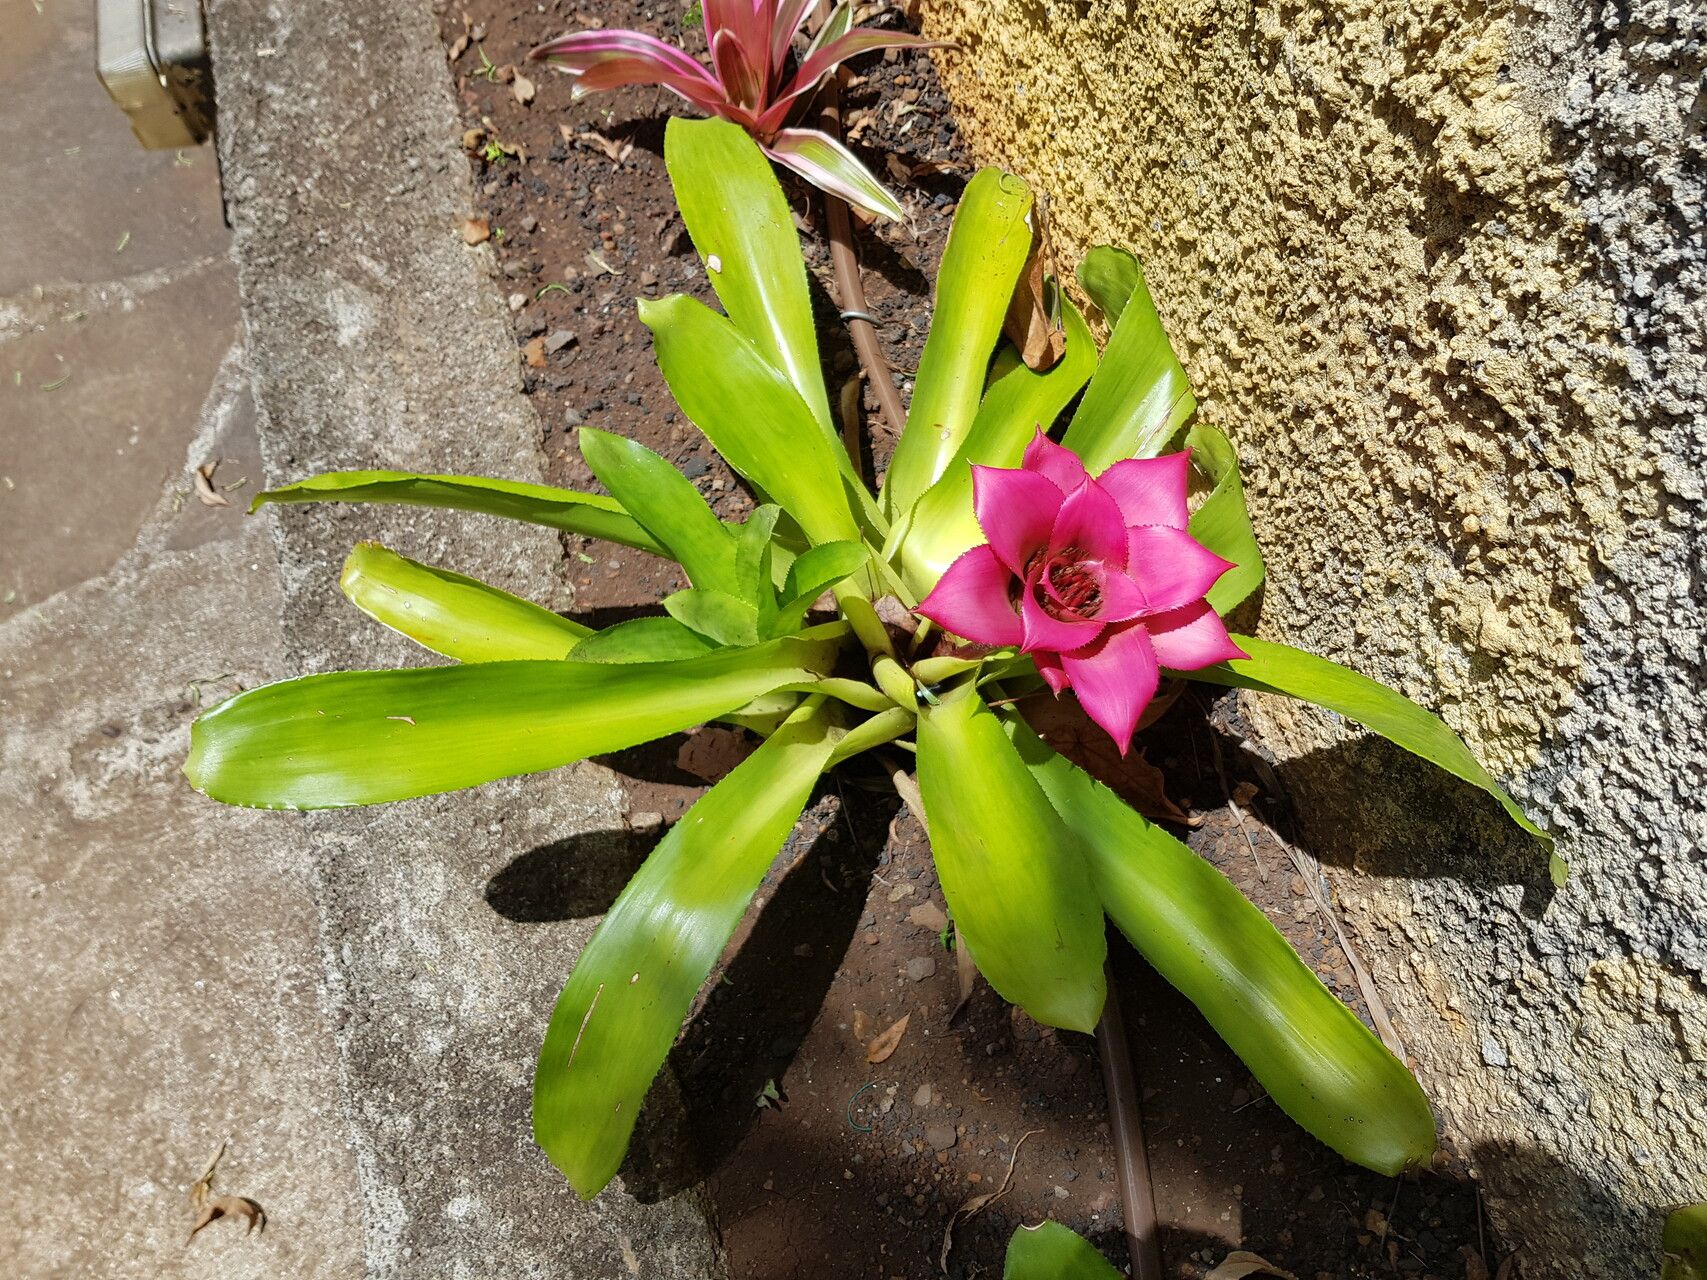
Oh, those Nidularium innocentii! Aren’t they just spectacular with their deep, jewel-toned leaves and that lovely central cup? I’ve been growing them for years, and seeing a new little plant emerge from an established one always brings a smile to my face. It’s a truly satisfying feeling, like watching a tiny miracle unfold in your own garden.
If you’re wondering if Nidularium innocentii is an easy plant to propagate, I’d say it’s moderately easy. It’s not as hands-off as some succulents, but with a little attention, you’ll be well on your way to a whole brood of these beauties.
The Best Time to Start
For the absolute best chance of success with Nidularium innocentii, I always recommend spring or early summer. This is when the plant is naturally in its most vigorous growth phase. You’ll find it’s producing more energy and therefore more readily willing to put out new roots. Aim to propagate when the parent plant is actively growing, not when it’s dormant.
Supplies You’ll Need
To get started, you’ll want to have these on hand:
- Sharp Pruning Shears or a Clean Knife: Sterilize them with rubbing alcohol before you begin.
- Well-Draining Potting Mix: I like a mix of equal parts peat moss, perlite, and orchid bark. A good bromeliad mix will also work wonders.
- Small Pots or Trays: Whatever you have available that’s suitable for small plants.
- Rooting Hormone (Optional but Recommended): This can give your cuttings a helpful boost.
- Plastic Bag or Propagator: To create a humid environment.
- Spray Bottle: For misting.
Propagation Methods
The most reliable way I’ve found to propagate Nidularium innocentii is through division, as they tend to produce offsets (pups) naturally.
- Gently Remove the Parent Plant: Carefully take the mature Nidularium innocentii out of its pot. You might need to loosen the soil around the edges with your fingers or a small trowel.
- Locate the Offsets (Pups): Look around the base of the main plant. You’ll see smaller, new plants starting to grow, often attached by a short rhizome.
- Separate the Pups: Using your sterilized shears or knife, make a clean cut between the offset and the parent plant. Try to get as much of the offset’s own root system as possible. If an offset has no roots yet, don’t worry, it can still root.
- Potting Up: Fill your small pots with your prepared well-draining mix. Make a little hole in the center with your finger.
- Planting the Offset: Place the base of the offset into the hole and gently firm the soil around it. The goal is to have the offset sitting snugly in its new home, not buried too deeply.
- Water Lightly: Give the newly potted offsets a light watering. You don’t want to drown them.
The “Secret Sauce” (Pro Tips)
Here are a few things I’ve learned over the years that make a difference:
- Don’t Let the Leaves Sit in Standing Water: This is crucial for bromeliads. When you water, water the soil and avoid filling the central cup too much. Excess water sitting in the cup can lead to rot.
- Mimic Their Natural Humidity: Nidularium innocentii loves a good, humid environment. After potting, I like to place the pots inside a clear plastic bag or a propagator. This creates a mini-greenhouse effect. Just make sure to open it up for a bit of fresh air every few days to prevent mold.
- Consider a Touch of Bottom Heat: If your home is on the cooler side, a seedling heat mat can work wonders. It encourages root development without drying out the foliage too much. This isn’t strictly necessary, but it does speed things up.
Aftercare & Troubleshooting
Once your pups are potted, keep them in bright, indirect light – no harsh sun! Mist the leaves lightly every couple of days, especially if they’re in a plastic bag. You’re looking for signs of new growth, which usually means new leaves unfurling or the plant looking a bit more robust.
The most common problem you might encounter is rot. If you see the leaves turning mushy and brown, or smelling unpleasant, it’s likely rot. This usually means it’s been too wet. You can try to salvage it by removing the rotted parts with sharp shears and replanting in fresh, drier soil, but sadly, it doesn’t always recover. Overwatering is the biggest culprit here.
A Encouraging Closing
Remember, propagation is an exercise in patience. Not every attempt will be a runaway success, and that’s perfectly okay. Each little offset you successfully root is a victory! Enjoy the process, observe your new plants, and soon you’ll have a delightful collection of Nidularium innocentii to admire. Happy growing!
Resource:
https://identify.plantnet.org/k-world-flora/species/Nidularium%20innocentii%20Lem./data