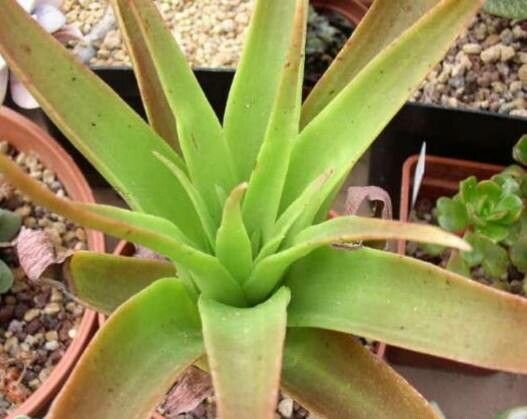
Hello fellow plant lovers! It’s so wonderful to have you here. Today, we’re diving into the delightful world of propagating Crassula acinaciformis. If you’re captivated by its graceful, saber-like leaves, you’ll be happy to know that creating more of these beauties is a truly rewarding endeavor. It’s also a fantastic plant for beginners to try their hand at propagation. The success rate is generally quite good, which makes the learning curve much gentler and more enjoyable.
The Best Time to Start
For the highest success rate, aim to propagate your Crassula acinaciformis during its active growing season. For most of us, this means spring and early summer. During these warmer months, the plant has more energy to put into rooting and developing new growth. You can take cuttings from healthy, mature stems then. Waiting for this period significantly increases your chances of a thriving new plant.
Supplies You’ll Need
Before we get our hands dirty, let’s gather our essentials:
- Sharp, clean pruning shears or a craft knife: A clean cut is crucial to prevent disease.
- Well-draining potting mix: A cactus or succulent mix is ideal. You can also make your own by combining equal parts potting soil, perlite, and coarse sand.
- Small pots or propagation trays: Terracotta pots are great as they allow the soil to dry out faster.
- Rooting hormone (optional but recommended): This little helper can speed up the rooting process.
- Watering can or spray bottle: For gentle watering.
- Gloves (optional): If you prefer to keep your hands clean.
Propagation Methods
Let’s get down to business! Fortunately, Crassula acinaciformis is quite forgiving and can be propagated through a few straightforward methods.
1. Stem Cuttings: My Go-To Method
This is usually the most successful and quickest way to get new plants.
- First, select a healthy, mature stem. Look for one that’s firm and plump.
- Using your sharp shears or knife, make a clean cut just below a leaf node. A node is where a leaf attaches to the stem.
- Once you’ve taken your cutting, it’s important to let it callus over. Place the cutting in a dry, airy spot for a few days to a week. You’ll see the cut end dry out and form a protective scab. This step is non-negotiable for preventing rot.
- After callusing, you have a choice: you can lightly dip the callused end into rooting hormone if you’re using it.
- Now, fill your pot with your well-draining potting mix.
- Gently insert the callused end of the cutting into the soil, about an inch or so deep. You can use a pencil or your finger to make a small hole first.
- Water very sparingly initially, just enough to settle the soil around the cutting. You don’t want soggy conditions.
- Place the pot in a bright location, but out of direct, harsh sunlight.
2. Water Propagation: A Visual Treat
While I prefer soil propagation for succulents, water propagation can work well for Crassula acinaciformis and lets you watch the roots develop!
- Take your stem cutting as described above, but this time, do not let it callus.
- Remove the lower leaves from the stem, making sure there are no leaves submerged in the water.
- Find a clean glass or jar and fill it with clean water.
- Place the stem cutting into the water so that the leaf nodes are submerged, but the leaves themselves are not.
- Position the jar in a bright spot, again, away from direct sun.
- Change the water every few days to keep it fresh and prevent bacterial growth.
The “Secret Sauce” (Pro Tips)
Here are a few little tricks I’ve picked up over the years that can make a real difference:
- Don’t Rush the Callus: Seriously, this is the single most important step to avoid rot. A proper callus is your best friend when propagating succulents.
- Location, Location, Location: While you want bright light, direct, intense midday sun can scorch succulent cuttings. A bright windowsill that gets morning sun or filtered afternoon light is usually perfect.
- Bottom Heat Trick: If you’re propagating in cooler temperatures or just want to give your cuttings an extra boost, consider using a heat mat designed for seedlings. Placing your pots on a gentle heat source can significantly speed up root formation. Just make sure it’s not too hot – lukewarm is best.
Aftercare & Troubleshooting
Once you start to see little roots emerging from the bottom of your cutting (this can take a few weeks to a few months), you’re on your way!
- For soil-propagated cuttings: Continue to water sparingly. Allow the soil to dry out completely between waterings. You can test for roots by gently tugging on the cutting; if there’s resistance, roots have formed. Once you have a good root system, you can start watering more normally, as you would your mature plant.
- For water-propagated cuttings: Once your roots are about an inch long, you can carefully transfer them to soil. Gently remove the cutting, try not to disturb the new roots too much, and plant it in your well-draining potting mix. Water very lightly after transplanting.
Common Signs of Failure:
- Rotting: If your cutting turns mushy, black, or smells foul, it’s likely succumbed to rot. This is almost always due to too much moisture and lack of callusing. Unfortunately, this cutting cannot be saved.
- Shriveling: If the cutting shrivels and dries out without forming roots, it might not have received enough moisture, or it was placed in too much direct sun.
A Little Patience Goes a Long Way
Propagating plants is a journey, and like any good journey, it requires a bit of patience and a lot of observation. Don’t be discouraged if your first attempt isn’t perfect. Each new plant you nurture from a simple cutting is a testament to nature’s resilience and your own green thumb. Enjoy the process of watching these little miracles grow! Happy propagating!
Resource:
https://identify.plantnet.org/k-world-flora/species/Crassula%20acinaciformis%20Schinz/data