Hey there, fellow plant lovers!
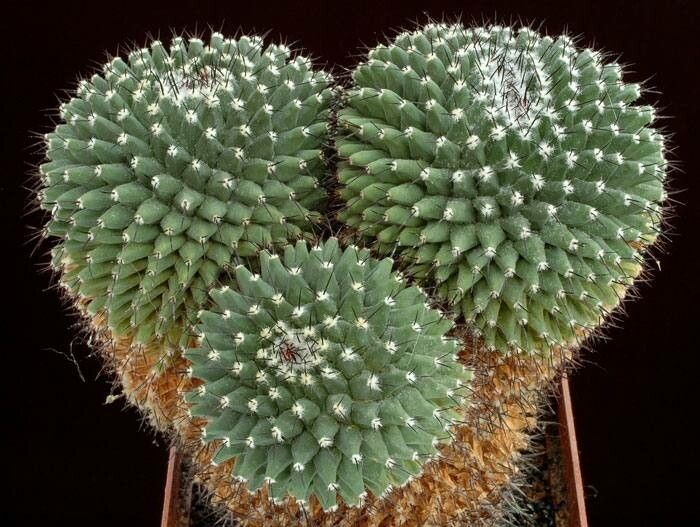
I’m so excited to chat about one of my favorite little cacti today: Mammillaria carnea. If you haven’t met this beauty yet, imagine a fluffy, barrel-shaped cactus covered in the most delightful, rosy-pink flowers. It’s like a tiny, fuzzy cloud that bursts into color! Propagating these gems feels like a little bit of magic, and it’s a fantastic way to create more of this charm for your own collection or to share with friends. And guess what? Even if you’re just dipping your toes into the world of cacti, you’ll find Mammillaria carnea to be a wonderfully forgiving plant to propagate.
The Best Time to Start
For the happiest Mammillaria carnea, I always recommend starting your propagation efforts in the spring or early summer. This is when the plant is actively growing and has the energy it needs to heal quickly and send out roots. Trying to propagate during its dormant winter period is usually a recipe for disappointment. Just picture it: the plant is waking up, stretching, and ready to put on a show – perfect timing!
Supplies You’ll Need
Gathering your supplies beforehand makes the whole process so much smoother. Here’s what I usually have on hand:
- Well-draining potting mix: A cactus or succulent mix is ideal. You can also create your own by mixing equal parts potting soil, coarse sand, and perlite.
- Sharp, sterile knife or pruning shears: For making clean cuts. I always give mine a quick wipe with rubbing alcohol between uses.
- Rooting hormone (optional but helpful): This can give your cuttings a nice boost.
- Small pots or seedling trays: With drainage holes, of course!
- Grit or small pebbles: For top-dressing, which helps with drainage and stability.
- Watering can with a fine rose: For gentle watering.
Propagation Methods
Mammillaria carnea is quite adaptable, so you have a couple of great options for making new plants.
Offsets (or Pups)
This is often the easiest and most successful method for Mammillaria, as they freely produce little baby plants around their base.
- Gently remove the offsets: Wait until the offsets are a decent size, at least an inch or so in diameter. You can often gently pull them away from the mother plant. If they’re a bit stubborn, use your clean knife to carefully sever the connection at the base.
- Let them callous: This is crucial! Place the offsets in a dry, bright spot for 2-7 days, or until the cut end has dried and formed a callus. This prevents rot.
- Pot them up: Once calloused, nestle the offsets into their own small pots filled with your well-draining cactus mix. You can press them in just enough to hold them upright.
- Wait to water: Resist the urge to water immediately! I wait about one to two weeks after potting before giving them their first drink. This gives any nicks from the removal process time to heal.
Stem Cuttings (Head Cuttings)
If your Mammillaria has gotten a bit tall or leggy, you can take a cutting from the top.
- Make a clean cut: Using your sharp, sterile knife, cut off the top portion of the cactus. Aim for a section that looks healthy and plump.
- Let the cutting callous: Just like with offsets, the cut end of the Cuttings must dry out and form a hard callus. This can take anywhere from 5 days to two weeks. Keep it in a dry, airy location.
- Pot the cutting: Once calloused, you can insert the calloused end into a pot filled with your cactus mix. You don’t need to bury it too deeply – just enough for it to stand up. I like to use a bit of grit on top to help support it.
- Water cautiously: Similar to offsets, wait about a week or two before watering. Misting the surface occasionally can help encourage root formation without over-saturating.
The “Secret Sauce” (Pro Tips)
Here are a couple of things I’ve learned over the years that REALLY make a difference:
- Patience with water: I cannot stress this enough – do not overwater! Succulents, especially when trying to root, are far more susceptible to rot from too much moisture than from being a little dry. It’s better to wait too long to water than to water too soon.
- Gentle airflow is your friend: When your cuttings or offsets are callousing and rooting, a gentle breeze can be incredibly beneficial. It helps keep the area dry and discourages fungal issues. I sometimes place them near a slightly open window or in a room with good air circulation.
Aftercare & Troubleshooting
Once your new Mammillaria babies start to show signs of rooting – you might see new growth or they might feel a bit more secure in their pots – you can begin watering them a bit more regularly. Water deeply but allow the soil to dry out completely between waterings. Keep them in a bright spot, but out of intense, scorching direct sun for the first few weeks.
The most common problem you’ll encounter is rot. If you see your cutting or offset turning mushy, discolored (often brown or black), or smelling funky, it’s likely rot. Sadly, this is usually unrecoverable. Prevention is key: ensure excellent drainage, proper airflow, and don’t water too soon. If you catch it very early on a cutting, you might be able to cut off the rotted part and let the healthy section callous again, but it’s a long shot.
A Encouraging Closing
Propagating plants, especially something as charming as Mammillaria carnea, is such a rewarding journey. It takes a little patience, a watchful eye, and a healthy dose of optimism. Don’t get discouraged if your first attempt isn’t perfect. Every plant and every season is a learning experience. Just enjoy the process of nurturing something new to life – it’s truly one of the most satisfying things a gardener can do! Happy propagating!
Resource:
https://identify.plantnet.org/k-world-flora/species/Mammillaria%20carnea%20Zucc.%20ex%20Pfeiff./data