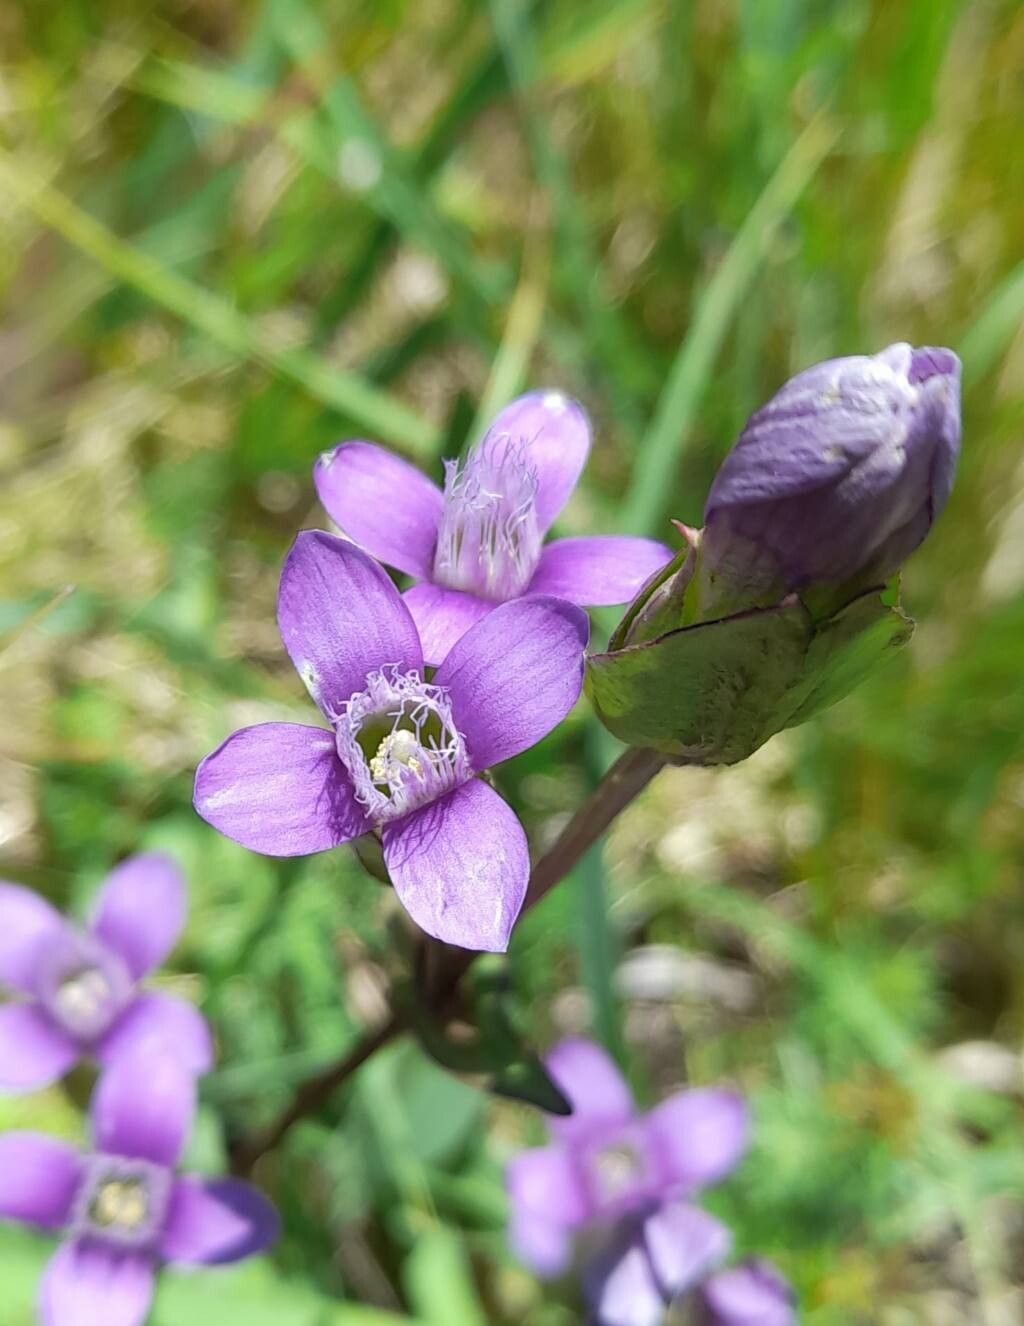
Oh, hello there! Pull up a chair. I’m so glad you’re interested in propagating Gentianella campestris, the Field Gentian. These little gems are just exquisite, aren’t they? Their intense blue, star-shaped flowers bring a touch of wild magic to any garden, and there’s something incredibly satisfying about coaxing new life from an existing plant. Now, if you’re a complete beginner staring at this lovely plant, I’ll be honest – Gentianella campestris can be a bit of a finesser. It’s not the easiest plant to propagate, but with a little patience and the right approach, you’ll absolutely be rewarded.
The Best Time to Start
For our little Field Gentians, spring is truly your golden ticket. As the plant starts waking up from its winter slumber and putting on new, vigorous growth, that’s when you’ll have the best chance. Aim for early spring, before it gets too warm and while its energy is focused on new shoots. You can also try a second window in late summer after flowering, taking cuttings from non-flowering stems, but spring usually yields the highest success rates.
Supplies You’ll Need
Here’s what you’ll want to have ready before you begin:
- Sharp, clean pruning shears or a sharp knife: A clean cut is crucial.
- Rooting hormone (optional, but recommended): For an extra boost. Look for one formulated for stem cuttings.
- Small pots or trays: For starting your cuttings. Ensure they have drainage holes.
- A light, well-draining seed starting mix or potting mix: A good mix is key. I often use a combination of peat moss or coco coir, perlite, and a little bit of grit.
- Dibber or pencil: To make holes for your cuttings.
- Plastic bag or propagation dome: To create a humid environment.
- Spray bottle: For misting.
- Labels: To keep track of your efforts!
Propagation Methods
The most reliable way to increase your stock of Gentianella campestris is through stem cuttings. Division is generally not recommended for this plant as it tends to be delicate and can be easily damaged.
Stem Cuttings:
- Select your parent plant: Choose a healthy, vigorous Gentianella campestris in early spring.
- Take your cuttings: Using your sharp pruning shears or knife, carefully snip off healthy, non-flowering stems. Aim for cuttings that are about 3-4 inches long. Make the cut just below a leaf node (where a leaf attaches to the stem).
- Prepare the cuttings: Gently remove the lower leaves from each cutting. You want to expose at least one or two leaf nodes that will eventually be buried in the soil.
- Apply rooting hormone (if using): Dip the cut end of each stem into your rooting hormone, tapping off any excess.
- Pot up your cuttings: Fill your small pots or trays with your prepared potting mix. Use your dibber or pencil to create small holes in the soil.
- Insert the cuttings: Carefully place each cutting into a hole, ensuring that at least one or two leaf nodes are submerged. Gently firm the soil around the base of the cutting to secure it.
- Water gently: Water the soil thoroughly but gently. You don’t want to disturb the cuttings.
- Create a humid environment: Cover the pots with a plastic bag or place them under a propagation dome. This will help keep the humidity high, which is vital for cuttings to form roots. Secure the bag around the pot with a rubber band.
- Provide light and warmth: Place the pots in a bright spot but out of direct sunlight. A little warmth from a heat mat can be beneficial, but it’s not strictly necessary if you have a warm windowsill.
The “Secret Sauce” (Pro Tips)
Now, for a couple of tricks I’ve learned over the years that can make a real difference:
- Keep those leaves dry! When you mist your cuttings or water the soil, try your best to avoid getting the leaves wet. Excess moisture on the leaves can lead to fungal issues, and we certainly don’t want that. A fine mist is your friend here.
- The power of bottom heat. If you have the space and the equipment, placing your pots on a gentle heat mat can significantly speed up root development. It mimics the soil temperature in spring and gives those little root tips a gentle nudge to get going.
- Don’t be afraid to trim a bit more. If a cutting looks a little leggy or has a lot of leaves, don’t hesitate to trim it back further. Fewer leaves mean less stress on the cutting as it tries to establish roots.
Aftercare & Troubleshooting
Once your cuttings look like they’re settling in, continue to keep the soil consistently moist but not waterlogged. You’ll know roots are forming when you see new growth appearing – a little leaf unfurling is a wonderful sign! You can also gently tug on a cutting; if there’s resistance, you’ve got roots!
The biggest issue you might encounter is rot. If you see stems turning mushy or black at the soil line, it’s usually a sign of too much moisture and not enough air circulation. In this case, you may need to discard the affected cuttings and review your watering and humidity levels. If a cutting just seems to be wilting and not developing roots after a few weeks, it might just be that it wasn’t successful, and that’s okay! Don’t be discouraged.
A Little Encouragement
Propagating plants is a journey, and Gentianella campestris can certainly teach you a thing or two. Be patient with yourself and with your little cuttings. Celebrate every tiny success, and don’t fret over the ones that don’t make it. The satisfaction of seeing those new plants thrive, knowing you helped them along, is truly one of the greatest joys of gardening. Happy propagating!
Resource:
https://identify.plantnet.org/k-world-flora/species/Gentianella%20campestris%20(L.)%20Börner/data