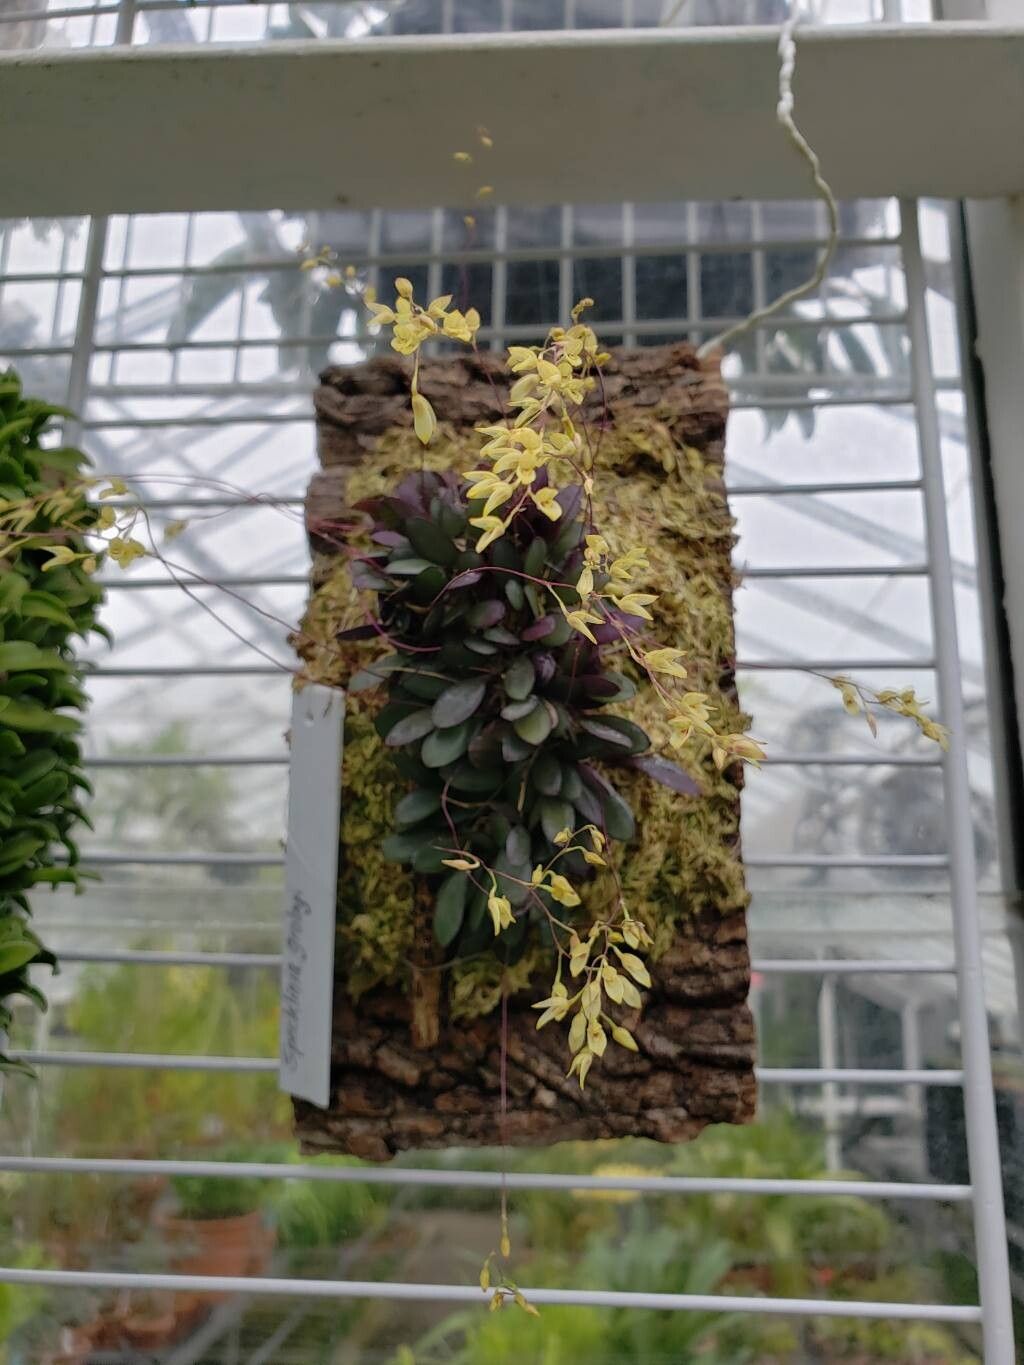
Oh, hello there! Come on in, grab a mug. I’ve been so eager to chat with you about Specklinia grobyi. This little orchid, sometimes called the Miniature Mexican Daisy Orchid, is just downright adorable. Its tiny, charming flowers are like little bursts of sunshine, and watching them bloom is such a joy. Propagating them is a wonderful way to share that joy, though I’ll be honest, it’s not the easiest plant for a complete beginner. But don’t let that deter you! With a little patience and these tips, you’ll be well on your way.
The Best Time to Start
When it comes to Specklinia grobyi, timing is everything. The absolute best time to think about propagation is during its active growth period. For most of these miniature orchids, that means late spring through early fall. You’ll see new growth emerging, maybe even those darling little flower spikes. This is when the plant has the energy to put into producing new roots. Trying to propagate when it’s resting is just asking for disappointment!
Supplies You’ll Need
Let’s get our toolkit ready. Don’t worry, it’s nothing too fancy. Here’s what I like to have on hand:
- Sharp, sterile pruning shears or a razor blade: Cleanliness is key to preventing disease.
- Orchid potting mix: A fine-grade, airy mix is crucial. I often use a blend of bark, perlite, and a touch of sphagnum moss.
- Small pots or propagation trays: Ones with good drainage holes are a must.
- Rooting hormone (optional but helpful): A powdered or liquid rooting hormone can give those new roots a little nudge.
- A spray bottle: For gentle watering.
- A small, sharp knife or scalpel: For clean divisions.
- Clear plastic bags or a propagation dome: To create a humid environment.
Propagation Methods
Specklinia grobyi is best propagated through division. While other methods exist for orchids, division is the most reliable and straightforward for this particular species.
Here’s how I do it:
- Gently remove the plant from its pot. I like to give it a good soak beforehand. This makes the roots more pliable and less likely to break.
- Inspect the root system. Look for natural breaks in the plant, where one pseudobulb or a cluster of leaves is clearly connected to the main plant by healthy roots. You want to see at least two to three pseudobulbs and a good portion of roots for each new division.
- Using your sterile knife or scalpel, carefully separate the divisions. Work slowly and deliberately. If you get stuck, don’t force it. Gently tease the roots apart if possible, or make a clean cut through the rhizome (the creeping stem) that connects them. Ensure each new piece has healthy roots.
- Trim away any dead or damaged roots.
- If using rooting hormone, dip the cut end of each division into the powder or liquid. Tap off any excess.
- Pot up each division in its new, small pot with your fresh, airy orchid mix. The top of the pseudobulbs should be just at the surface of the mix.
- Water lightly. You don’t want to drown them.
- Place each potted division inside a clear plastic bag or under a propagation dome. This creates that essential humid microclimate. Seal it loosely so there’s still some air circulation.
The “Secret Sauce” (Pro Tips)
Now, for a couple of little tricks I’ve picked up over the years that can really make a difference:
- Don’t submerge the crown: When you water, try your best not to let water sit in the crown (where the leaves emerge from the pseudobulb). This is a surefire way to invite rot, especially on new divisions that are still a bit stressed. A gentle misting or watering at the base is usually best.
- Consider bottom heat: If you can, placing your propagation tray or pots on a gentle seedling heat mat can work wonders. Warm roots encourage faster establishment. Just make sure it’s not too hot – we’re aiming for cozy, not cooked!
- Patience with that first bloom: It might take a while for your new divisions to re-establish and produce their first bloom. Don’t get discouraged! Focus on healthy leaf growth first. The blooms will follow when the plant is ready.
Aftercare & Troubleshooting
Once your Specklinia grobyi divisions have settled in and you see signs of new roots emerging (often visible through the clear pot or at the surface of the mix), it’s time to start transitioning them out of the high humidity. Gradually open the bags or dome a little more each day over a week or two.
Water them when the potting mix feels slightly dry to the touch. They’ll still appreciate consistent moisture, but not soggy feet. Continue to provide good light and avoid direct, harsh sun.
The most common problem you’ll encounter is rot. If you notice mushy, black leaves or pseudobulbs, it’s a sign of too much moisture and not enough air circulation. If this happens, you may need to unpot, trim away all the rotted parts with sterile tools, and repot into fresh, dry mix. Sometimes, you can save them, but often rot is unforgiving. Another sign of trouble is a lack of new growth after a few weeks. This could mean the roots aren’t establishing, or the conditions aren’t quite right.
A Encouraging Closing
Propagating these miniature orchids is a beautiful journey. It takes a bit of observation and a lot of gentle care, but the reward of nurturing a new plant from an existing one is truly special. Be patient with yourself and your new plant. Enjoy the process, learn from any hiccups, and before you know it, you’ll have a whole little collection of these sunny beauties. Happy growing!
Resource: