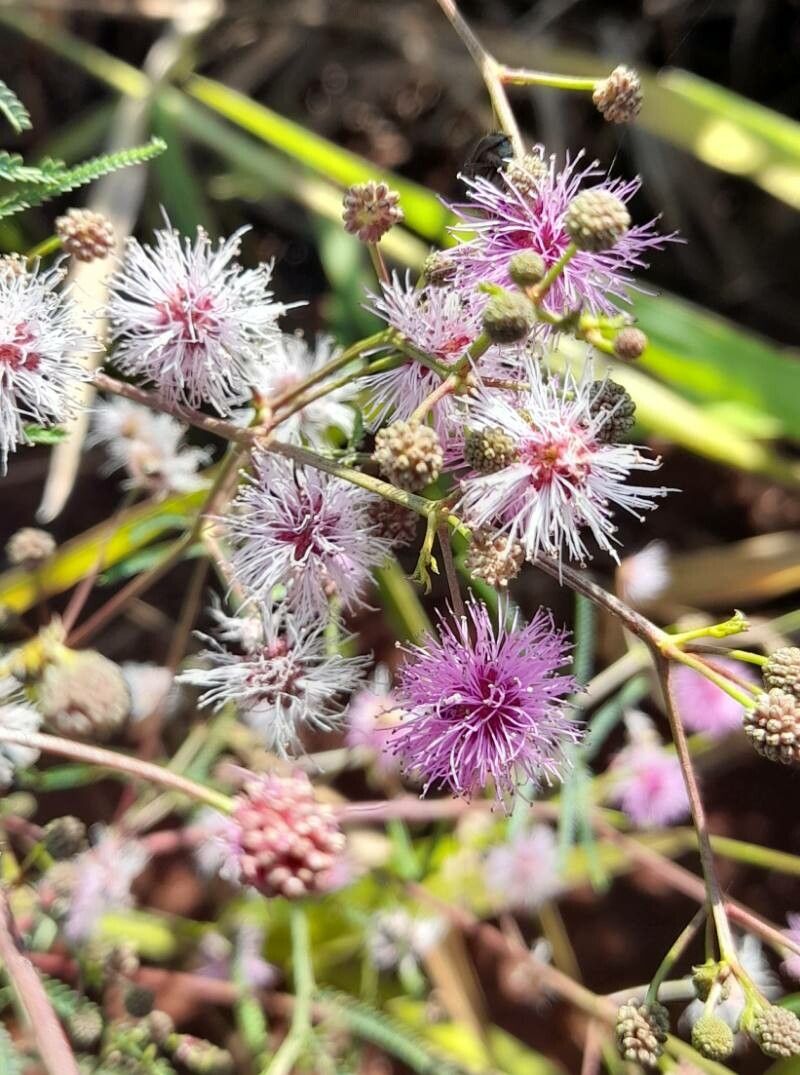
Hey there, fellow plant lovers! I’m so excited to chat with you today about one of my absolute favorites: Mimosa bifurca. If you’re not familiar, imagine a plant that holds a little bit of jungle magic right in your home. Its delicate, fern-like foliage is just gorgeous, and honestly, watching those feathery leaves unfurl is such a delight.
There’s a special kind of joy in coaxing a new life from an existing plant. It feels like unlocking a little secret of nature, doesn’t it? And Mimosa bifurca, while it might have a fancy name, is surprisingly welcoming when it comes to sharing its beauty. For beginners, I’d say it’s a moderately easy plant to propagate, meaning with a little patience and following these steps, you’ll likely see success!
The Best Time to Start
Honestly, the sweet spot for propagating Mimosa bifurca is when the plant is actively growing. Think late spring through summer. This is when its energy is flowing, and those new shoots are developing nicely. You’ll have the best chance of getting healthy cuttings that root quickly.
Supplies You’ll Need
Gathering your tools beforehand makes the whole process much smoother. Here’s what I find essential:
- Sharp, clean pruning shears or a sharp knife: For making clean cuts. Sterilize them with rubbing alcohol!
- Potting mix: A well-draining mix is key. I love a blend of peat moss, perlite, and a little bit of compost. You can also buy specialized seed-starting or propagation mixes.
- Small pots or seed trays: Clean ones, of course.
- Rooting hormone (optional but recommended): This really gives your cuttings a boost. Look for one with auxin.
- Clear plastic bag or dome: To create a humid environment.
- Water: For watering and, if you choose, water propagation.
- Labels and a marker: To keep track of what you’ve planted and when!
Propagation Methods
We’ve got a couple of great ways to get more Mimosa bifurca.
Stem Cuttings
This is my go-to method for this beauty.
- Take your cutting: In the growing season, look for a healthy, non-flowering stem. You want a piece that’s about 4-6 inches long. Using your sterilized shears, make a clean cut just below a leaf node – that’s the spot where a leaf attaches to the stem.
- Prepare the cutting: Gently remove the leaves from the bottom half of the cutting. You want to expose the nodes, as this is where roots will emerge. Leave just a couple of leaves at the top to help the cutting photosynthesize.
- Apply rooting hormone (if using): Dip the cut end into the rooting hormone powder, tapping off any excess.
- Plant the cutting: Fill your small pots with your well-draining potting mix. Make a small hole with your finger or a pencil and gently insert the cutting, ensuring the leafless nodes are covered by soil. Firm the soil gently around the stem to ensure good contact.
- Water and cover: Water the soil lightly until it’s evenly moist, but not soggy. Then, cover the pot with a clear plastic bag or a propagation dome to maintain high humidity. You can use stakes to keep the bag from touching the leaves.
Water Propagation
This method is lovely to watch unfold!
- Take and prepare your cutting: Follow steps 1 and 2 above for taking and preparing your stem cutting.
- Place in water: Find a clean jar or glass and fill it with fresh water. Place your cutting in the water, making sure no leaves are submerged. The nodes that were lower down should be in the water.
- Find a good spot: Place the jar in a bright spot with indirect light.
- Change the water regularly: Every few days, change out the water to keep it fresh and prevent rot. You’ll start to see tiny roots emerge from the nodes in a few weeks. Once the roots are about an inch long, you can transplant them into soil using the method above.
The “Secret Sauce” (Pro Tips)
Here are a few tricks I’ve picked up over the years that really make a difference:
- Bottom Heat is Your Friend: If you can, use a heating mat placed under your pots for stem cuttings. This gentle warmth encourages root development much faster than ambient room temperature alone. It’s like giving your little ones a cozy warm bed to grow in!
- Don’t Drown Your Cuttings: For stem cuttings, it’s crucial to make sure the soil is moist, not waterlogged. Soggy soil is the fastest way to invite rot, and we absolutely don’t want that for our precious baby Mimosa bifurcas. A good poke with your finger should tell you if the soil is still damp.
- Patience with the Unfurling: With Mimosa bifurca, you might not see immediate signs of growth. New leaf development is your best indicator of successful rooting, rather than just looking for roots in the soil (which can be hard to see!). Wait for those tiny, fuzzy leaves to begin appearing.
Aftercare & Troubleshooting
Once your cuttings have developed a good system of roots (you might see them peeking out the drainage holes, or new growth is clearly evident), it’s time to carefully transition them.
- Acclimatize: If you used a plastic bag, gradually reduce the humidity by opening the bag a little more each day over a week. This helps them get used to drier air.
- Watering: Water thoroughly when the top inch of soil feels dry. They’re still delicate, so avoid overwatering.
- Light: Continue to provide bright, indirect light. Avoid harsh, direct sun which can scorch their young leaves.
- Troubleshooting: The most common issue is rot. If your cutting turns mushy or black, it’s likely rotted. This usually happens from too much moisture and not enough airflow. If you see signs of rot in water propagation, start over with a fresh cutting and clean water. For stem cuttings, check the soil moisture. Sometimes, a cutting just fails to root – don’t be discouraged! It happens to all of us.
A Little Encouragement
Propagating plants is a journey, my friends, and it’s one filled with learning and discovery. Be patient with your little Mimosa bifurca cuttings. They’ll show you when they’re ready. Enjoy the process, celebrate every tiny new leaf, and soon you’ll have more of this wonderful plant to share and enjoy. Happy growing!
Resource:
https://identify.plantnet.org/k-world-flora/species/Mimosa%20bifurca%20Benth./data