Hello there, fellow garden enthusiasts! I’m so excited to chat with you about a plant that has truly captured my heart over the years: Fumaria rupestris.
Unveiling the Charm of Fumaria rupestris
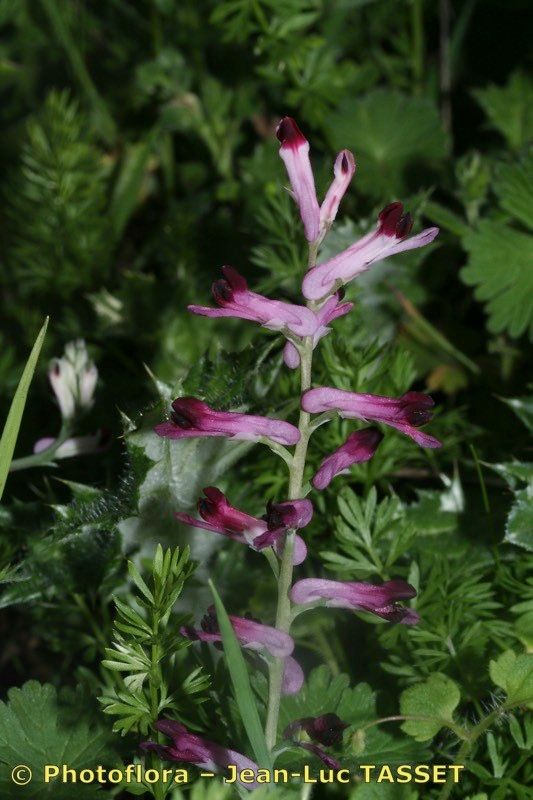
If you’re looking for a plant that brings a delicate, airy beauty to your garden, Fumaria rupestris might be just the ticket. Its wispy, often blue-grey foliage and dainty flowers create a wonderful contrast in borders and containers. It reminds me of a wild, untamed spirit gracing our manicured spaces. Propagating this gem is incredibly rewarding. You get to multiply that unique charm, and honestly, there’s a special satisfaction in nurturing a brand-new life from a tiny piece of your existing plant. For beginners, it’s a pretty manageable plant to work with. Don’t be intimidated; with a little guidance, you’ll be well on your way!
When to Get Your Hands Dirty
The absolute best time to start propagating Fumaria rupestris is in the late spring or early summer. This is when the plant is actively growing and has plenty of energy to put into developing new roots. You want to look for stems that are semi-hardened – not brand new, floppy growth, but also not woody, mature stems. Think of it like a happy medium!
Your Propagation Toolkit
Here’s what you’ll want to gather before you begin:
- Sharp Pruning Shears or a Clean Knife: For making clean cuts.
- Rooting Hormone (Optional but Recommended): A powder or gel that encourages root development.
- Well-Draining Potting Mix: A blend of peat moss, perlite, and a little sand works wonders. You can also find specific “seed starting” or “cutting” mixes.
- Small Pots or Trays: Clean ones are key to preventing disease.
- Watering Can or Spray Bottle: For gentle watering.
- Plastic Bags or a Clear Dome: To create a humid environment.
- Labels: To keep track of what you’ve planted!
Cultivating New Life: Propagation Methods
Let’s dive into the ways we can multiply our Fumaria rupestris.
1. Stem Cuttings: My Go-To Method
This is how I usually have the best luck with Fumaria rupestris.
- Select Your Cuttings: Find healthy, non-flowering stems that are about 4-6 inches long. Gently remove any lower leaves, leaving just a few at the top.
- Prepare the Cutting: Make a clean cut just below a leaf node (where a leaf attaches to the stem). This is where roots are most likely to form. If you’re using rooting hormone, dip the cut end into it now, tapping off any excess.
- Plant Them Up: Fill your small pots with your prepared potting mix. Make a small hole with your finger or a pencil, and carefully insert the cutting. Gently firm the soil around the base.
- Create Humidity: Water the soil thoroughly but gently. Then, cover the pots with a plastic bag or a clear dome, ensuring the leaves don’t touch the plastic. This is crucial for keeping the cuttings from drying out.
- Find a Cozy Spot: Place the pots in a bright location but out of direct sunlight. A little warmth from the bottom can be beneficial, but it’s not strictly necessary if your house is warm enough.
2. Water Propagation: A Peek-a-Boo Approach
This method is fun because you can watch the roots develop!
- Prepare Your Cuttings: Follow the same steps as for stem cuttings regarding stem selection and making the cut.
- Place in Water: Put the cuttings in a jar or glass of clean water. Make sure no leaves are submerged below the waterline. This prevents them from rotting.
- Change the Water: Every few days, change the water to keep it fresh and oxygenated.
- Wait and Watch: Place the jar in a bright spot, again, out of direct sun. You should start to see tiny white roots emerging from the nodes within a few weeks.
The “Secret Sauce”: Insider Tips from My Garden
Here are a couple of things I’ve learned over the years that really seem to help.
- The Sweet Spot for Cuttings: Don’t take your cuttings when the plant is stressed, say, during a heatwave or a dry spell. Wait until it’s happy and hydrated. A well-watered parent plant provides the best energy for those new roots.
- Don’t Overdo the Hormone: If you’re using rooting hormone, just a light dusting is usually sufficient. Too much can actually inhibit root growth. Think of it as a gentle nudge, not a forceful shove.
Nurturing Your Tiny Sprouts
Once you see roots forming (usually a couple of inches long for stem cuttings, or clearly visible in water), it’s time to give them a bit more permanent home.
- For Water Cuttings: Carefully plant the rooted cuttings into your well-draining potting mix, just as you would with stem cuttings. Water them gently.
- For Stem Cuttings: You’ll know they’re ready when you feel a gentle resistance when you tug lightly on a cutting, or when you see new leaf growth. Gradually acclimatize them by removing the plastic cover for increasing periods over a few days.
Troubleshooting: The most common issue you might encounter is rot. This usually happens if the soil stays too wet or if leaves are sitting in water (in the water propagation method) or touching overly damp soil. If you see a cutting going black and mushy, unfortunately, it’s best to discard it and try again with a fresh one, paying close attention to soil moisture and air circulation.
Happy Propagating!
Growing new plants is such a joy, a wonderful way to connect with nature and share the beauty of your garden. Be patient with your Fumaria rupestris cuttings; sometimes, they take their time. Enjoy the process, learn from each attempt, and before you know it, you’ll have a whole new collection of this charming plant to brighten your world. Happy gardening!
Resource:
https://identify.plantnet.org/k-world-flora/species/Fumaria%20rupestris%20Boiss.%20&%20Reut./data