Hello, fellow plant enthusiasts! Today, we’re diving into the wonderful world of propagating Isoetes durieui. This fascinating little plant, with its quill-like, grass-like foliage, brings a unique texture and lushness to any aquatic or semi-aquatic garden. It’s often called the “quillwort,” and honestly, when you see it thriving, you’ll understand why. The process of coaxing new life from an established plant is incredibly rewarding, and while Isoetes durieui might seem a bit specialized, propagating it is more accessible than you might think. Don’t be intimidated; with a little gentle guidance, you’ll be well on your way.
The Best Time to Start
For Isoetes durieui, the sweet spot for propagation is generally during its active growing season. This typically falls in the spring and early summer, after your plant has had time to recover from dormancy and is putting on new growth. You’ll know it’s a good time when you see fresh, vibrant leaves emerging from the crown. Avoid propagating when the plant is stressed, perhaps from extreme heat or cold, or at the end of its growth cycle.
Supplies You’ll Need
Gathering your supplies beforehand makes the whole process much smoother. Here’s what you’ll want to have on hand:
- Sharp, sterilised pruning shears or a sharp knife: For clean cuts.
- A well-draining propagation substrate: For Isoetes durieui, a mix of horticultural sand, perlite, and a little coco coir works wonderfully. You want good aeration and to prevent waterlogging.
- Small pots or trays: Clean containers to house your new propagules.
- Optional: Rooting hormone powder: While not always strictly necessary for Isoetes durieui, it can provide an extra boost.
- Water source: Clean, dechlorinated water is essential.
- A small trowel or spoon: For gently handling the substrate.
- Mist sprayer: For maintaining humidity.
Propagation Methods
Isoetes durieui is most commonly propagated through division and, with a little care, from basal offsets.
Division
This is often the most straightforward method for Isoetes durieui.
- Gently remove your established plant from its pot or substrate. If it’s planted in the ground, carefully dig around it.
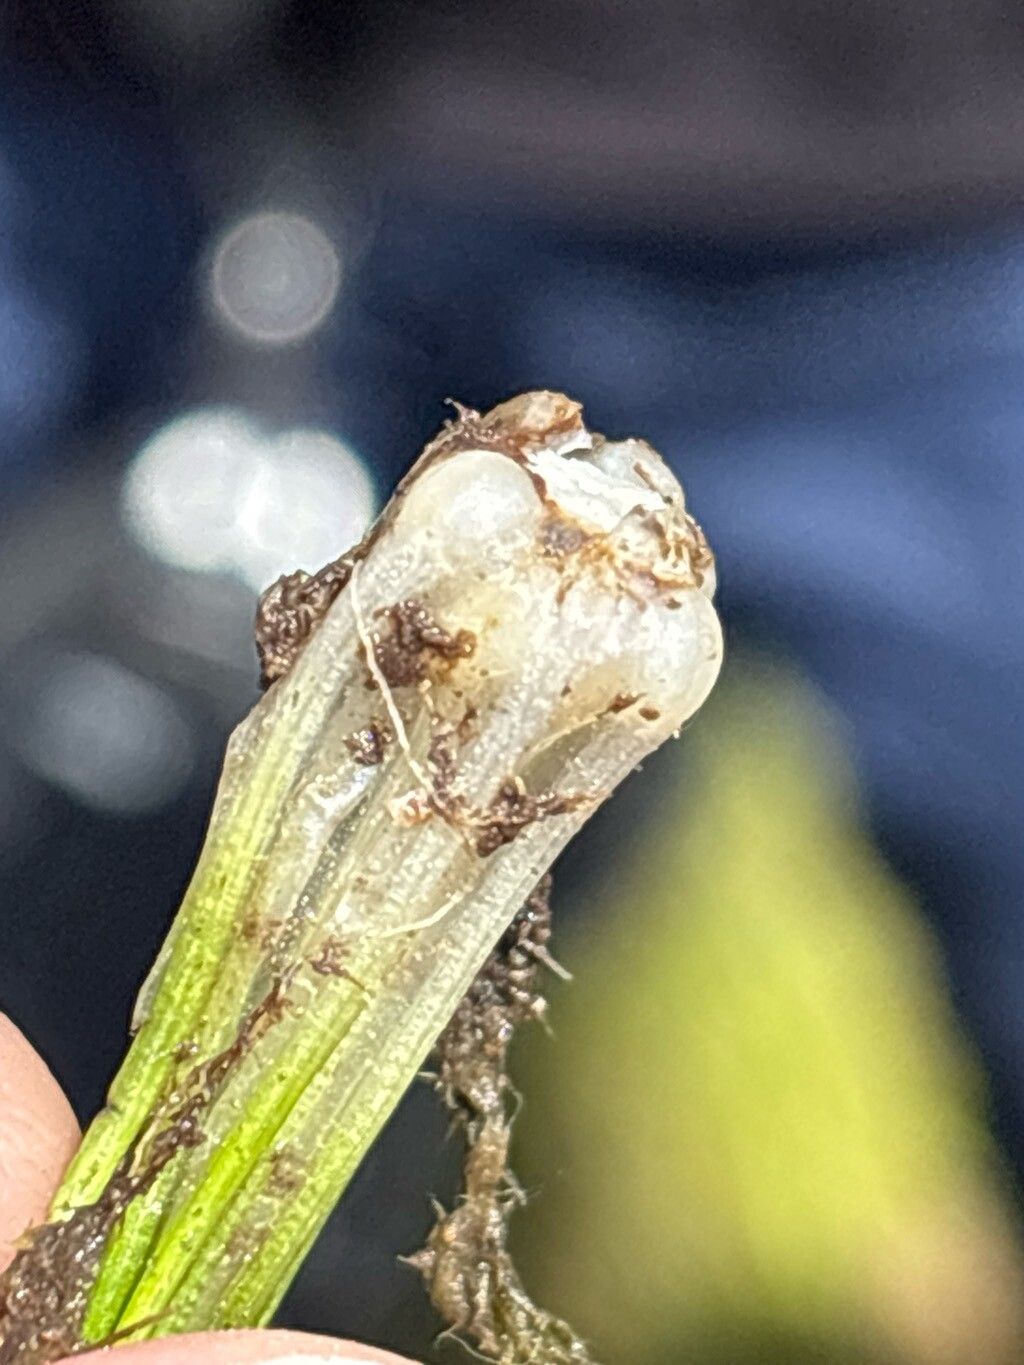
- Inspect the root ball. You’ll often find that the plant naturally forms clumps or offsets connected at the base.
- Carefully tease apart these clumps. You want to ensure each division has a healthy portion of roots and at least a few healthy leaf bases. If it’s a bit stubborn, a clean, sharp knife can be used to make a gentle cut through any connecting roots, but try to avoid this if possible.
- Pot up each division into its own small pot filled with your prepared propagation substrate.
- Water thoroughly to settle the substrate around the roots.
Basal Offsets
Sometimes, Isoetes durieui will produce small, new plantlets directly from its base.
- Look for small, green shoots emerging near the main plant’s crown. These are your potential new plants.
- Using a sterilised blade or sharp tool, carefully cut the offset away from the mother plant. Aim to get as much of its own small root system as possible.
- Plant the offset directly into a small pot of your well-draining substrate.
- Water gently.
The “Secret Sauce” (Pro Tips)
Here are a couple of things I’ve learned over the years that make a difference:
- Don’t let the leaves touch the water. If you’re growing this in an aquatic setup, and happen to have a cutting that detaches, try to keep the foliage above the waterline. Submerged leaves are more prone to rot before roots have a chance to form.
- Bottom heat can be a game-changer, especially for offsets. Placing your pots on a gentle seedling heat mat can encourage faster root development. Think of it as giving your new little plants a cozy, warm start.
Aftercare & Troubleshooting
Once your divisions or offsets are potted, the real waiting game begins, but it’s important to give them the right environment.
- Keep them in bright, indirect light. Avoid harsh, direct sunlight, which can scorch young foliage.
- Maintain consistent moisture. The substrate should be kept evenly moist but never waterlogged. This is crucial for Isoetes durieui. If you’re a bit heavy-handed with the watering, you might see signs of rot, which will look like mushy, discolored leaf bases. If this happens, try to remove the affected parts immediately and let the substrate dry out a bit more between waterings.
- Patience is key. Roots can take several weeks to establish. You’ll know they’re starting to take hold when you see new leaf growth appearing from the center of the plant.
So there you have it! Propagating Isoetes durieui is a beautiful way to multiply your enjoyment of this unique plant. Be patient, keep an eye on moisture levels, and enjoy the process of watching new life emerge. Happy gardening!
Resource:
https://identify.plantnet.org/k-world-flora/species/Isoetes%20durieui%20Bory/data