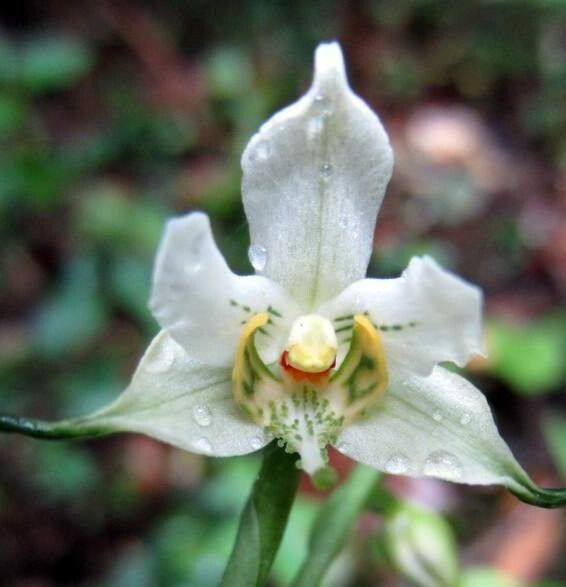
Oh, happy gardeners! If you’ve ever swooned over the delicate, orchid-like allure of Gavilea araucana, I’m right there with you. Their graceful blooms bring such a unique charm to any corner. And the best part? You can coax more of these beauties into existence! Propagating them might seem a little daunting at first, but trust me, it’s a journey filled with satisfaction, and a wonderfully rewarding one at that. While Gavilea isn’t the absolute easiest plant for a complete beginner to multiply, with a little care and attention, you’ll be well on your way to success.
When to Get Your Hands Dirty
The sweet spot for propagating Gavilea araucana is usually late spring or early summer. This is when the plant is actively growing after its initial bloom and has good, healthy energy to put into new roots. You want to be looking for new, non-flowering shoots, often called vegetative growth. Avoid trying to take cuttings when the plant is stressed or in the middle of a major flowering flush; it’s just not in the right headspace for pushing out new life.
Your Propagation Toolkit
Here’s what you’ll want to gather before you begin. It’s not a huge list, but having everything ready will make the process smoother:
- Sterile Pruning Shears or a Sharp Knife: Clean tools are crucial to prevent disease.
- Rooting Hormone (Powder or Gel): This is a helpful booster, though not always strictly necessary.
- A Well-Draining Potting Mix: I love a mix of perlite, orchid bark, and a bit of peat moss. You want good aeration!
- Small Pots or Trays: Clean pots are a must.
- A Spray Bottle: For maintaining humidity.
- Plastic Bags or a Propagator Lid: To create a mini-greenhouse effect.
- Labeling Stakes: You’ll thank me later for knowing what you planted!
Nurturing New Life: Propagation Methods
For Gavilea araucana, the most reliable method is taking stem cuttings. Think of it as borrowing a strong, healthy piece to grow a whole new plant.
- Select Your Cuttings: With your clean shears, take a cutting from a healthy, non-flowering shoot, about 3-4 inches long. Make the cut just below a leaf node (where a leaf attaches to the stem). It’s a good idea to take a few cuttings, as not every one will take.
- Prepare the Cutting: Gently remove the lower leaves from the cutting, leaving just a couple of leaves at the top. This prevents rot in the moist environment you’re about to create.
- Apply Rooting Hormone (Optional but Recommended): Dip the cut end of the stem into your rooting hormone, tapping off any excess.
- Plant Your Cuttings: Make a small hole in your prepared, moist potting mix. Insert the cut end of the stem cutting into the hole, ensuring it’s snug. Gently firm the soil around it.
- Create a Humid Environment: Water the pot lightly. Then, cover the pot loosely with a clear plastic bag or place it inside a propagator with a lid. Make sure the bag or lid doesn’t touch the leaves if possible.
- Placement is Key: Put your pots in a bright spot that receives indirect sunlight. Avoid direct sun, which can scorch the delicate cuttings.
The “Secret Sauce”: My Insider Tips
After years of whispering encouragements to my plants, I’ve picked up a few tricks. Here are a couple that have made a real difference for me:
- Bottom Heat is Your Friend: If you can, place your pots on a gentle heating mat designed for seedlings. This little bit of warmth from below will really encourage root development. It’s like tucking them into a warm bed!
- Humidity, But Not Soggy: While humidity is vital, you don’t want the soil to be waterlogged. The goal is evenly moist soil, not standing water. Bury the cut end of the stem, not the leaves, in the soil. If condensation builds up too much on your plastic bag, open it for a short while each day to allow for some air circulation and to prevent fungal issues.
Aftercare and What to Watch For
Once your cuttings are happily nestled in their pots, continue to keep the soil lightly moist and the environment humid. You’ll want to check them regularly.
The first sign of success is usually new leaf growth appearing at the top of the cutting. This can take anywhere from 4 to 8 weeks, sometimes longer, so patience is key. You can also gently tug on a cutting; if you feel a bit of resistance, roots have likely begun to form.
The most common sign of failure is rot. If your cutting turns mushy, black, or falls over, it’s likely succumbed to rot. This usually happens from overwatering combined with poor air circulation. If you see this, remove the affected cutting immediately to prevent it from spreading. Yellowing leaves can also be a sign of stress or too much direct sun.
Grow On, My Friends!
Propagating Gavilea araucana is a beautiful way to expand your collection and share the joy of these lovely plants. Don’t be discouraged if your first few attempts aren’t perfect. Every gardener has their share of learning curves! Just keep observing, keep caring, and enjoy the quiet magic of watching new life emerge from a simple stem. Happy gardening!
Resource:
https://identify.plantnet.org/k-world-flora/species/Gavilea%20araucana%20(Phil.)%20M.N.Correa/data