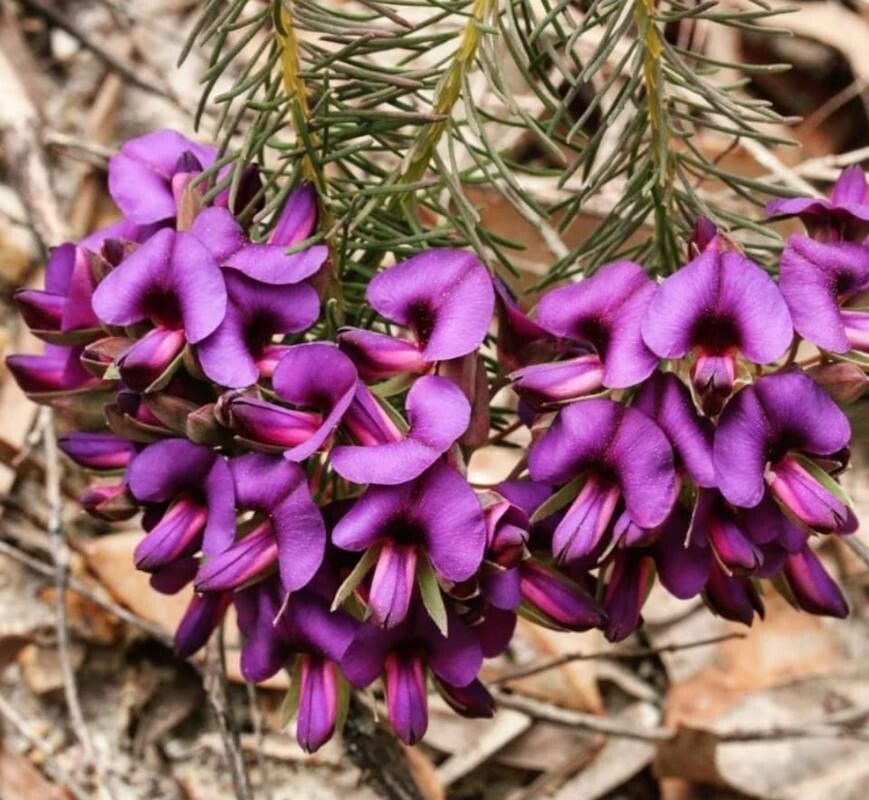
Hello, fellow garden enthusiasts! Today, we’re diving into the world of a truly special Australian native: Gompholobium confertum. If you’ve ever admired its delicate, pea-like purple flowers cascading over its fine foliage, you know just how enchanting this plant can be. Growing your own from scratch is incredibly satisfying, and while it might have a little bit of a learning curve, I promise it’s totally achievable with a little patience and know-how. Let’s get propagating!
The Best Time to Start
The sweet spot for propagating Gompholobium confertum is typically from late spring to early summer. This is when the plant is actively growing and has plenty of energy to put into root development. You’ll want to select new, non-flowering shoots that are still somewhat soft and flexible, often referred to as “semi-ripe cuttings.” Avoid anything that’s woody and stiff or has already flowered.
Supplies You’ll Need
Gathering your supplies beforehand makes the whole process smoother! Here’s what I usually have on hand:
- Sharp pruning shears or a clean, sharp knife: For making clean cuts.
- Small pots or trays: With good drainage holes!
- A well-draining potting mix: I like a blend of equal parts perlite, coco coir, and a bit of fine grit or coarse sand. You can also find specialized native plant mixes.
- Rooting hormone (optional but recommended): A powder or gel can significantly boost your success rate.
- A clear plastic bag or propagation dome: To create a humid environment.
- Watering can with a fine rose: For gentle watering.
- Labels: So you don’t forget what you planted!
Propagation Methods: Stem Cuttings
This is my go-to method for Gompholobium confertum because it’s generally the most successful.
- Take the Cuttings: First, find those young, leafy shoots I mentioned. Using your clean shears or knife, make a cut just below a leaf node (where a leaf attaches to the stem). You want cuttings that are about 4-6 inches long. Remove the lower leaves, leaving just a few at the top. This prevents them from rotting in the soil.
- Prepare the Cuttings: Dip the cut end of each stem into your rooting hormone if you’re using it. Tap off any excess.
- Pot Them Up: Fill your small pots or trays with your prepared potting mix. Make a small hole in the center of the mix using a pencil or your finger.
- Insert the Cuttings: Gently place the prepared cutting into the hole, ensuring the leaf nodes that were below the surface are buried. Firm the soil gently around the base of the cutting to ensure good contact.
- Water Gently: Water the pots thoroughly but gently using your fine-rose watering can. You want the soil to be moist but not waterlogged.
The “Secret Sauce” (Pro Tips)
Here are a couple of things I’ve learned over the years that really make a difference:
- Mimic the Aussie Bush: Gompholobium confertum loves a free-draining mix. Don’t be tempted to use heavy, moisture-retentive potting soil. Think sandy, gritty, and airy! This is crucial for preventing rot.
- Humidity is Key: Once your cuttings are potted, cover them with a clear plastic bag or propagation dome. This traps moisture and humidity, creating the perfect microclimate for roots to form. Make sure the leaves don’t touch the sides of the bag – gently prop it up if needed.
- A Little Warmth Helps: If you have a heat mat designed for plants, placing your potted cuttings on it can speed up root development considerably. It mimics the warmth of the soil in warmer climates.
Aftercare & Troubleshooting
Once your cuttings are planted and covered, place them in a bright spot that receives indirect light. Direct sun will scorch them! Keep the soil consistently moist but not soggy.
You’ll know your cuttings have taken root when you see new growth appearing at the top, or when you gently tug on a cutting and feel resistance. This can take anywhere from 4-8 weeks, sometimes longer.
The most common problem you’ll encounter is rot. If you see your cuttings turning black and mushy at the base, it’s usually a sign of too much moisture and not enough air circulation. Don’t be discouraged; it happens to the best of us. You might need to start again with cuttings that are a bit drier and ensure your mix is extra well-draining.
A Bit of Patience, A Lot of Reward
Propagating Gompholobium confertum is a wonderful way to expand your garden and share the beauty of this stunning native. It requires a touch of care and a whole lot of patience, but witnessing those tiny roots emerge and eventually grow into a new plant is one of gardening’s greatest joys. Keep at it, enjoy the process of nurturing, and soon you’ll have more of these gorgeous purple blooms to admire! Happy growing!
Resource:
https://identify.plantnet.org/k-world-flora/species/Gompholobium%20confertum%20(DC.)%20Crisp/data