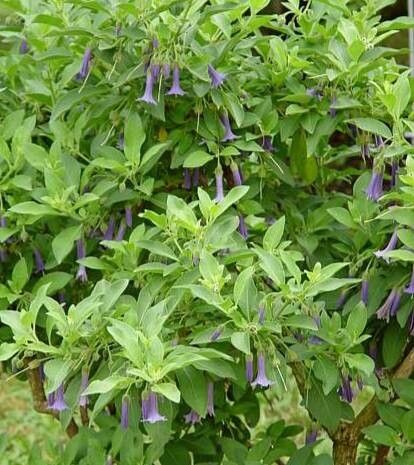
Oh, hello there! Come on in, grab a mug. Let’s chat about one of my absolute favorite plants: Iochroma warscewiczii. If you’ve ever seen one of these beauties in bloom – those stunning, tubular, often vibrant blue or purple flowers – you know exactly why it’s so captivating. It brings a touch of the exotic to any garden, and trust me, coaxing new life from your existing plants is incredibly rewarding. For those of you just starting out, I’d say Iochroma is moderately easy to propagate. It’s not as fuss-free as, say, a pothos, but with a little attention, you’ll be celebrating success in no time.
The Best Time to Start
When it comes to making new Iochroma babies, timing is everything. I find the late spring or early summer is your sweet spot. This is when the plant is actively growing, pushing out new, healthy shoots. You want to be taking cuttings from stems that are actively growing but aren’t yet woody. Think of them as being soft and flexible, not hard and brittle.
Supplies You’ll Need
Gathering your tools beforehand makes the whole process much smoother. Here’s what I usually have on hand:
- Sharp pruning shears or a clean, sharp knife: Essential for clean cuts.
- Rooting hormone: I prefer a powder form for easy application.
- Well-draining potting mix: A blend of perlite, peat moss, and a good quality potting soil works wonders. You can also buy specific “seed and cutting” mixes.
- Small pots or trays: About 4-6 inch pots are perfect for cuttings.
- Plastic bags or a propagation dome: To create a humid environment.
- Spray bottle: For misting.
- Labels and a marker: Because it’s easy to forget what you planted where!
Propagation Methods
Iochroma warscewiczii is a real star when it comes to taking stem cuttings. This is my go-to method, and it’s quite reliable.
- Select Your Cuttings: Look for healthy, non-flowering stems that are about 4-6 inches long. Make a clean cut just below a leaf node (where the leaf attaches to the stem). This is where the magic happens for root formation.
- Prepare the Cuttings: Gently remove the leaves from the bottom half of your cutting. You want to expose those leaf nodes, as they’re prime spots for roots to emerge. If the remaining leaves are very large, I sometimes snip them in half to reduce water loss.
- Apply Rooting Hormone: Dip the cut end of your stem into the rooting hormone, flicking off any excess. This stuff really gives those developing roots a helpful nudge.
- Plant Your Cuttings: Fill your small pots with the well-draining potting mix and moisten it. Make a small hole in the center with your finger or a pencil and gently insert the prepared cutting. Firm the soil gently around the base to ensure good contact.
- Create Humidity: Water everything lightly. Now, cover your pots with a plastic bag or a propagation dome. This traps moisture and creates the humid microclimate your cuttings need to prevent drying out before they can establish roots. Pop the pots in a bright spot, but out of direct sunlight.
The “Secret Sauce” (Pro Tips)
Now, let’s get a little more intimate with what makes propagation truly sing.
- Bottom Heat is Your Best Friend: If you have it, placing your pots on a heated propagation mat can significantly speed up root development. It mimics the warm soil that plants love in their growing season.
- Don’t Drown Your Dreams: While humidity is crucial, avoid waterlogged soil. Soggy conditions are a direct invitation for rot, and we really don’t want that. Make sure your pots have drainage holes, and only water when the top bit of the soil starts to feel dry. A gentle misting of the leaves can also be beneficial.
- Patience, Young Gardener: This is perhaps the most important tip. Some plants root in a couple of weeks, others take a month or more. Resist the urge to constantly pull them up to check for roots! You’ll stress the cutting and potentially damage any nascent roots. Trust the process.
Aftercare & Troubleshooting
Once you start to see new leaf growth, that’s a sure sign that roots are forming! At this stage, you can slowly acclimate your new plants to less humid conditions by gradually lifting the plastic bag or opening the dome vent for longer periods each day. Continue to keep them in bright, indirect light and water when the top inch of soil feels dry.
If you notice your cutting wilting and turning yellow, or if there’s a slimy, black stem base, it’s likely rot. This usually means the conditions were too wet or too cold. Sometimes, you can salvage a cutting if rot has just begun by trimming away the affected parts and replanting in fresh, drier mix, but often, it’s a sign to start again.
And there you have it! Propagating Iochroma warscewiczii is a wonderful way to share the beauty of this plant with friends or simply expand your own collection. Be patient with yourself and enjoy the journey of nurturing these tiny beginnings into blooming wonders. Happy gardening!
Resource:
https://identify.plantnet.org/k-world-flora/species/Iochroma%20warscewiczii%20Regel/data