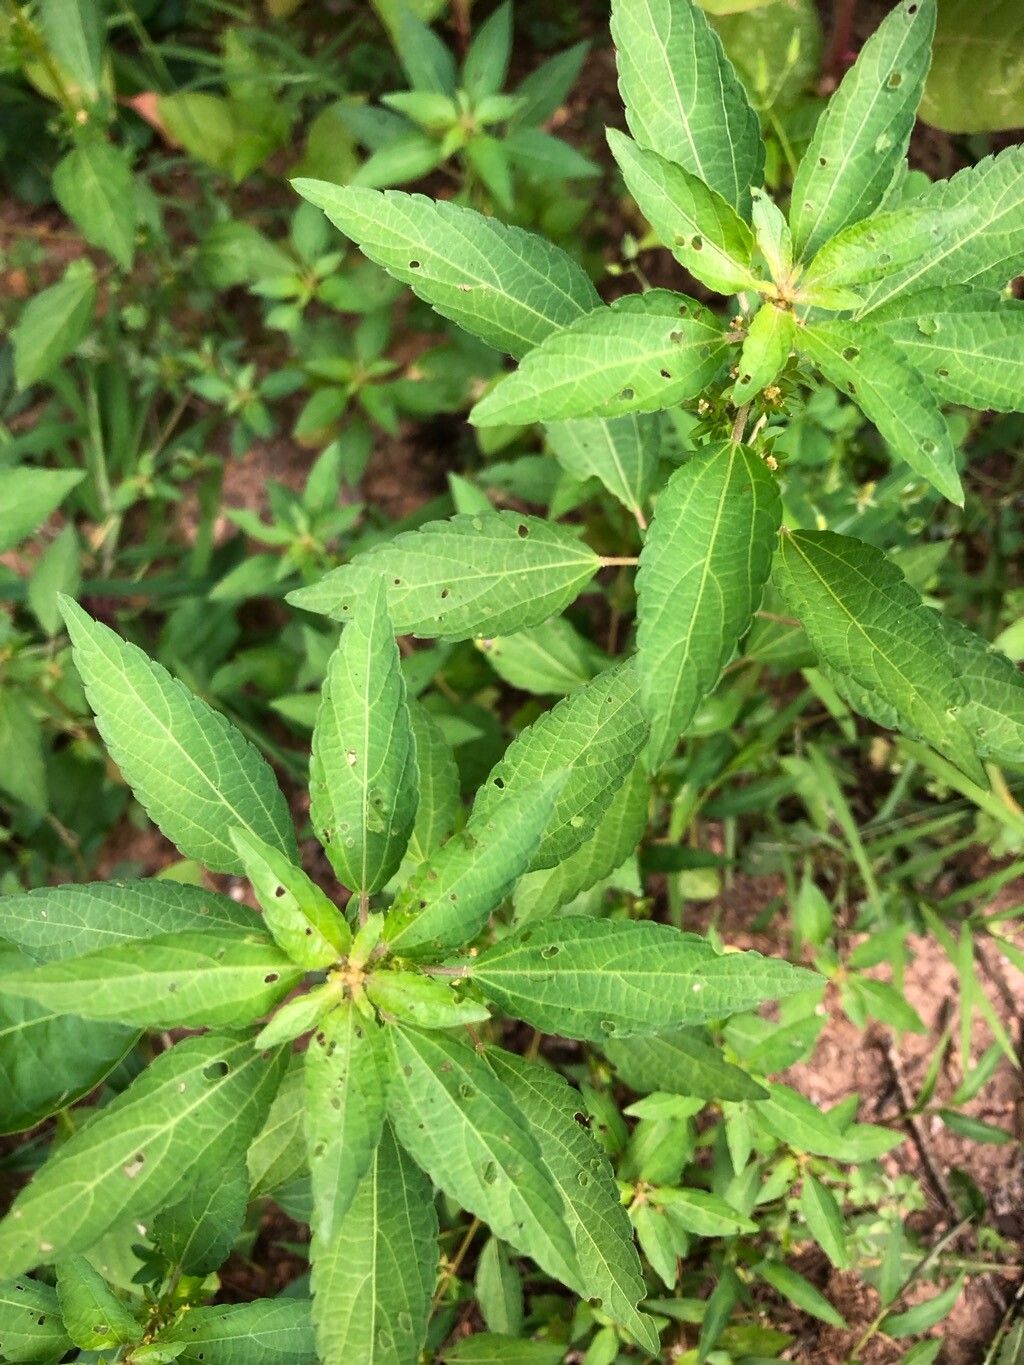
Oh, hello there! I’m so glad you’re interested in Acalypha rhomboidea. It’s a plant that often flies under the radar, but its delicate, almost fern-like foliage and pretty, subtle blooms bring such a lovely texture to the garden. For me, it’s a real charmer. And the best part? Propagating it is surprisingly easy and incredibly rewarding. You’ll feel like a bit of a plant wizard when you see those little roots start to form! If you’re just dipping your toes into the world of propagation, this is a fantastic one to start with.
The Best Time to Start
My favorite time to grab cuttings from Acalypha rhomboidea is during the late spring or early summer. This is when the plant is really in a vigorous growth phase. You’ll find soft, new growth that snaps off easily and is bursting with energy to produce roots. Waiting until the plant has actively started growing after winter is key. Trying to propagate when it’s dormant just won’t yield the same exciting results.
Supplies You’ll Need
- Sharp Pruning Shears or a Knife: Clean cuts are important!
- Well-Draining Potting Mix: I like a blend of equal parts peat moss or coir and perlite. This ensures good aeration and prevents soggy roots.
- Small Pots or Seed Trays: Clean containers are a must to avoid disease.
- Rooting Hormone (Optional, but nice!): A simple powder or gel will really boost your success rate.
- Clear Plastic Bag or Dome: To create a humid environment.
- Watering Can or Spray Bottle: For gentle watering.
Propagation Methods
Let’s get our hands dirty! Acalypha rhomboidea is a champion for stem cuttings.
- Take Your Cuttings: Head out to your Acalypha (ideally in late spring/early summer) and look for healthy, non-flowering stems. You want pieces that are about 4-6 inches long. Using your sharp shears, make a clean cut just below a leaf node. This is where the magic happens for root formation.
- Prepare the Cuttings: Gently remove the lower leaves from the cutting. You want to leave just a couple of leaves at the top. If the remaining leaves are large, you can even cut them in half horizontally. This reduces water loss through transpiration.
- Apply Rooting Hormone (If Using): Dip the cut end of the stem into your rooting hormone, tapping off any excess powder.
- Plant Your Cuttings: Fill your clean pots with your well-draining potting mix. Make a little hole with your finger or a pencil, and insert the cut end of the stem. Gently firm the soil around it.
- Water Gently: Give the soil a good, gentle watering. You want it to be moist but not waterlogged.
- Create a Humid Environment: This is where the plastic bag or dome comes in. Tent a clear plastic bag over the pot (making sure it doesn’t touch the leaves too much!) or place a clear dome over your tray. This traps moisture and creates the humid microclimate cuttings need to thrive.
- Provide Bright, Indirect Light: Place your pots in a location that gets bright, indirect sunlight. Avoid direct sun, which can scorch those delicate new cuttings.
The “Secret Sauce” (Pro Tips)
Here are a few little tricks I’ve learned over the years that really help:
- Bottom Heat is Your Friend: If you have a seedling heat mat, placing your pots on it can significantly speed up rooting. It mimics the warmth of spring soil and is a game-changer for many plants, including Acalypha.
- Don’t Overwater, But Don’t Let Them Dry Out: This is a delicate balance. Check the soil moisture regularly. When the top inch feels dry, it’s time to water. A gentle spray from a misting bottle can also help keep humidity levels up without disturbing the soil too much.
- Take a Few More Than You Think You Need: Not every cutting will take. It’s just the nature of the game! Pop in a few extra, and you’ll have a better chance of getting a good handful of new plants. It’s always better to have a few to share!
Aftercare & Troubleshooting
Once you start to see new growth appearing on your cuttings – a sure sign of roots! – you can gradually acclimate them to normal room humidity. Start by taking the plastic bag off for a few hours a day, then progressively longer. Water them when the top of the soil feels dry.
The most common problem you might encounter is rot. This usually happens if the soil stays too wet. If you notice your cuttings looking limp, mushy, or developing dark spots, it’s often a sign of too much moisture and not enough air circulation. If you catch it early, you might be able to save a cutting by gently removing it, trimming away any rotten parts, and repotting it in fresh, dry soil.
Happy Propagating!
See? Not so daunting, is it? Taking cuttings is a wonderful way to expand your plant collection and feel that deep satisfaction that comes with nurturing life. Be patient with your little Acalypha cuttings – they’ll tell you when they’re ready. Enjoy the process, and may your propagation efforts be fruitful!
Resource:
https://identify.plantnet.org/k-world-flora/species/Acalypha%20rhomboidea%20Raf./data