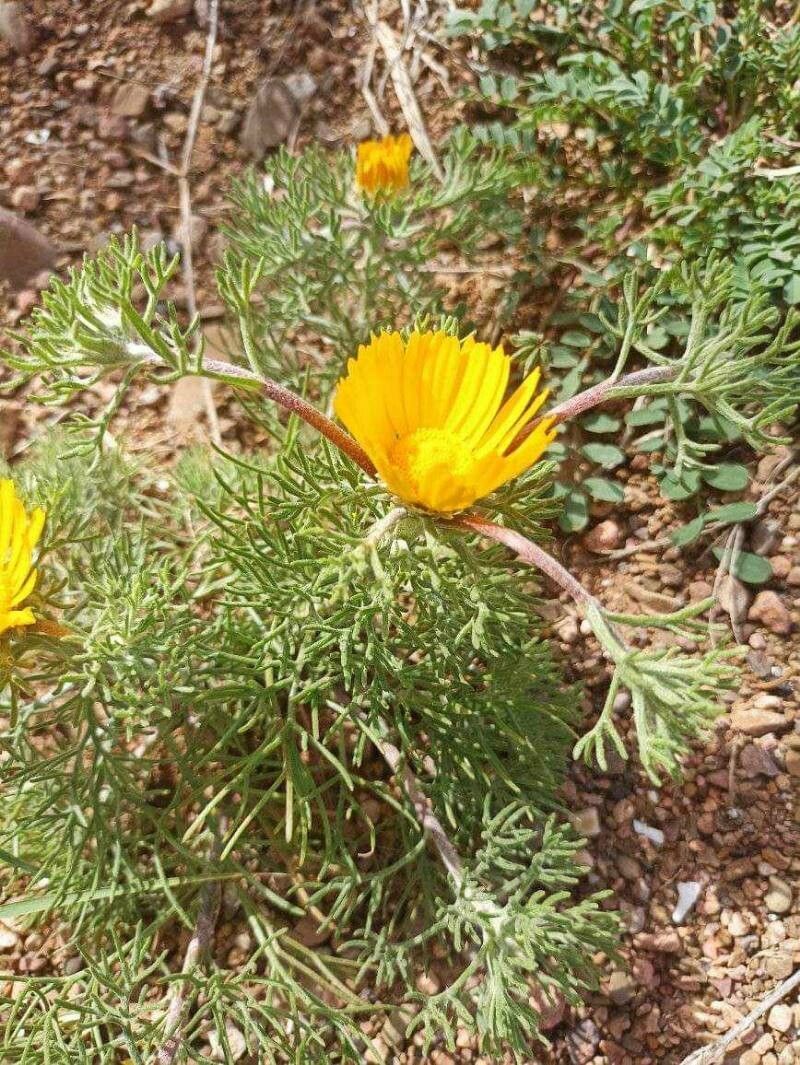
Oh, hello there! Come on in and pull up a chair. I’ve got a fresh pot brewing, and I wanted to chat with you about a truly charming little plant: Cladanthus arabicus. If you’ve ever spotted this beauty with its feathery foliage and delicate, daisy-like flowers, you know exactly why it’s so captivating. It brings a lovely touch of sunshine to any garden corner.
And the best part? You can easily multiply this joy! Propagating Cladanthus arabicus is surprisingly rewarding, and while it might sound a bit technical, trust me, it’s absolutely achievable, even for those just dipping their toes into the gardening pond. I’ve found it to be quite forgiving, which always makes learning a new skill so much more enjoyable.
The Best Time to Start
When it comes to getting those new little plants going, spring is your golden ticket. Think about when the plant is truly waking up after a winter nap. That’s when it has the most energy to put into growing roots. Aim to take cuttings just as new growth is starting to really take off, before the plant gets too set in its summer bloom. It’s a window of opportunity that really boosts your success rate.
Supplies You’ll Need
Gathering your supplies beforehand makes the whole process smoother. Here’s what I always have on hand:
- Sharp pruning shears or a clean knife: For making those precise cuts.
- Well-draining potting mix: I like a blend of equal parts peat moss and perlite, or even a specialized seed-starting mix.
- Small pots or trays: For your new cuttings.
- Rooting hormone (optional but helpful): A little boost can encourage stronger root development.
- A watering can or spray bottle: Gentleness is key when watering young cuttings.
- Plastic bags or a propagation dome: To create a humid environment for your cuttings.
Propagation Methods
I usually go for stem cuttings with Cladanthus arabicus. It’s tried and true, and I find it gives me the best results.
- Take Cuttings: With your clean shears, select healthy, non-flowering shoots from your established plant. Look for stems that are about 4-6 inches long. Make your cut just below a leaf node (where the leaf meets the stem). This is where the magic happens for root formation!
- Prepare the Cuttings: Gently remove the lower leaves from the cutting, leaving just a few at the top. This prevents them from rotting in the soil. If you’re using rooting hormone, dip the cut end of the stem into the powder, tapping off any excess.
- Plant the Cuttings: Fill your small pots with the well-draining potting mix. Make a small hole with your finger or a pencil, and gently insert the prepared cutting. Firm the soil gently around the base.
- Create a Humid Environment: Water the soil lightly until it’s moist but not soggy. Then, cover the pots with a clear plastic bag or place them under a propagation dome. This traps humidity, which is crucial for preventing the cuttings from drying out before they can form roots.
The “Secret Sauce” (Pro Tips)
Over the years, I’ve picked up a few little tricks that seem to make all the difference.
- Think “Air Circulation”: While we want humidity, we don’t want stagnant air, which can encourage fungal issues. Open the plastic bag or dome for a few minutes each day to allow for some air exchange. It’s a small step, but it really helps prevent rot.
- Bottom Heat is Your Friend: If you can, place your pots on a gentle heat mat. This subtle warmth from below provides an ideal cozy environment for roots to emerge much faster. It’s like giving your cuttings a little warm hug to encourage their growth.
Aftercare & Troubleshooting
Once your cuttings are planted, your job isn’t quite done yet! Keep the soil consistently moist, but again, avoid waterlogging. Keep them in a bright spot with indirect sunlight. Direct sun can scorch those delicate new cuttings.
You’ll know your cuttings are happy campers when you start to see new leaf growth appearing. This is a sure sign that roots have formed! You can gently tug on a cutting – if there’s resistance, roots are there. Once they’ve established a good root system, you can carefully transplant them into larger pots.
Now, what if things aren’t going as planned? The most common culprit is rot. If you see your cuttings turning black and mushy, it’s usually a sign of too much moisture and not enough air circulation. Don’t be too hard on yourself if some don’t make it; it happens to all of us! Just learn from it and try again.
A Encouraging Closing
So there you have it! Propagating Cladanthus arabicus is a delightful way to expand your collection or share these sunny blooms with friends. Be patient, enjoy the process of nurturing these tiny beginnings, and soon you’ll have a whole troop of these wonderful plants to enjoy. Happy gardening!
Resource:
https://identify.plantnet.org/k-world-flora/species/Cladanthus%20arabicus%20(L.)%20Cass./data