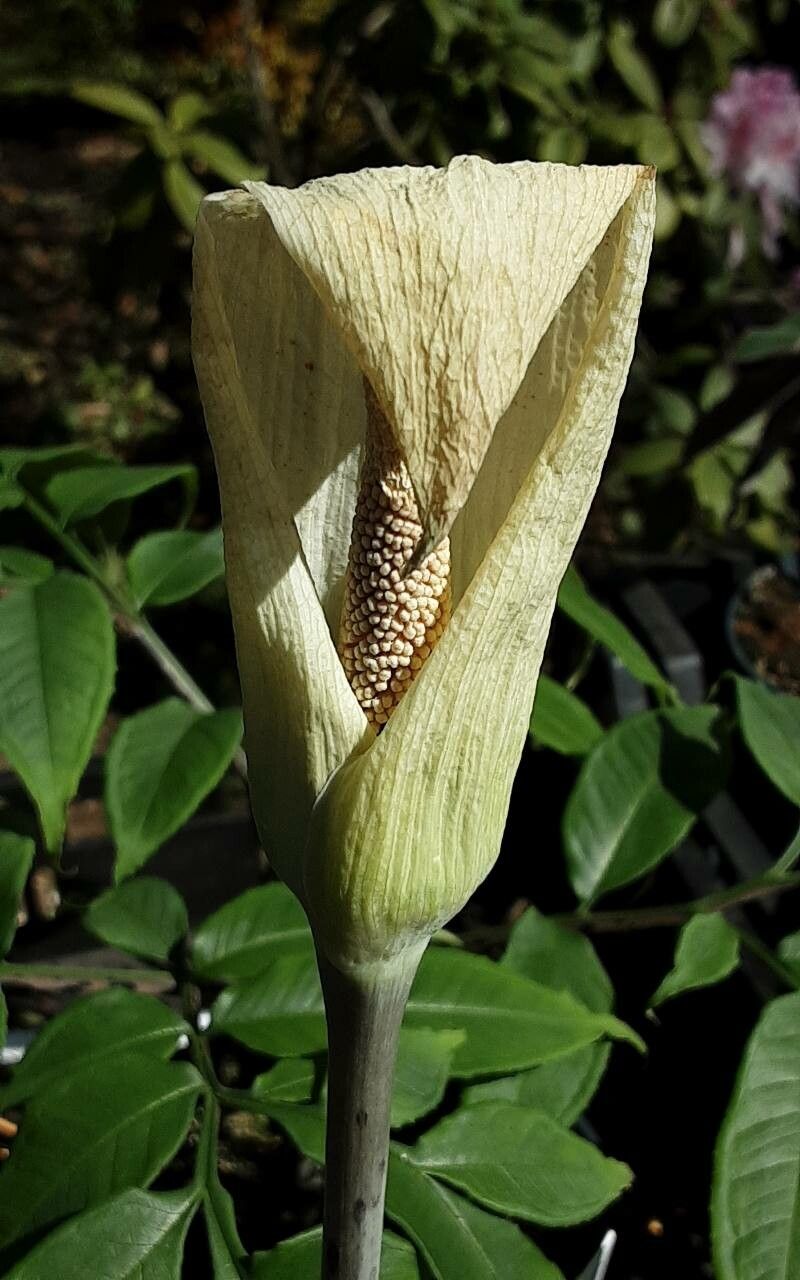
Hello there, fellow plant enthusiasts! I’m so excited to talk to you today about a truly unique and captivating plant: Amorphophallus albus. You know, the one with the absolutely stunning, often enormous, white flower spathe that looks like something out of a fantasy novel? If you’re drawn to the extraordinary in your garden, or even on your windowsill, then A. albus is definitely for you.
Propagating these beauties is an incredibly rewarding experience. It’s like capturing a little bit of that magic to share. Now, I won’t lie, Amorphophallus albus isn’t always the easiest plant for absolute beginners to propagate. It has its quirks, but with a bit of patience and the right approach, you’ll be well on your way to success.
The Best Time to Start
For Amorphophallus albus, the ideal time to begin propagation is when the plant is actively growing. This typically means during the spring and early summer months, after it has emerged from its dormancy. You’ll be looking for a healthy, vigorous plant with a fully developed leaf (called a frond in aroids). Trying to propagate when the plant is dormant or just starting to die back will significantly lower your chances of success.
Supplies You’ll Need
Gathering your tools beforehand makes the whole process go much smoother. Here’s what I usually have on hand:
- Well-draining potting mix: A blend of peat moss, perlite, and orchid bark works wonders. You want something that dries out quickly.
- Sterilized pruning shears or a sharp knife: For making clean cuts.
- Rooting hormone (optional but recommended): A powdered hormone can give your cuttings a helpful boost.
- Small pots or propagation trays: Ideally with drainage holes.
- Plastic bag or propagation dome: To maintain humidity.
- Water: For cleaning tools and, well, watering!
- Gloves: Amorphophallus albus can be a mild irritant, so it’s always good practice to wear gloves when handling them.
Propagation Methods
Amorphophallus albus is most commonly propagated by division of its corms or from seed (though seed propagation is a much longer game and less common for home growers wanting quick results). Here, I’ll focus on the most accessible method for increasing your collection.
Division of Corms
This is the most straightforward way to get more Amorphophallus albus plants.
- Wait until dormancy: The best time to divide the corms is when the plant is completely dormant. This means the frond has turned yellow and died back to the ground. Carefully dig up the main corm.
- Inspect the corm: Gently clean off any excess soil. You’re looking for any smaller cormlets that have naturally separated or are attached to the main corm.
- Separate the cormlets: Using your sterilized knife or shears, carefully cut away any cormlets that have begun to form their own root systems. If a cormlet seems very small or lacks roots, it might be best to leave it attached to the mother corm for now, as it might not have enough stored energy to survive independently.
- Callousing (important!): Once separated, allow the cut surfaces of both the parent corm and the new cormlets to air dry and ” Đó” for a few days to a week. This helps form a protective callus, which is crucial for preventing rot. You can place them in a dry, airy spot on a tray or newspaper.
- Planting: Once calloused, plant your cormlets in small pots filled with your well-draining potting mix. Plant them with the root side down and the top slightly exposed or just barely covered, depending on its size. Ensure the pot has drainage.
- Watering: Lightly water the soil, and then keep the soil consistently, but not soggy, moist.
The “Secret Sauce” (Pro Tips)
Over the years, I’ve learned that a few little tricks can make all the difference.
- Don’t rush the division: While you want to propagate, don’t try to force separation if it’s not naturally occurring or if the cormlets are too small. A healthy connection means a better chance of survival.
- Sterilize everything: I can’t stress this enough. Clean your tools between each cut and after you finish. This disease prevention step is vital, especially when dealing with potentially sensitive aroids.
- Patience is key… and bottom warmth!: For new cormlets, providing gentle bottom heat can dramatically speed up root and shoot development. A heat mat set to around 70-75°F (21-24°C) is perfect. Don’t expect immediate results; it can take weeks or even months for a new shoot to emerge.
Aftercare & Troubleshooting
Once your cormlets are planted and settled, keep them in a bright location, but avoid direct, harsh sunlight. Maintain that consistently moist (not wet!) soil.
The most common issue you’ll face is rot. If you notice a soft, mushy spot on your cormlet or a blackening of the newly emerging shoot, it’s likely rot. This is usually due to overwatering or poor drainage. If you catch it early, you can try to cut away the rotted parts with a sterilized knife, dust the clean cut with cinnamon (a natural fungicide), and let it air dry for longer before replanting. Sadly, advanced rot is difficult to recover from.
Another sign of trouble is no growth after a very long time. This is often just a matter of patience, especially if the cormlet is small or didn’t have a strong root system. If it begins to look shriveled and stays that way for months with no signs of life, it might not have made it.
A Heartfelt Closing
Propagating Amorphophallus albus is a journey, not a race. Each new plant you nurture into existence is a testament to your care and connection with the natural world. Be patient with your little cormlets, observe them closely, and most importantly, enjoy the incredible process of watching life emerge. Happy growing, everyone!
Resource: