Oh, hello there, fellow plant enthusiast! Grab your favorite mug, because we’re diving into the delightful world of propagating one of my garden favorites: Navarretia capillaris.
The Tiny Marvel of Navarretia capillaris
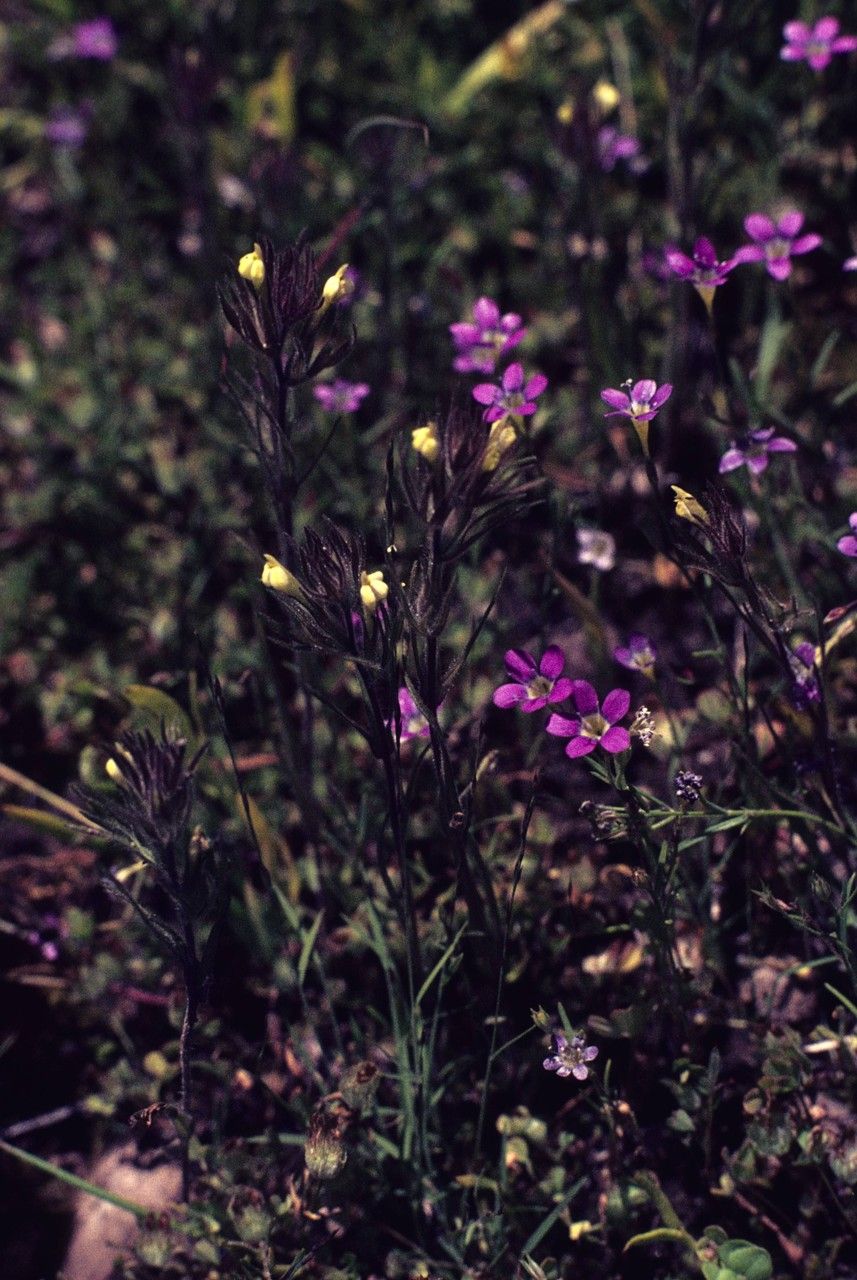
If you haven’t met Navarretia capillaris yet, prepare to be charmed. This little native wildflower, often called “Threadleaf FNAW”, is a gem. It throws up these delicate, airy clusters of purplish-blue flowers that just dance in the breeze. It’s fantastic for filling in gaps in a sunny border or creating a hazy carpet of color in a rocky garden. And the best part? Propagating it yourself is incredibly rewarding. It’s a good one for beginners, too! You’ll be amazed at how easily you can multiply this beauty.
When to Get Your Hands Dirty
The absolute best time to start propagating Navarretia capillaris is in late spring to early summer. This is when the plant is actively growing and has plenty of energy to put into new roots. You can also try seed sowing in the fall, letting nature do its thing over winter.
Your Propagation Toolkit
Before we begin, let’s gather our supplies. You probably have most of these already:
- Small pots or seed trays: Clean, with drainage holes.
- A good quality potting mix: I like a mix of equal parts peat moss (or coir), perlite, and compost. For seeds, a finer seed-starting mix works best.
- Sharp pruning shears or a clean knife: For taking cuttings.
- Rooting hormone (optional but helpful): Especially for stem cuttings.
- A spray bottle: For gentle watering.
- Labels and a marker: To keep track of what you’ve planted!
Let’s Get Growing: Propagation Methods
Navarretia capillaris is pretty adaptable, but here are my go-to methods:
1. Stem Cuttings: The Most Reliable
This is my favorite way to increase my stock.
- Take your cuttings: In late spring or early summer, find a healthy, non-flowering stem. Using your clean shears, cut a piece about 3-4 inches long, just below a leaf node (where a leaf attaches to the stem).
- Prep the cutting: Gently strip off the lower leaves, leaving just a couple of pairs at the top. If you’re using rooting hormone, dip the cut end into it now.
- Plant it up: Fill your small pots with your potting mix. Make a little hole in the center with your finger or a pencil.
- Insert and water: Place the cutting into the hole so the nodes where you removed leaves are buried. Gently firm the soil around it. Mist the leaves lightly with your spray bottle.
- Provide a cozy home: Place the pots in a bright spot that gets indirect sunlight. Keep the soil consistently moist but not waterlogged. A little greenhouse or covering the pots with a clear plastic bag can help maintain humidity.
2. Seed Sowing: Nature’s Way
This is wonderfully simple if you can collect seeds.
- Collect seeds: Let seed heads form and dry on the plant. Once they are completely brown and brittle, carefully collect the tiny seeds.
- Prepare your tray: Fill a seed tray with your seed-starting mix.
- Sow the seeds: Lightly scatter the seeds over the surface of the soil. They are quite small, so don’t overdo it! Don’t bury them too deeply; they need light to germinate.
- Water gently: Use your spray bottle to mist the surface of the soil until it’s damp.
- Give them a cool start: Place the tray in a cool, bright spot. For better germination, you can stratify the seeds. This means exposing them to a period of cold, mimicking winter. You can do this by popping the tray in the fridge for 4-6 weeks before moving it to a warmer spot. Or, simply sow them outdoors in the fall and let winter do the work!
My Little “Secret Sauce”
Here are a few things I’ve learned that really make a difference:
- Don’t overcrowd your cuttings: Give each stem cutting its own little space. If they’re crammed together, they’re more likely to develop fungal issues.
- Bottom heat is a game-changer for cuttings: While not strictly necessary for Navarretia capillaris, placing your pots on a gentle heat mat can significantly speed up root development. It gives the roots a nice warm environment to get established.
- Patience with seeds: Navarretia capillaris seeds can be a bit quirky. Some might sprout quickly, while others take their sweet time. Don’t give up if you don’t see immediate results!
Aftercare and What to Watch For
Once you see new growth or roots poking out of the drainage holes, your little plant is ready for a bit more attention.
- Gradually acclimate: If you’ve been keeping your cuttings in a humid environment, start opening up the plastic bag or greenhouse for a few hours each day to let them get used to drier air.
- Watering: Once roots are well established, water them thoroughly when the top inch of soil feels dry.
- Signs of trouble: The biggest enemy of young cuttings is rot. If your cuttings look mushy, black, or are wilting dramatically despite moist soil, it’s likely rot. This is often caused by overwatering or poor air circulation. Remove any affected cuttings immediately and try to increase airflow.
Keep Growing!
Propagating plants is a journey of discovery, and Navarretia capillaris is a lovely one to embark on. Be patient with yourself and your new little green babies. The joy of watching them grow and thrive, all thanks to your efforts, is truly something special. Happy propagating!
Resource: