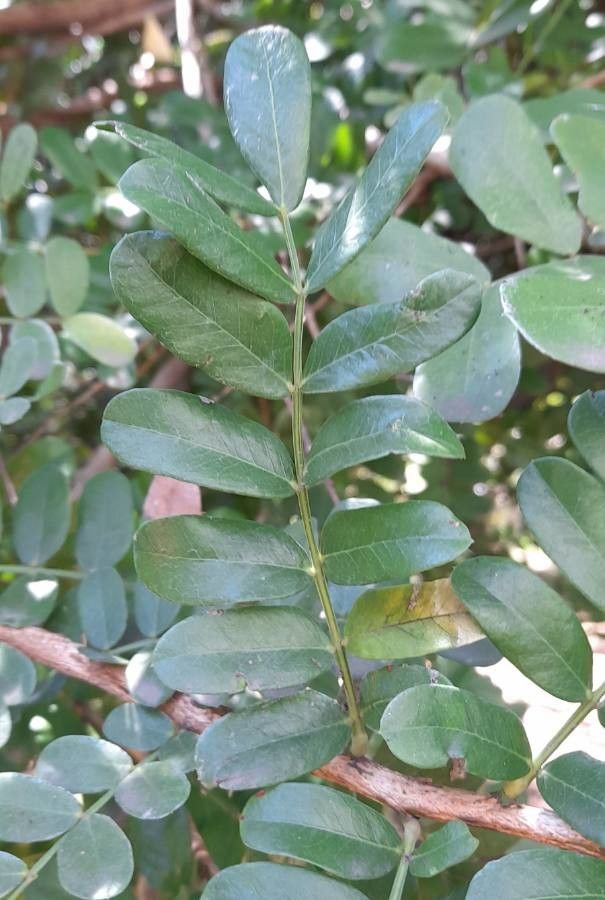
Hello, fellow plant lovers! It’s so wonderful to connect with you today. There’s a special kind of joy that comes from coaxing a new plant to life from a tiny cutting or a division, isn’t there? It’s like sharing a little bit of magic. Today, I want to talk about a truly stunning plant that’s often overlooked: Schotia latifolia, or the Weeping Schotia. Its elegant, deep green foliage and, when it’s happy, spectacular display of rosy-red flowers make it a treasured specimen. Propagating it is a rewarding endeavor, and while it might not be an absolute beginner plant, with a little guidance, you’ll be well on your way to success.
The Best Time to Start
For Schotia latifolia, I’ve found that the late spring to early summer is truly the sweet spot. This is when the plant is actively growing, and the stems have enough energy to put towards rooting. You want to select stems that are semi-hardwood – they’ve passed their soft, new growth stage but haven’t fully hardened off into old, woody branches.
Supplies You’ll Need
Before we get our hands dirty, let’s gather our tools. Here’s what I always have on hand:
- Sharp Pruning Shears or a Craft Knife: For clean cuts that heal better.
- Potting Mix: A well-draining mix is crucial. I often use a blend of perlite, peat moss, and a bit of coarse sand. You can also find specific cuttings mixes at your local garden center.
- Small Pots or Seedling Trays: With good drainage holes, of course!
- Rooting Hormone (Optional but Recommended): A powdered or gel form can significantly boost your success rate.
- Watering Can or Spray Bottle: For gentle watering.
- Plastic Bags or a Propagator: To create a humid environment.
- Labels: Don’t forget to label your cuttings!
Propagation Methods
Let’s dive into the most reliable ways to multiply your beautiful Schotia latifolia.
1. Stem Cuttings (My Go-To Method)
This is how I get the most success with my Schotia.
- Take Your Cuttings: Select healthy, semi-hardwood stems that are about 4-6 inches long. Using your clean pruning shears, make a cut just below a leaf node (where a leaf meets the stem). Remove the leaves from the lower half of the cutting. You can leave one or two leaves at the top to help with photosynthesis.
- Prepare the Cutting: Here’s where the rooting hormone comes in handy. Dip the cut end of the stem into your rooting hormone, tapping off any excess.
- Potting Up: Fill your small pots with your well-draining potting mix. Make a hole in the center of the soil with your finger or a pencil. Gently insert the prepared cutting into the hole, ensuring the node where you removed the leaves is buried in the soil. Firm the soil around the base of the cutting.
- Create Humidity: Water the soil gently. Then, you can either cover the pot with a clear plastic bag (making sure the leaves don’t touch the plastic) or place it in a propagator. This humidity is key to preventing the cuttings from drying out before they form roots.
- Placement: Place your pots in a warm spot with bright, indirect light. Avoid direct sun, which can scorch the delicate cuttings.
2. Water Propagation (For the Patient Observer)
While I prefer soil for Schotia, you can try water propagation, but it’s a bit more finicky.
- Prepare Cuttings: Similar to stem cuttings, take 4-6 inch semi-hardwood cuttings and remove the lower leaves.
- Place in Water: Put your cuttings in a clean jar or vase filled with fresh water. Ensure that no leaves are submerged in the water, as this will cause them to rot.
- Change Water Regularly: Change the water every few days to keep it fresh and oxygenated.
- Patience is Key: Roots will eventually form, but it can take longer. Once the roots are about an inch long, you can carefully transplant them into soil.
The “Secret Sauce” (Pro Tips)
Here are a few things I’ve learned over the years that really make a difference:
- Cleanliness is Paramount: Always use sterilized tools and pots. This drastically reduces the risk of fungal infections, which are the bane of propagation. A quick wipe with rubbing alcohol does wonders.
- Bottom Heat is Your Friend: If you can, provide a little warmth from below. A heat mat designed for propagators is fantastic. This encourages root development without drying out the top growth. It’s a game-changer for many woody cuttings.
- Don’t Rush the Transplant: Be a little patient before you try to tug on your cuttings to see if they’re rooted. I wait until I see new leaf growth, which is a sure sign that roots are forming and supporting the plant.
Aftercare & Troubleshooting
Once you see those tiny roots appearing, the real care begins!
- Gradual Acclimation: Slowly start to acclimate your new plants to lower humidity. If you’re using a plastic bag, start by opening it for a few hours each day. Gradually increase the time until you can remove it completely.
- Water Gently: Continue to water them gently. The soil should be consistently moist but not waterlogged. Overwatering is a common mistake and can lead to root rot, which manifests as wilting, yellowing leaves, and a slimy base.
- Watch for Pests: Keep an eye out for any tiny insects. New growth can sometimes attract aphids.
- Wilting and Yellowing: If your cuttings are wilting dramatically and the soil is moist, it could be rot. If the soil is dry, they’re just thirsty. Yellowing leaves can also be a sign of too much direct sun or just natural shedding of older leaves as the plant focuses on new growth.
A Little Bit of Patience Goes a Long Way
Propagating Schotia latifolia is a journey, and like any good journey, it’s about the experience as much as the destination. Don’t be discouraged if your first attempt doesn’t yield a forest of new plants. Every cutting you try teaches you something new. So, gather your supplies, get your hands in the soil, and enjoy the slow, beautiful magic of bringing new life into your garden. Happy propagating!
Resource:
https://identify.plantnet.org/k-world-flora/species/Schotia%20latifolia%20Jacq./data