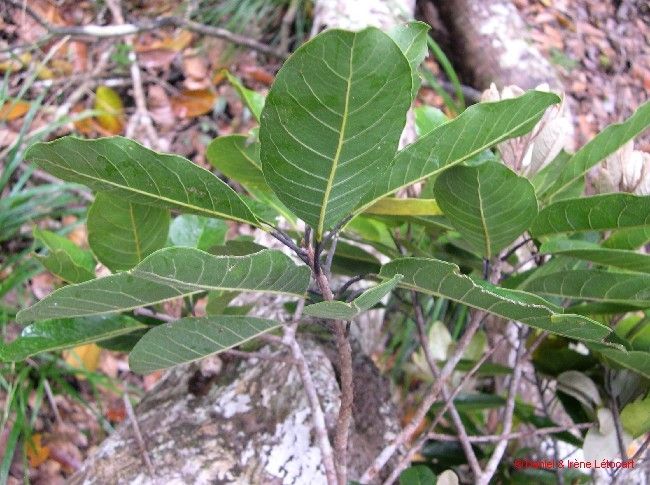
Hello fellow plant enthusiasts! So, you’ve got your eye on Pycnandra bourailensis? Excellent choice! This gorgeous native of New Caledonia, with its stunning, often iridescent foliage and delicate flowers, is a true jewel in any garden or indoor collection. The excitement of seeing a tiny twig sprout into a brand-new plant is just about irreplaceable, and with Pycnandra, it’s a particularly satisfying endeavor. Now, I won’t sugarcoat it – this isn’t quite a “stick it in the ground and forget it” kind of plant. It leans a little more towards the intermediate side of propagation. But with a bit of care and attention, you can absolutely master it!
The Best Time to Start
For the highest success rate, I always aim to start my Pycnandra bourailensis propagation efforts in the late spring or early summer. This is when the plant is gearing up for its most vigorous growth. You’re looking for stems that are semi-hardwood – not brand new, floppy growth, but not old, woody material either. Think of it as that stage where the stem has a bit of firmness but can still be bent without snapping. This is the sweet spot for rooting.
Supplies You’ll Need
Here’s what you should have on hand before you begin:
- Sharp, clean pruning shears or a sharp knife: Essential for making clean cuts that heal well.
- Rooting hormone (powder or gel): This is a big help, especially for trickier propagations. Look for one with a good concentration of auxins.
- Sterile potting mix: A good blend of perlite, peat moss, and perhaps a bit of orchid bark works wonders. We want excellent drainage!
- Small pots or trays: Clean containers to house your cuttings. Terracotta pots are my favorite as they breathe.
- Plastic bags or a mini greenhouse: To create a humid environment for your cuttings.
- Watering can with a fine rose: For gentle watering.
- Optional: Bottom heat mat: This can significantly speed up root development.
Propagation Methods
The most reliable way I’ve found to propagate Pycnandra bourailensis is through stem cuttings. Here’s how I do it:
- Take Your Cuttings: Using your clean shears, select healthy stems that fit the semi-hardwood description. Make your cuts just below a leaf node (where a leaf attaches to the stem). Aim for cuttings that are about 4-6 inches long.
- Prepare the Cuttings: Gently remove the lower leaves from your cuttings, leaving just a few at the top. This prevents them from rotting in the soil. If the remaining leaves are very large, you can trim them in half to reduce water loss.
- Apply Rooting Hormone: Dip the cut end of each stem into rooting hormone, ensuring it’s coated. Tap off any excess.
- Plant Your Cuttings: Fill your clean pots or trays with your sterile potting mix. Make a small hole in the center of the mix with a pencil or your finger. Insert the treated end of the cutting into the hole, and gently firm the soil around it. You can plant several cuttings per pot, ensuring they aren’t touching.
- Create a Humid Environment: Water the soil gently. Then, cover your pots with a clear plastic bag or place them in a mini greenhouse. Make sure the plastic doesn’t touch the leaves of the cuttings – you can use stakes to prop it up.
The “Secret Sauce” (Pro Tips)
Now for a few tricks I’ve picked up over the years that really make a difference:
- Don’t Over-Water, But Keep It Consistent: This is crucial. The soil should be consistently moist but never soggy. Soggy conditions are a one-way ticket to rot, especially with Pycnandra. If you are using a plastic bag, you’ll notice condensation. If there’s too much, air it out for a few hours.
- Bottom Heat is Your Friend: If you can, place your pots on a bottom heat mat set to around 70-75°F (21-24°C). This gentle warmth encourages root development from below, signaling the plant that it’s time to grow. It makes a noticeable difference in rooting time!
- Patience is Paramount: Pycnandra bourailensis isn’t the fastest rooter. Don’t be tempted to pull them up to check for roots every few days. I usually wait 4-8 weeks, and sometimes even longer, before I gently tug on a cutting to see if there’s resistance.
Aftercare & Troubleshooting
Once you see new leaf growth or feel good resistance when you gently tug, it’s a strong indication that roots have formed! Gradually acclimate your new plants to lower humidity by slowly opening the plastic bag or greenhouse vents over a week or two. Continue to water them as you did before, ensuring the soil stays moist.
The most common problem you’ll encounter is rot. If a cutting turns black and mushy, it’s usually a sign of too much moisture and poor air circulation. If you see this happening, remove the affected cutting immediately to prevent it from spreading. Another sign of failure is a cutting that shrivels up and turns brown even when the soil is moist. This could indicate lack of sufficient humidity or that the cutting wasn’t healthy to begin with. Discard these and try again.
So there you have it! Propagating Pycnandra bourailensis is a bit of a journey, but the reward of creating new life from an existing plant is truly special. Be patient, observe your cuttings, and enjoy the process. Happy growing!
Resource: