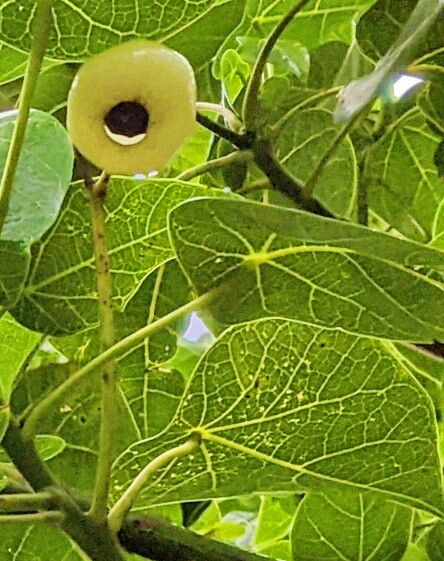
Hey there, fellow plant lovers! Today, we’re going to talk about a truly special plant that brings a touch of the tropics right to our gardens: Hernandia nymphaeifolia. You might know it as the Lantern Tree or the False Magnolia, and trust me, its big, beautiful, heart-shaped leaves and unique, lantern-like seed pods are just about the most charming things you’ll ever see. Growing them from scratch feels like unlocking a little piece of magic, and I’m here to guide you through it. Don’t worry too much if you’re new to this plant; while it’s not as straightforward as, say, a pothos, with a little care and attention, you’ll be successful!
The Best Time to Start
For Hernandia nymphaeifolia, the sweet spot for propagation is usually late spring or early summer. This is when the plant is actively growing and has plenty of energy stored to put into developing new roots. You’re looking for stems that are neither too soft and new nor too woody and old. Think of the current season’s growth, something firm but flexible.
Supplies You’ll Need
Here’s what you’ll want to have on hand before you begin:
- Sharp Pruning Shears or a Clean Knife: For making clean cuts.
- Rooting Hormone (Powder or Gel): This gives your cuttings a great head start.
- Potting Mix: A well-draining blend is crucial. I like a mix of equal parts perlite, peat moss, and good quality potting soil. You can also use a specialized seed-starting mix.
- Small Pots or Trays: Clean and with drainage holes, of course!
- Plastic Bags or a Clear Dome: To create a humid environment.
- Watering Can with a Fine Rose or a Spray Bottle: For gentle watering.
- Optional: Bottom Heat Mat: This can significantly speed up rooting.
Propagation Methods
We’ll focus on the most reliable method for Hernandia nymphaeifolia: stem cuttings.
-
Take Your Cuttings: Select healthy, vigorous stems from your parent plant. Look for sections with at least two or three sets of leaves. Using your sharp shears or knife, make a clean cut just below a leaf node. This is where roots tend to form most readily. You want cuttings that are about 4-6 inches long.
-
Prepare the Cuttings: Gently remove the lower leaves from your cuttings, leaving only the top two or three. This reduces water loss and helps the plant focus its energy on root development. If the remaining leaves are very large, you can cut them in half horizontally to further reduce transpiration.
-
Apply Rooting Hormone: Dip the cut end of each stem into your rooting hormone, tapping off any excess. Ensure the cut surface is well-coated.
-
Plant Your Cuttings: Fill your small pots or trays with your prepared potting mix. Make a hole in the center of the mix with a pencil or your finger – this prevents the rooting hormone from rubbing off. Insert the bottom end of your cutting into the hole, and gently firm the soil around it. You can typically fit 2-3 cuttings per small pot.
-
Create the Humid Environment: Water the soil thoroughly until it’s evenly moist. Then, cover your pots or trays with a clear plastic bag or a propagator lid. This traps in humidity, which is vital for stem cuttings. Make sure the leaves aren’t touching the plastic if possible.
-
Provide Warmth and Light: Place your cuttings in a bright spot that receives indirect sunlight. Avoid direct sun, which can scorch the tender cuttings. If you have a bottom heat mat, now’s the time to use it! Aim for a soil temperature of around 70-75°F (21-24°C).
The “Secret Sauce” (Pro Tips)
Here are a couple of things I’ve learned over the years that make a real difference:
- Don’t Drown Them! While humidity is key, soggy soil is the enemy. Let the surface of the soil dry out slightly between waterings. Overwatering will lead to rot before roots can even think about forming.
- The “Air Bubble” Trick: Sometimes, even with good drainage, cuttings can sit in water at the bottom of the pot. If you notice water pooling, try gently tilting the pot to let the excess drain out. It’s a small thing, but it can prevent a lot of heartache.
Aftercare & Troubleshooting
Once your cuttings have started to show signs of rooting, which can take anywhere from 4-8 weeks (or longer), you’ll want to gradually acclimate them to less humid conditions. Start by opening the plastic bag for increasing amounts of time each day.
You’ll know they’re rooting when you see new leaf growth or feel a gentle tug when you very carefully try to lift a cutting. At this point, you can transplant them into slightly larger individual pots filled with your regular potting mix. Continue to keep them well-watered but not waterlogged, and in bright, indirect light.
Signs of Failure: The most common issue is rot. If your cuttings turn black and mushy, it’s usually due to too much moisture and not enough air circulation. If you see signs of rot, it’s best to discard those cuttings and start fresh, focusing on that slightly drier soil approach. If a cutting simply wilts and doesn’t show any new growth after a good while, it might just not have taken. Don’t be discouraged!
A Encouraging Closing
Propagating Hernandia nymphaeifolia is a journey, and like all good journeys, it’s about the process as much as the destination. Be patient with yourself and with your new plant babies. Enjoy watching those tiny roots emerge, and soon enough, you’ll have your very own beautiful Lantern Trees to admire. Happy growing!
Resource: