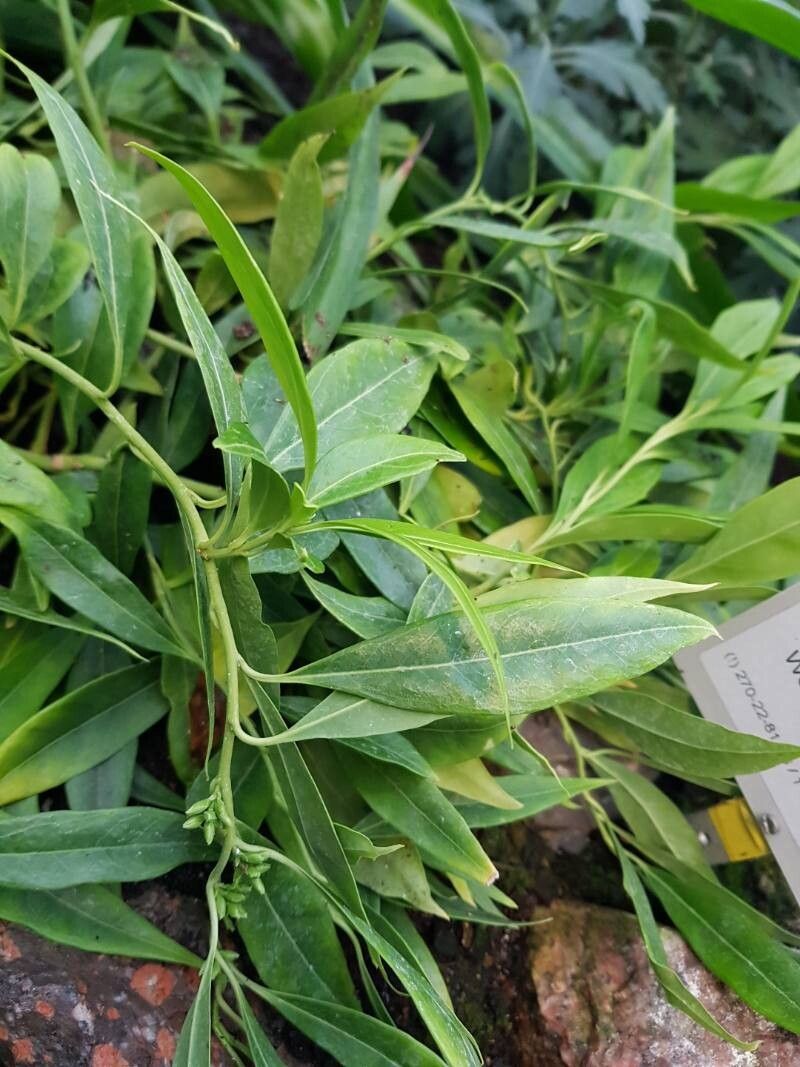
Well hello there, fellow plant lover! It’s so good to have you here. You know, I’ve spent the last two decades with my hands in the soil, nurturing all sorts of green beauties. Today, I want to chat about something truly special: Sarcococca saligna, also known as Himalayan Sweet Box.
This shrub is an absolute gem for any garden. Its glossy, dark green leaves are handsome year-round, and in late winter or early spring, it bursts forth with incredibly fragrant, creamy white flowers. The scent is just divine, a welcome perfume when much of the garden is still dormant. Propagating sarcococca is a wonderful way to fill your garden with more of this beauty, or to share its charm with friends. Honestly, I find it to be a fairly straightforward plant to propagate, even for those just dipping their toes into the plant-parent waters.
The Best Time to Start
My favorite time to take cuttings for Sarcococca saligna is during the late spring or early summer. This is when the plant is actively growing, and you can take semi-hardwood cuttings. Think of it as taking cuttings from stems that have started to harden off but haven’t become completely woody. They have that perfect balance of flexibility and sturdiness. If you miss that window, don’t fret! You can also try with greenwood cuttings in early spring, though they can be a bit more delicate.
Supplies You’ll Need
Gathering your supplies beforehand makes the whole process so much smoother. Here’s what I usually have on hand:
- Sharp pruning shears or a sharp knife (cleanliness is key!)
- A rooting hormone (powder or gel – I’m a bit partial to a gel myself for ease of use)
- A good quality seed-starting mix or a blend of peat moss and perlite (roughly 50/50)
- Small pots or propagation trays with drainage holes
- A plastic bag or a propagation dome to create a humid environment
- A small watering can or spray bottle
- Labels to mark your cuttings (trust me, you’ll thank yourself later!)
Propagation Methods
There are a couple of ways we can get more Sarcococca saligna plants. I find taking stem cuttings to be the most reliable and effective.
Stem Cuttings (The Way I Go)
- Select Your Cuttings: Head out to your established Sarcococca plant. Look for healthy, non-flowering stems from the current season’s growth. You want pieces that are about 4 to 6 inches long.
- Make the Cut: Using your clean, sharp pruners, make a clean cut just below a leaf node. A leaf node is where a leaf attaches to the stem. This is where the magic happens for root formation.
- Prepare the Cutting: Gently remove the lower leaves from the cutting, leaving just a couple of leaves at the very top. If the remaining leaves are quite large, you can even cut them in half horizontally to reduce water loss through transpiration.
- Apply Rooting Hormone: Dip the cut end of the stem into your rooting hormone, ensuring it’s coated where you removed the lower leaves. Tap off any excess.
- Potting Up: Fill your small pots or propagation tray with your chosen sterile potting mix. Make a small hole in the center of the mix with your finger or a pencil.
- Insert the Cutting: Gently insert the base of the cutting into the hole. Firm the soil gently around the stem to ensure good contact.
- Water and Cover: Water gently after potting. Then, place the pot inside a plastic bag, or cover your tray with a propagation dome. This creates that essential humid microclimate.
The “Secret Sauce” (Pro Tips)
Now, here are a few little tricks I’ve picked up over the years that can really boost your success rate:
- Sanitation is King: I can’t stress this enough. Always sterilize your tools with rubbing alcohol before making any cuts. This prevents the spread of any diseases that could harm your parent plant or your precious new cuttings.
- Don’t Drench, Just Dampen: When you water your potted cuttings, you want the soil to be consistently moist, but not waterlogged. Soggy soil is a fast track to rot. I like to water from the bottom if I can, allowing the soil to wick up moisture.
- Bottom Heat is Your Friend: If you can, placing your pots on a gentle heating mat designed for propagation can significantly speed up root development. It mimics the warmth of spring and encourages those roots to form more quickly.
Aftercare & Troubleshooting
Once your cuttings are potted and settled, place them in a bright spot out of direct sunlight. Keep that plastic bag or dome on to maintain humidity. Check the soil moisture regularly and mist if needed to keep it slightly damp.
The most common sign of failure you’ll see is wilting and yellowing leaves, eventually leading to the cutting turning black and mushy – that’s rot. Usually, this means too much watering or not enough airflow. If you see signs of rot, it’s often best to discard that cutting and try again, perhaps with less water or by opening the bag/dome for an hour each day to allow for some air circulation.
Be patient! It can take anywhere from 4 to 8 weeks, or even longer, for roots to form. You can gently tug on a cutting – if there’s resistance, it’s a good sign roots have developed. Once you see healthy new growth, or feel that resistance, it’s time to gradually introduce your new plant to normal conditions by opening the bag/dome a little more each day for a week. Then, you can transplant it into a slightly larger pot.
An Encouraging Closing
Propagating plants is such a rewarding journey, isn’t it? It’s about patience, observation, and a little bit of faith. Don’t be discouraged if every single cutting doesn’t make it. That’s just part of the learning process! Celebrate the ones that do, and enjoy the satisfaction of growing more of this wonderful Sarcococca. Happy gardening!
Resource:
https://identify.plantnet.org/k-world-flora/species/Sarcococca%20saligna%20(D.Don)%20Müll.Arg./data