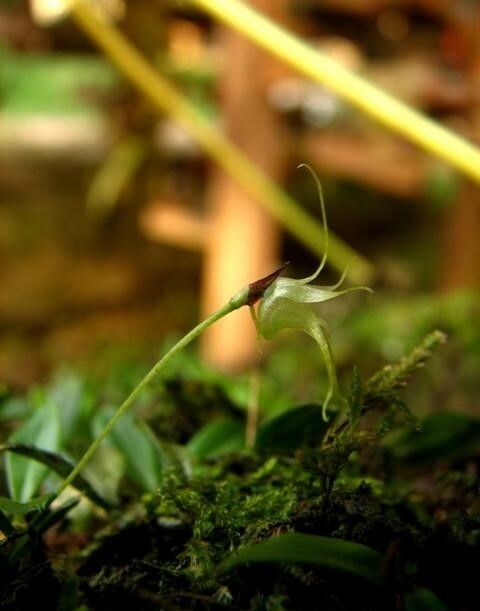
Hello there, fellow plant enthusiasts! I’m so excited to chat with you today about a truly captivating gem for any collection: Porpax elaidium. If you’ve ever admired its satiny, almost velvety leaves and unique growth habit, you’re not alone. Getting more of these beauties is incredibly rewarding, and I’m here to share my secrets on how to do it.
Porpax elaidium might sound a little intimidating, but trust me, propagating it is surprisingly accessible, even if you’re just dipping your toes into the world of plant propagation. It’s one of those plants that generously rewards a little bit of your time and care with new beginnings.
The Best Time to Start
For the highest success rate with Porpax elaidium, I always recommend late spring to early summer. This is when the plant is in its active growth phase. You’ll see plenty of new, healthy shoots, which are perfect candidates for taking cuttings. Starting when the weather is warm and days are longer gives your cuttings the energy they need to root quickly.
Supplies You’ll Need
Gathering your supplies beforehand makes the whole process so much smoother. Here’s what I usually have on hand:
- Sharp, clean pruning shears or a knife: For making clean cuts.
- Well-draining potting mix: I like a blend of peat moss, perlite, and a bit of orchid bark. You want something airy!
- Small pots or propagation trays: Clean ones, of course!
- Rooting hormone (optional but helpful): A powder or gel can give your cuttings a nice boost.
- Clear plastic bag or humidity dome: To maintain a humid environment.
- Watering can with a fine rose: For gentle watering.
- Perlite or pebbles: For the bottom of pots if using water propagation.
Propagation Methods
There are a couple of ways to go about this, but my go-to method, which is usually the most successful, is stem cuttings.
Stem Cuttings:
- Select a healthy mother plant. Look for vigorous growth and no signs of pests or disease.
- Identify a suitable stem. You want a section that has at least two to three sets of leaves and is about 4-6 inches long. Avoid any woody or overly soft new growth.
- Make a clean cut. Using your sharp shears or knife, make a cut just below a leaf node (where a leaf attaches to the stem). This is where the magic of rooting happens.
- Prepare the cutting. Gently remove the bottom set of leaves. If the remaining leaves are very large, you can cut them in half horizontally to reduce water loss through transpiration.
- Apply rooting hormone (optional). Dip the cut end into your rooting hormone, tap off any excess.
- Plant the cutting. Insert the cut end into your prepared potting mix, ensuring the leaf nodes are in contact with the soil. You can insert a couple of cuttings per pot, but give them a little space.
- Water gently. Moisten the soil thoroughly with your fine-rose watering can.
- Create a humid environment. Cover the pot with a clear plastic bag or humidity dome. You can prop up the bag with a few stakes if it looks like it will touch the leaves.
- Place in bright, indirect light. Avoid direct sun, which can scorch your delicate cuttings.
Water Propagation (less common but can work):
If you prefer, you can also try rooting cuttings in water.
- Follow steps 1-4 above.
- Place the cuttings in a clean jar or vase filled with lukewarm water.
- Crucially, ensure no leaves are submerged. If they are, trim them off or tie the cutting carefully so only the stem is in the water.
- Place in bright, indirect light.
- Change the water every few days to keep it fresh and prevent bacterial growth.
The “Secret Sauce” (Pro Tips)
Here are a couple of things I’ve learned over the years that really make a difference:
- Don’t overcrowd your cuttings! Give them enough space in the pot and in their humid environment. Overcrowding leads to poor air circulation, which can encourage rot.
- Bottom heat is your friend. If you have a seedling heat mat, placing your pots on it can significantly speed up root development, especially if your home is on the cooler side. It mimics that lovely warm soil of summer.
- Watch for the “tug test.” After a few weeks, gently tug on a cutting. If you feel resistance, roots have formed!
Aftercare & Troubleshooting
Once you start seeing signs of new growth (tiny new leaves or shoots), that’s a great indicator that roots have formed.
- Gradually acclimate your new plant. Begin by removing the plastic bag or humidity dome for short periods, gradually increasing the time each day over a week or two. This helps it adjust to normal humidity levels.
- Continue watering gently as needed, allowing the top inch of soil to dry out slightly between waterings.
- Keep it in indirect light.
The most common issue you might encounter is rot. If a cutting turns mushy, black, or starts to wilt dramatically and is clearly not drying out too much, it’s likely rot. Discard any affected cuttings immediately to prevent it from spreading. Good drainage and avoiding overwatering are your best defenses against this.
A Word of Encouragement
Propagating Porpax elaidium is a beautiful way to expand your collection and share the joy of plants with others. Don’t be discouraged if your first attempt isn’t perfect. Every plant, and every cutting, is a learning experience. Be patient, observe your new little plants with care, and soak in the satisfaction of nurturing life. Happy propagating!
Resource: