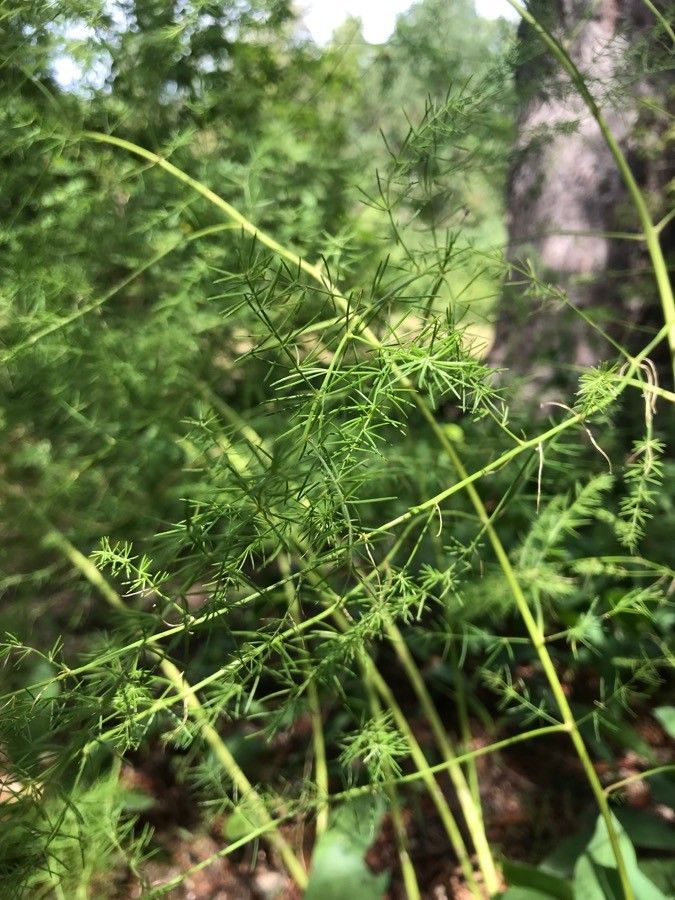
Hello there, fellow plant lovers! I’m so excited to chat with you today about a truly delightful plant: Asparagus schoberioides. It’s a gem in the garden, offering delicate, fern-like foliage that can bring a whisper of elegance to shady corners or a touch of lightness to mixed containers. If you’ve ever admired its ethereal beauty and thought, “I wish I had more of that!”, you’re in the right place. Propagating this beauty is a wonderfully rewarding endeavor, and while it’s not exactly a “set-it-and-forget-it” kind of plant, I promise, it’s totally achievable for most home gardeners.
The Best Time to Start
My experience tells me that spring is your golden ticket to success with Asparagus schoberioides. Specifically, when the plant is actively showing new growth, usually after the last frost has passed. This surge of energy means it’s ready to put its best foot forward and enthusiastically embrace new beginnings. Waiting until this post-dormancy phase gives your cuttings or divisions the best shot at establishing themselves quickly and happily.
Supplies You’ll Need
Gathering your tools beforehand makes the whole process smoother. Here’s what I usually have on hand:
- Sharp pruning shears or a clean knife: For making neat cuts.
- Well-draining potting mix: A blend of peat moss, perlite, and a bit of compost works wonders.
- Small pots or trays: With drainage holes, of course!
- Rooting hormone powder or gel (optional): This can give cuttings a helpful boost.
- Watering can or spray bottle: For gentle hydration.
- Plastic bags or domes: To create a humid microclimate.
Propagation Methods
For Asparagus schoberioides, division is usually my go-to method, as it’s reliable and gives you a mature plant piece right away. Stem cuttings can also work, but might take a bit more patience.
Division: The Most Reliable Route
- Gently excavate: Carefully dig up the entire plant from its pot or garden bed. Try not to disturb the roots too much.
- Locate the crowns: Look for distinct clumps or crowns where new shoots are emerging from the base. These are your divisions.
- Separate with care: Using your hands, or a clean, sharp knife if the clumps are stubborn, gently pull or cut apart the root ball, ensuring each division has a healthy root system and at least one good shoot.
- Pot them up: Plant each division in its own pot filled with your well-draining potting mix. Bury the base of the shoots just slightly below the soil line.
- Water gently: Water them in well, but avoid waterlogging.
Stem Cuttings: For the Adventurous
- Choose your cutting: Look for a healthy, non-flowering stem that’s about 4-6 inches long. Make a clean cut just below a leaf node (where a leaf meets the stem).
- Prepare the cutting: You can remove the lower leaves. If using rooting hormone, dip the cut end into it now.
- Plant the cutting: Insert the cut end into a pot filled with your potting mix. You can plant several cuttings in one pot, spacing them out.
- Create humidity: Cover the pot with a clear plastic bag or dome. This is crucial for keeping the cuttings moist until they root.
- Provide light: Place the pot in bright, indirect light.
The “Secret Sauce” (Pro Tips!)
Here are a couple of my tried-and-true tricks that often make all the difference:
- Bottom Heat is Your Friend: For stem cuttings, placing the pot on a heating mat (specifically designed for plants) can significantly speed up root development. It mimics the warmth of spring soil and encourages those stubborn little roots to emerge.
- Air Circulation is Key to Preventing Rot: While you want humidity for cuttings, don’t let the leaves of your cuttings or divisions sit directly in water in the soil. If water is pooling, gently tip the pot or add a little more dry mix. Good air flow around the base helps prevent fungal issues.
Aftercare & Troubleshooting
Once you see signs of new growth (tiny new leaves emerging!), your Asparagus schoberioides is likely on its way.
- Gradual Acclimation: If you used a plastic bag or dome, start gradually introducing your new plants to drier air by poking a few holes in the bag or lifting the dome for increasingly longer periods each day over a week.
- Consistent Moisture: Keep the soil consistently moist but never soggy. Think of it like a wrung-out sponge.
- Watch for the Signs: The most common pitfall is rot, which looks like mushy, dark stems at the soil line. If you see this, it’s usually a sign of overwatering or poor drainage. You might be able to salvage a healthy part of the stem if rot hasn’t spread too far. Yellowing leaves can also indicate too much direct sun or nutrient deficiency, but with fresh divisions or cuttings, it’s often just stress settling in – be patient!
A Gentle Encouragement
Propagating plants is a journey, my friends. There will be times when things go swimmingly, and other times when a cutting just doesn’t take. Don’t get discouraged! Learn from each experience, celebrate your successes, and remember that every plant you nurture, every new life you foster, brings a little more beauty into the world. So go ahead, get your hands in the soil, and enjoy the magic of watching Asparagus schoberioides multiply! Happy gardening!
Resource:
https://identify.plantnet.org/k-world-flora/species/Asparagus%20schoberioides%20Kunth/data