Oh, hello there! Come on in, pull up a chair. I’ve got a fresh pot of coffee brewing. We’re going to chat about a real gem today: Cyrtorchis henriquesiana.
Something Special About Cyrtorchis henriquesiana
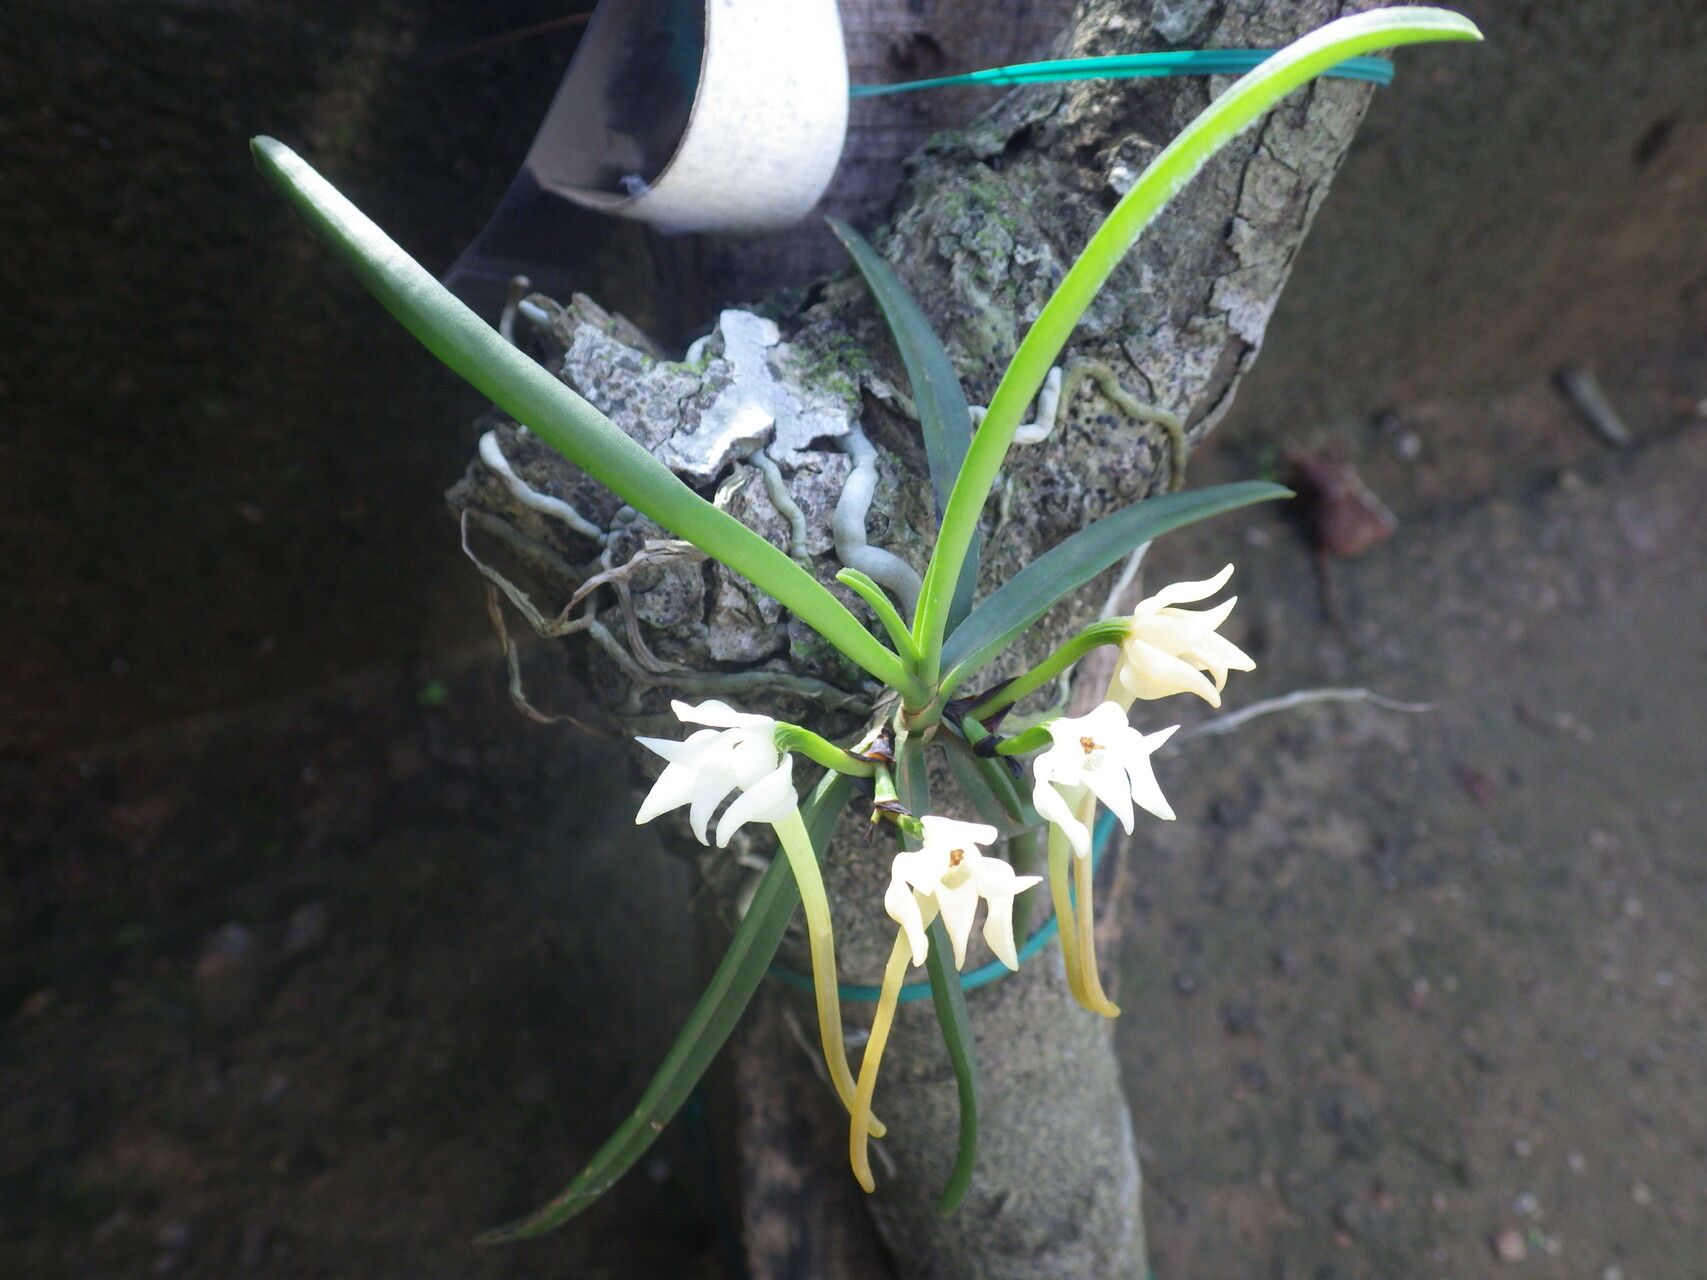
If you’re anything like me, you’ve probably admired the delicate beauty of Cyrtorchis henriquesiana. Its arching sprays of fragrant, star-shaped white flowers are simply breathtaking, and the subtle scent it releases is pure magic, especially in the evening. It’s one of those orchids that makes a statement without being overly flashy. Now, I’ll be honest, propagating orchids isn’t always as straightforward as, say, a succulent. Cyrtorchis henriquesiana can be a bit of a diva, so for absolute beginners, it might present a little challenge. But don’t let that deter you! With a little patience and the right approach, you’ll be rewarded with new little treasures.
When is the Best Time to Start?
The magical window for propagating Cyrtorchis henriquesiana is typically during its active growing season. For most of us, this means late spring through to early autumn. You’ll see the plant pushing out new shoots and growing vigorously then. This is when it has the most energy to dedicate to developing new roots. Avoid attempting propagation during its rest period, usually in the cooler, darker months.
What You’ll Need on Your Propagation Journey
Gathering your supplies before you start is always a good idea. It makes the whole process smoother and less stressful. Here’s what I usually have on hand:
- Sharp, sterile pruning shears or a clean knife: For making clean cuts. Sterilize with rubbing alcohol between each cut.
- Orchid bark mix: A high-quality, airy mix is crucial. I like a coarse grade for good drainage. Some growers swear by a blend of bark and perlite.
- Sphagnum moss: Good quality, long-fibered sphagnum moss is my go-to for rooting.
- Small pots or containers: Think 2-3 inch pots, or even reusable seedling trays with good drainage.
- Rooting hormone (optional): While not strictly necessary for Cyrtorchis henriquesiana, a bit of powdered rooting hormone can sometimes give young roots an extra boost. I use it sparingly.
- Clear plastic bags or a small greenhouse: For creating a humid environment.
- Watering can with a fine spray nozzle: To avoid disturbing delicate new growth.
- Labeling stakes and a waterproof marker: Don’t skip this! You’ll thank me later.
Bringing New Life: Propagation Methods
For Cyrtorchis henriquesiana, the most reliable method I’ve found is division. This orchid tends to grow in clumps, which makes it perfectly suited for this technique.
Method: Division
- Gently examine your orchid. Look for healthy, mature pseudobulbs (those swollen stem-like structures) that have at least two or three leaves and are attached to a lead growth. You’re looking for sections that can stand on their own.
- Prepare your workspace. Lay out your sterile tools and clean pots.
- Remove the orchid from its pot. Carefully ease the entire plant out. If it’s stuck, don’t force it. You might need to gently break the pot or carefully work a knife around the edges.
- Clean off excess old potting mix. Gently brush away as much of the old bark and moss as you can with your fingers or a soft brush. This helps you see the roots and rhizomes (the thick, creeping stem that connects the pseudobulbs) clearly.
- Identify division points. Look for natural separations between pseudobulbs along the rhizome. You want to make a clean cut that separates clumps, ensuring each new division has at least two healthy pseudobulbs and a good root system.
- Make the cut. Using your sterile shears or knife, carefully cut through the rhizome to separate the divisions. Be deliberate and try to injure the roots as little as possible. If you’re using rooting hormone, you can lightly dust the cut surface of the rhizome.
- Prepare the new divisions for planting. Trim away any dead or decaying roots. If you’ve got any damaged leaves, trim those off too.
- Pot up your new plants. Place each division in its own small pot. Position the pseudobulbs so they are just at the surface of the potting mix, or slightly above. Add your fresh orchid bark mix, filling in around the roots. Don’t pack the potting mix too tightly. You want good air circulation.
- Water gently. Water thoroughly, but gently, to settle the potting mix.
The “Secret Sauce”: My Insider Tips
Over the years, I’ve picked up a few tricks that seem to make all the difference with these sometimes fussy beauties.
- The humidity tent is your best friend. After potting, I immediately place each new division into a clear plastic bag that’s loosely secured around the pot, or I put them in a mini-greenhouse. This creates a humid environment that mimics their natural habitat. Ventilate it daily for a few minutes to prevent fungal issues.
- Bottom heat works wonders. If you have a seedling heat mat, placing your newly potted divisions on gentle bottom heat (around 70-75°F or 21-24°C) can significantly encourage root development. It’s like giving them a warm hug to get them going.
- Don’t overwater, even in the tent! While humidity is key, soggy roots lead to rot. Let the potting medium begin to dry out slightly between waterings. You can check by feeling the weight of the pot or gently probing the surface of the mix.
Aftercare and Troubleshooting: Giving Them the Best Start
Once your Cyrtorchis henriquesiana divisions are potted, they’ll need a bit of TLC.
Ongoing Care:
- Light: Place them in bright, indirect light. Think of the dappled shade you’d find under a rainforest canopy.
- Watering: Continue to keep them in that humid environment, but ensure good air circulation. Water when the potting mix starts to feel drier.
- Fertilizer: Once you see new growth and signs of active rooting (which can take several weeks or even months), you can introduce a very diluted orchid fertilizer (like a 1/4 strength) once a month.
Watch Out For:
The most common sign of trouble is rot. This usually appears as mushy, discolored pseudobulbs or roots, often accompanied by a foul smell. It’s usually a sign of overwatering and poor air circulation. If you spot rot, act quickly. Remove the affected parts immediately with your sterile tool, and repot into fresh, dry medium. You might also see shriveled pseudobulbs, which can indicate the plant is using up its stored reserves because it hasn’t developed enough roots yet. Just keep up the humidity and be patient.
Keep Growing!
Propagating Cyrtorchis henriquesiana is a journey that requires a little patience and a keen eye. Don’t get discouraged if your first attempt isn’t perfect. Each orchid has its own personality, and learning to read their cues is part of the fun. Celebrate the small victories, enjoy the process of nurturing these new plants, and soon you’ll have more of those beautiful, fragrant blooms to share! Happy growing!
Resource: