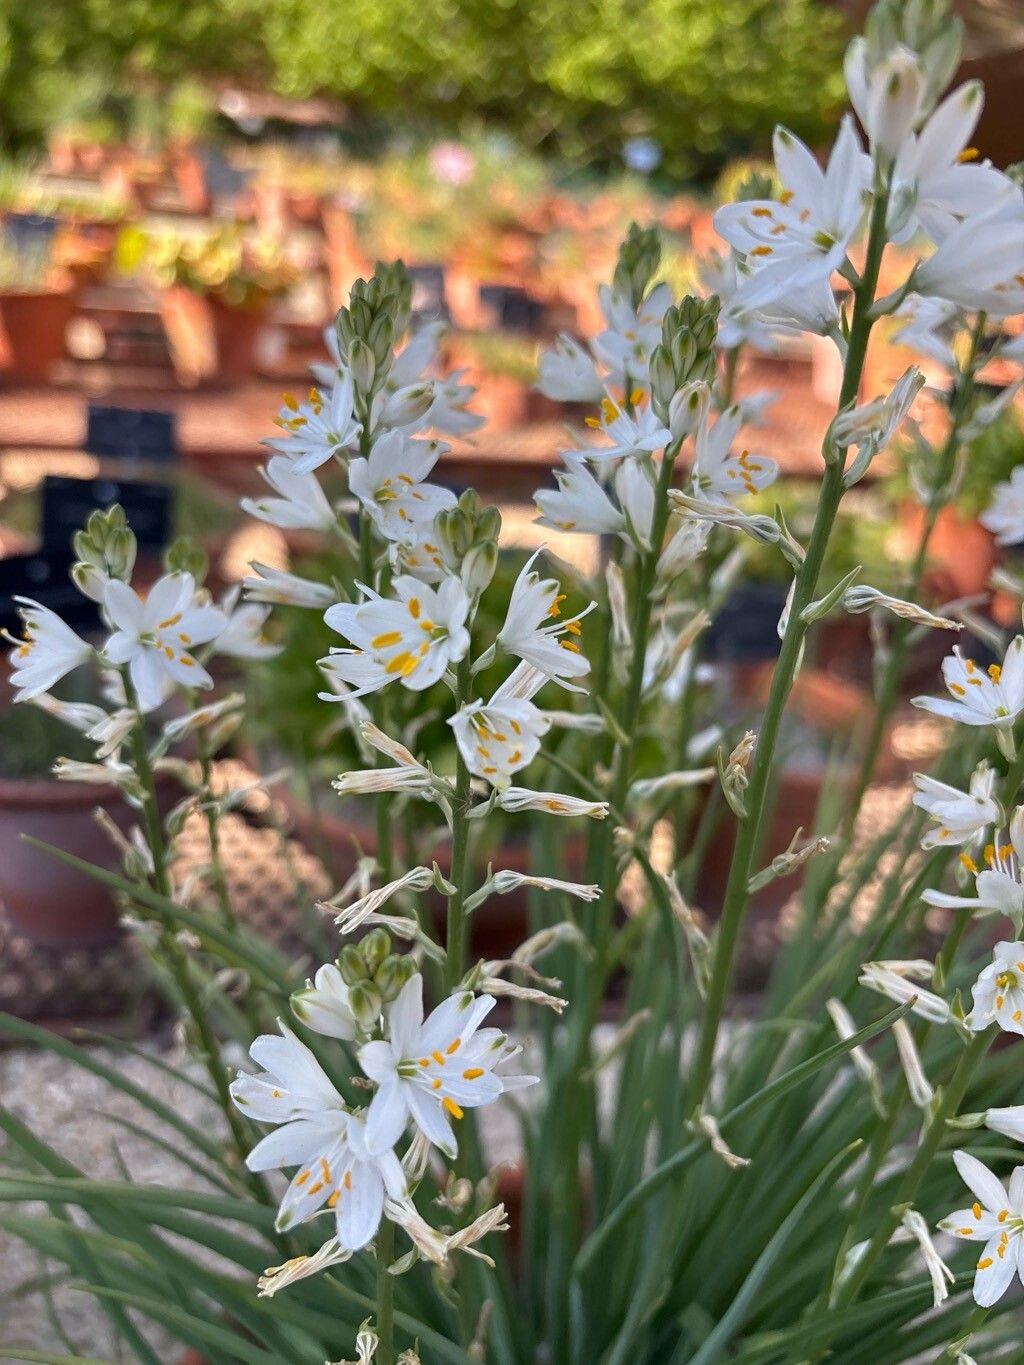
Oh, hello there! Come on in and pull up a chair. Let’s talk about a truly delightful plant that’s been bringing a smile to my face for years: Anthericum baeticum. Sometimes known as the Spider Plant’s European cousin, this beauty boasts gracefully arching leaves, often with a lovely variegated pattern. And the bonus? It throws out delicate, star-shaped white flowers that are just charming.
Propagating Anthericum baeticum is such a joy. It’s a wonderful way to fill your garden or pots with more of these graceful plants without spending a dime. Plus, watching those little plantlets grow and develop is incredibly satisfying. And for those of you just starting out? Good news! This plant is wonderfully forgiving. I’d say it’s a fantastic choice for beginners looking to dip their toes into propagation.
The Best Time to Start
For the absolute highest success rate, I always find late spring through early summer to be the sweet spot. This is when the plant is really in its vigorous growing phase. You’ll see plenty of those lovely “spiderettes” or plantlets unfurling from the flower stalks. That’s your cue!
Supplies You’ll Need
You don’t need a whole lot to get started, thankfully! Here’s what I usually have on hand:
- Sharp pruning shears or scissors: Cleanliness is key here!
- Small pots or trays: Whatever you like to start your babies in.
- Well-draining potting mix: A good blend of peat or coco coir, perlite, and a bit of compost works wonders.
- Rooting hormone (optional but helpful): I sometimes use a powder or gel.
- Watering can with a fine rose: Gentle watering is a must.
- (For division) A garden fork or trowel: To gently tease apart the roots.
Propagation Methods
Anthericum baeticum is a champion at reproducing itself. You’re in luck because it’s pretty straightforward.
Method 1: The Speedy Spiderettes (Plantlets)
This is my absolute favorite way to propagate these plants. It’s so easy and rewarding!
- Identify the plantlets: Look for the little baby plants that dangle from the ends of the flower stalks. They usually have tiny leaves already forming.
- Give them a little encouragement: The plantlets will often already have tiny root nubs. If they don’t, don’t worry, they usually develop them quickly.
- Gently separate: You can either wait until the plantlet has visibly started to form roots or gently try to tease it away from the mother plant. Sometimes they detach with a gentle tug. If you need to cut the stalk connecting the plantlet, use your clean shears.
- Plant them up: Fill your small pots with your well-draining mix. You can dip the base of the plantlet in rooting hormone if you’re using it, then simply plant the base of the plantlet into the soil, burying the tiny roots or the start of its stem.
- Water gently: Give them a good, light watering. Keep the soil consistently moist, but never waterlogged.
Method 2: Division for Mature Plants
If you have a larger, more mature plant that’s starting to look a bit crowded, division is a great option. This gives you several new plants from one!
- Gently remove the plant from its pot: Turn the pot on its side and ease the plant out. If it’s stuck, give the pot a few gentle taps.
- Assess the root ball: Look for natural divisions. You’ll see clumps of leaves and roots that seem to be separate entities.
- Separate with care: This is where your garden fork or trowel comes in handy. Gently work it down between the root divisions, teasing them apart. Try to keep as many roots intact as possible on each new section. If it’s really tangled, you can use your clean shears to cut through tough roots, but be gentle.
- Replant the divisions: Pot up each division into its own pot with fresh, well-draining soil. Water them in well.
The “Secret Sauce” (Pro Tips)
Here are a couple of things I’ve learned over the years that seem to make a real difference:
- Don’t let the leaves touch the water (if you’re tempted to water propagate): While Anthericum baeticum is often propagated by plantlets in soil, some might try water. If you do, ensure only the roots touch the water. Those leaves sitting in stagnant water are a fast track to rot. I personally prefer soil propagation for this plant; it’s just easier and less prone to issues.
- Bottom heat is your friend: For both methods, I’ve found that placing the pots on a gentle heat mat can speed up root development significantly. It mimics the warmth of spring and encourages roots to form more quickly.
Aftercare & Troubleshooting
Once those little ones are planted, show them some love!
- Keep them moist: The key is to maintain consistent, but not soggy, moisture. Check the soil every day or two. If the top inch feels dry, it’s time to water.
- Bright, indirect light: They love bright conditions, but direct sun can scorch their delicate leaves, especially when they’re just starting out.
- Patience is a virtue: It can take a few weeks for you to see new growth. Don’t despair if it’s not immediate!
- Watch for rot: The biggest sign something is wrong is if the plantlet turns mushy and brown, especially at the base. This is usually a sign of overwatering or poor drainage. If you see this, gently remove the affected part and check your watering habits and soil.
And there you have it! Propagating Anthericum baeticum is such a rewarding endeavor. Take your time, enjoy the process, and relish in the knowledge that you’re bringing more green goodness into your home. Happy propagating!
Resource:
https://identify.plantnet.org/k-world-flora/species/Anthericum%20baeticum%20(Boiss.)%20Boiss./data