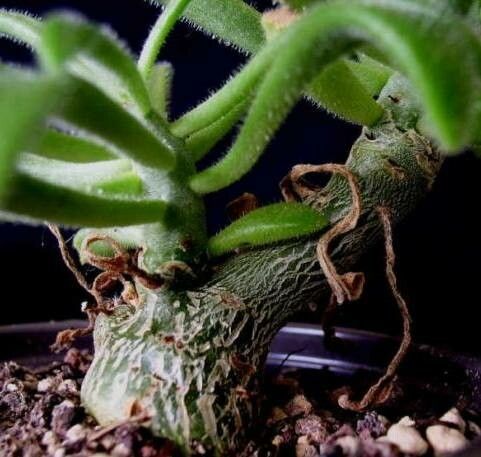
Hello, fellow plant enthusiasts! Today, we’re going to dive into the wonderfully quirky world of Tylecodon leucothrix. If you’ve ever seen one of these succulents, you know they possess a unique charm. Their fuzzy, white stems and the way they’re often trained into elegant shapes make them a real showstopper in any collection. And the best part? You can share that beauty by propagating them!
Propagating Tylecodon leucothrix can feel a little like magic. Watching a tiny cutting transform into a thriving plant is incredibly satisfying. Now, I won’t lie, this isn’t the absolute easiest succulent to propagate for a complete beginner, but with a little care and attention, it’s definitely achievable and oh-so-worth it.
The Best Time to Start
The sweet spot for propagating Tylecodon leucothrix is during their active growing season. This typically falls in late spring through early summer. During this period, the plants have more energy to put into growing new roots, giving your cuttings the best chance of survival. You’ll also have success with pieces taken in early autumn, as long as you can provide warm conditions for rooting.
Supplies You’ll Need
Before we get our hands dirty, let’s gather our tools. Having everything ready makes the process so much smoother.
- Sharp, clean pruning shears or a sharp knife: We need clean cuts to prevent disease.
- Well-draining potting mix: A cactus and succulent mix is ideal. You can also create your own by mixing equal parts potting soil, perlite, and coarse sand.
- Small pots or trays: Choose something with drainage holes.
- Rooting hormone (optional but recommended): This can give your cuttings a welcome boost.
- Gloves: Some succulents can be a bit sticky or have sap that can irritate skin.
- Watering can or spray bottle: For gentle watering.
Propagation Methods
Tylecodon leucothrix is most commonly propagated through stem cuttings. It’s straightforward and often very successful.
Step-by-Step with Stem Cuttings:
- Take your cuttings: Using your clean shears or knife, select a healthy stem. Cut a piece that is at least 3-4 inches long. Try to get a piece that has a few sets of leaves or nodes.
- Allow to callus: This is a critical step! Lay your cuttings on a dry surface in a well-ventilated area, away from direct sunlight, for 3-5 days. This allows the cut end to dry and form a protective callus. Do not skip this! It prevents rot.
- Prepare the pot: Fill your small pot with your well-draining potting mix.
- Apply rooting hormone (optional): Dip the callused end of your cutting into rooting hormone powder, tapping off any excess.
- Plant the cutting: Make a small hole in the soil with your finger or a pencil. Insert the callused end of the cutting into the hole. Gently firm the soil around it.
- Water sparingly: Water lightly, just enough to moisten the soil. You don’t want the soil to be soggy.
The “Secret Sauce” (Pro Tips)
Here are a couple of things I’ve learned over the years that can really improve your success rate:
- Don’t rush it: Resist the urge to water your cuttings constantly. They have no roots yet and will rot if kept too wet. Let the soil dry out between waterings. I usually wait about a week after planting before the first light watering.
- Bottom heat is your friend: If you can, place your pots on a heating mat designed for plants. This gentle warmth from below encourages root development much faster than ambient room temperature alone.
Aftercare & Troubleshooting
Once your cuttings are planted, patience is key. You’ll know they’re rooting when you see new growth or feel a gentle resistance when you tug on the cutting.
Caring for Your New Plant:
- Light: Once roots have formed, gradually introduce your new plant to brighter light. They still appreciate indirect light for a while before moving to more direct sun.
- Watering: Water when the soil is completely dry. This might be every week or two, depending on your climate and pot size.
- Potting up: When your new plant has established a good root system and shows consistent growth, you can transplant it into a slightly larger pot.
Troubleshooting:
The most common issue you’ll encounter is rot. If your cutting turns mushy, black, or smells off, it’s likely rotted. This usually happens from overwatering or not allowing the cutting to callus properly. Don’t despair! Just discard the rotten piece and try again, making sure to follow those callus and watering steps carefully. Sometimes, a cutting might just fail to root. It happens! It’s part of the learning process.
A Little Encouragement
So there you have it – a step-by-step guide to propagating your very own Tylecodon leucothrix. Remember, gardening is a journey, and every plant you nurture is a win. Be patient with these quirky beauties, enjoy the process of watching them grow, and soon you’ll be sharing your fuzzy treasures with friends. Happy propagating!
Resource: