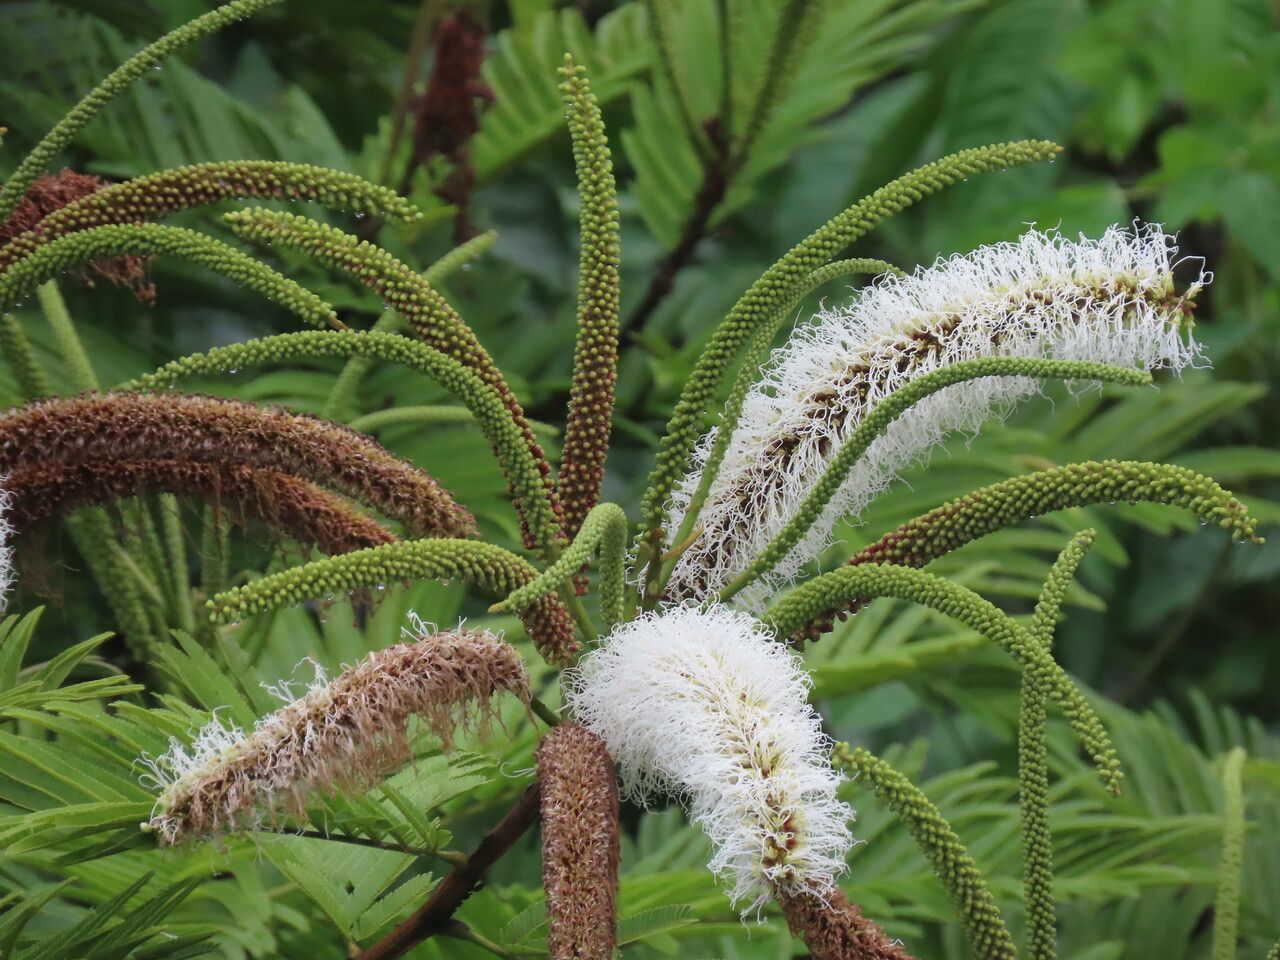
Oh, hello there, fellow plant enthusiast! It’s so lovely to have you join me today. We’re going to talk about a rather special plant, one that truly captivates with its unique beauty: Pentaclethra macroloba. Maybe you’ve seen its glossy, compound leaves or the intriguing seed pods, and thought, “I’d love to have more of those!” Well, you’re in luck, because propagating this one can be a wonderfully rewarding journey. It’s not going to be the easiest plant for an absolute beginner to tackle, but with a little care and attention, you can absolutely achieve success. And honestly, watching a new plant sprout from a piece of an old one? There’s just nothing quite like it.
When’s the Magic Moment?
For Pentaclethra macroloba, timing is everything. The best window to get your propagation efforts off to a flying start is usually in the late spring or early summer. This is when the plant is in a vigorous growth phase, meaning it’s actively producing new shoots and has the energy reserves to readily root. Look for stems that have started to mature a bit – they’ll be firm but not woody. You’re essentially aiming for that sweet spot, that perfect point of transition where the new growth has hardened off just enough.
Gathering Your Arsenal
Before we dive in, let’s make sure you have everything you need. A little preparation goes a long way, and this list will ensure you’re ready to roll.
- Sharp Pruning Shears or a Clean Knife: For making clean cuts, which is crucial.
- Well-Draining Potting Mix: A blend of peat moss, perlite, and a bit of compost works wonders. You want it to hold moisture without becoming waterlogged.
- Rooting Hormone (Optional but Recommended): This can significantly boost your success rate. Look for one formulated for woody or semi-hardwood cuttings.
- Small Pots or Propagation Trays: Clean containers are a must to prevent disease.
- Plastic Bag or Humidity Dome: To keep those precious cuttings from drying out.
- Watering Can with a Fine Rose: For gentle watering.
- Labels and a Pen: Trust me, you’ll want to know what’s what!
Let’s Get Our Hands Dirty!
While Pentaclethra macroloba can be a bit particular, we’ll focus on the method that generally gives the best results: stem cuttings.
- Select Your Cuttings: As I mentioned, look for healthy, semi-hardwood stems in late spring or early summer. You want cuttings that are about 4-6 inches long. Make your cut just below a leaf node (where a leaf attaches to the stem). This is where the magic of rooting really happens.
- Prepare the Cuttings: Gently remove any lower leaves. You want to expose a few leaf nodes, as this is where roots will emerge. If your cutting has very large leaves, you can cut them in half horizontally. This reduces water loss through transpiration while still allowing for photosynthesis.
- Apply Rooting Hormone: Dip the cut end of the stem into the rooting hormone powder, tapping off any excess. If you haven’t used powder before, a gel or liquid works just as well. Just follow the package instructions.
- Plant Your Cuttings: Fill your pots or trays with your prepared potting mix. Make a small hole in the center with your finger or a pencil. Gently insert the prepared end of the cutting into the hole, ensuring at least one or two leaf nodes are buried in the soil. Firm the soil gently around the base of the cutting.
- Water Gently: Water thoroughly after planting. You want the soil to be moist but not saturated.
The “Secret Sauce” You Won’t Find Everywhere!
Here are a few things I’ve learned over the years that can make all the difference with trickier propagations like this:
- Bottom Heat is Your Best Friend: If you can, place your pots on a heated propagator mat. This gentle warmth from below encourages root development much faster and more reliably than ambient room temperature alone. It mimics the conditions of spring soil heating up.
- Don’t Skimp on the Humidity: Once your cuttings are in their pots, pop them inside a clear plastic bag or cover them with a humidity dome. Make sure the leaves don’t touch the sides of the plastic, as this can encourage rot. The goal is to create a mini greenhouse environment to keep moisture levels high.
- Watch for the “Tug Test”: After a few weeks, you can gently tug on a cutting. If you feel a slight resistance, congratulations! You’ve got roots!
Nurturing Your New Sprouts
Once you see signs of new growth or pass the “tug test,” it’s time for careful nurturing.
- Gradual Acclimatization: When your cuttings have developed a good root system, gradually introduce them to less humid conditions. Start by opening the plastic bag or dome for a few hours each day, increasing the time over a week or two. This helps them adjust to normal room humidity.
- Continued Watering: Keep the soil consistently moist but never soggy. Overwatering is still the biggest enemy at this stage.
- Light: Place your new plants in a bright spot with indirect light. Avoid direct sun, which can scorch tender new leaves.
- Troubleshooting Rot: If you notice blackening stems or mushy leaves, it’s likely rot. This is usually caused by too much moisture and poor air circulation. It’s heartbreaking, but sometimes you have to discard affected cuttings and try again, focusing on better drainage and allowing the soil to dry out slightly between waterings.
And there you have it! Propagating Pentaclethra macroloba is a process that requires patience and a bit of observation. Don’t be discouraged if not every cutting takes. Gardening is a journey, and each attempt teaches you something new. Enjoy the process of watching these little wonders grow and bloom! Happy planting!
Resource: