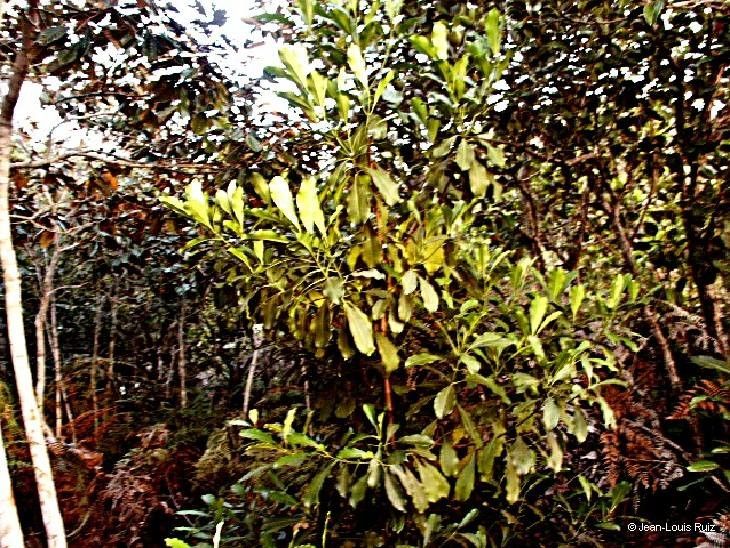
Hello dear gardeners, and welcome back to the cozy corner of our shared green obsession! Today, we’re diving into the wonderful world of Ochrosia sevenetii. You may know it by its common name, the New Caledonia Screw Pine, though it’s not a true pine. It’s that stunning plant with the architectural, spiraling leaves and, if you’re lucky, it might even offer up some beautifully fragrant flowers. Propagating Ochrosia sevenetii can be incredibly rewarding. You’ll have the joy of creating new life from an existing treasure, and trust me, there’s a unique satisfaction in watching a tiny cutting transform into a thriving plant. For beginners, I’d say it’s moderately easy—a little patience is key, but it’s certainly achievable!
The Best Time to Start
I’ve found that spring and early summer are absolutely the sweet spot for propagating Ochrosia sevenetii. This is when the plant is actively growing, and its energy levels are high. This natural surge in growth really helps cuttings establish themselves much faster and with a higher success rate. Think of it as giving them the best possible start with plenty of “oomph.”
Supplies You’ll Need
Gathering your tools ahead of time makes the whole process so much smoother. Here’s what you’ll want to have on hand:
- Sharp pruning shears or a clean, sharp knife: For making clean cuts.
- Rooting hormone powder or gel: This isn’t strictly essential, but it can significantly speed up root formation and improve success.
- Well-draining potting mix: A cactus/succulent mix or a blend of equal parts potting soil, perlite, and coarse sand works beautifully. You want to avoid anything too heavy that retains excess moisture.
- Small pots or seed trays: Clean thoroughly before use.
- Plastic bags or a propagation dome: To create a humid microclimate.
- Watering can or spray bottle: For gentle misting.
- Pot labels: To keep track of your new babies!
Propagation Methods: Stem Cuttings
This is my go-to method for Ochrosia sevenetii. It’s reliable and you can get quite a few new plants from a mature specimen.
- Select a healthy stem: Look for a firm, mature stem that is at least six inches long. Avoid anything that looks soft, damaged, or too young and spindly.
- Make the cut: Using your clean shears or knife, make a clean cut just below a leaf node. A leaf node is that little bump where a leaf attaches to the stem. This is where roots are most likely to form.
- Prepare the cutting: Gently remove any lower leaves, leaving just two or three at the top. This reduces moisture loss. If the leaves are very large, you can cut them in half horizontally to still allow for photosynthesis without taxing the cutting too much.
- Apply rooting hormone (optional but recommended): Dip the cut end of the stem into the rooting hormone, tapping off any excess.
- Plant the cutting: Moisten your well-draining potting mix and fill your pots or trays. Make a small hole in the center with your finger or a pencil. Insert the cut end of the stem into the hole, making sure a few nodes are buried below the surface. Gently firm the soil around the cutting.
- Create a humid environment: Water the soil gently. Then, cover the pot with a clear plastic bag or place it under a propagation dome. This traps humidity, which is crucial for cuttings to root without drying out. Secure the bag with a rubber band over the pot rim.
The “Secret Sauce” (Pro Tips)
Here are a few little tricks I’ve learned over the years that can make a big difference:
- Think “clean and sharp”: This can’t be stressed enough. A dull tool will crush the stem tissues, making it harder for the cutting to heal and root. Always use clean, sharp secateurs or a knife to avoid introducing diseases and ensure a clean wound.
- Don’t be afraid of a little heat: Ochrosia sevenetii loves warmth, and so do its roots. Placing your pots on a heated propagation mat can dramatically speed up the rooting process. Just be sure it’s set to a gentle, consistent warmth, not scorching hot.
- Patience is indeed a virtue (especially with this one): While some plants root in weeks, Ochrosia sevenetii can take a bit longer. Don’t despair if you don’t see immediate activity! I typically wait at least 4-8 weeks before I start gently tugging to check for resistance.
Aftercare & Troubleshooting
Once you’ve got your cuttings potted up, here’s how to keep them happy:
- Location: Place the pots in a warm spot with bright, indirect light. Avoid direct sun, which can scorch the tender cuttings.
- Watering: Keep the soil consistently moist but not soggy. Mist the leaves occasionally, especially if you notice them looking a bit tattered. If you’re using a plastic bag, open it for an hour or so every few days to allow for air exchange and prevent fungal issues.
- Rooting: You’ll know your cutting has rooted when you see new leaf growth at the top. A gentle tug will also reveal resistance from developing roots. Once roots are established, you can carefully remove the plastic bag or dome and gradually acclimate the new plant to your home environment.
- Troubleshooting: The most common issue is rot, which usually happens from overwatering and poor drainage. If you see your cutting turning black and mushy, it’s likely beyond saving. Ensure your soil is super well-draining and avoid letting the pot sit in standing water. If your cutting simply shrivels and dries out, it’s likely due to lack of humidity or insufficient light.
There you have it! Propagating Ochrosia sevenetii is a journey that’s absolutely worth embarking on. Remember to be patient, observe your cuttings, and celebrate every little sign of progress. Happy propagating, and may your home soon be filled with these beautiful architectural gems!
Resource:
https://identify.plantnet.org/k-world-flora/species/Ochrosia%20sevenetii%20Boiteau/data