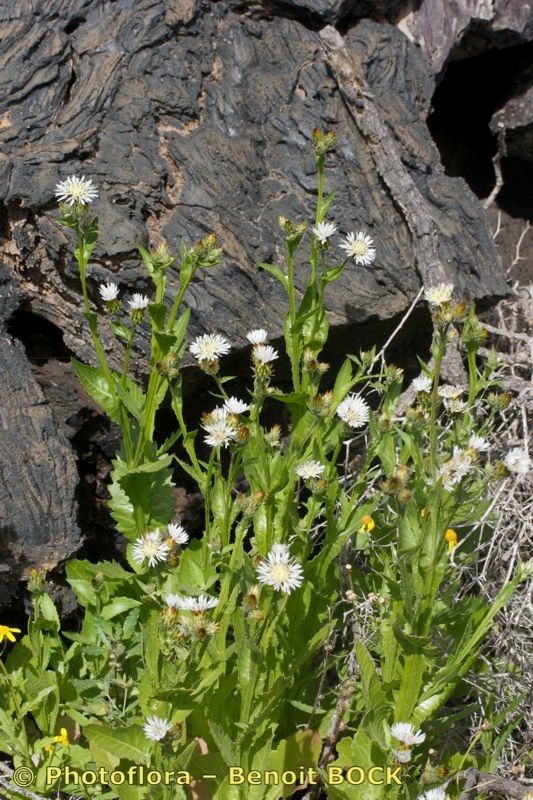
Hello there, fellow garden enthusiasts! If you’ve ever swooned over the delicate, daisy-like blooms of Volutaria bollei, you’re not alone. Its ethereal beauty and cheerful sprawl make it a real charmer in any garden, and honestly, who wouldn’t want more of that? The good news is, propagating Volutaria bollei is a joy that’s quite within reach, even for those of you just dipping your toes into the wonderful world of plant propagation.
The Best Time to Start
For the absolute best success with Volutaria bollei, I’ve found that late spring to early summer is your golden window. This is when the plant is actively growing, full of vigor, and has plenty of healthy, new stems to work with. Starting during this period means your cuttings will have a good long growing season ahead of them to establish themselves.
Supplies You’ll Need
Gathering your tools beforehand makes the whole process so much smoother. Here’s what I always have on hand:
- Sharp, clean pruning shears or a sharp knife: Crucial for making clean cuts, which are vital for successful rooting.
- Rooting hormone (optional, but recommended): A little boost can really encourage root development. I like the powdered kind.
- Well-draining seed starting mix or a blend of perlite and peat moss: This is key. We want something that dries out fairly quickly but still holds a little moisture.
- Small pots or seed trays: Clean containers are a must to prevent disease.
- Plastic bags or a propagation dome: To create a humid environment.
- Watering can or spray bottle: For gentle watering.
- Labels: To keep track of what you’re propagating and when.
Propagation Methods
Volutaria bollei is wonderfully amenable to stem cuttings. It’s straightforward and gives you a great sense of accomplishment when you see those little roots appearing.
Stem Cuttings:
- Take Your Cuttings: On a healthy, non-flowering stem, locate a section about 4-6 inches long. Make a clean cut just below a leaf node (the little bump where leaves emerge). This is where the magic happens for root formation.
- Prepare the Cuttings: Gently remove the leaves from the bottom half of the cutting. You want to expose those nodes where roots will form. Leave just a few leaves at the top to help the cutting photosynthesize. If the remaining leaves are very large, I sometimes give them a half-cut to reduce water loss.
- Apply Rooting Hormone (Optional): Dip the cut end of the stem into your rooting hormone, tapping off any excess.
- Plant Your Cuttings: Fill your small pots or trays with your prepared, moistened potting mix. Make a small hole with a pencil or your finger and gently insert the cutting, firming the soil around it.
- Create a Humid Environment: Water gently from the bottom, if possible, or mist the cuttings lightly. Then, cover the pots loosely with a plastic bag or a propagation dome. This traps moisture, creating a mini-greenhouse.
The “Secret Sauce” (Pro Tips)
Now, for a few little nuggets of wisdom I’ve picked up over the years:
- My absolute favorite trick is to use bottom heat. A simple seedling heat mat placed under your propagation trays can significantly speed up root formation. The warmth at the base of the cutting encourages it to send out roots much faster.
- When you’re misting or watering your cuttings inside their humid enclosure, try to avoid getting water on the leaves directly. Water sitting on leaves can sometimes encourage fungal issues, and we want our little ones to be healthy and happy.
- Don’t be tempted to pull up on a cutting to see if it has roots! You could damage the delicate new growth. Gentle tugs are bad. Instead, watch for new leaf growth – that’s your surest sign of successful rooting.
Aftercare & Troubleshooting
Once you’ve got cuttings tucked into their pots, here’s how to keep them thriving:
- Location: Place your pots in a bright spot, but out of direct, harsh sunlight. Too much sun will scorch those tender new cuttings.
- Watering: Keep the soil consistently moist but not soggy. Check the soil surface with your finger; if it feels dry, it’s time to water gently. Always remove excess water from saucers.
- Ventilation: After a week or two, start lifting the plastic bag or dome for a few minutes each day to allow for air circulation. Gradually increase this time.
- Hardening Off: Once your cuttings have developed a good root system (you’ll be able to feel some resistance when you tug gently, or see roots peeking from drainage holes), it’s time to acclimate them to normal conditions. This means removing the humidity cover completely and slowly introducing them to more air and less direct sun for about a week before transplanting into slightly larger pots.
The most common issue you might encounter is rot. If you see mushy stems or wilting that doesn’t seem to be from dehydration, it’s usually a sign of too much moisture and not enough air circulation. If you spot it early, you might be able to save the cutting by discarding the rotted parts and ensuring better drainage and airflow. Overwatering is the biggest culprit here, so err on the side of letting the soil dry out just a touch between waterings.
A Little Patience Goes a Long Way
Propagating plants is a bit like magic, isn’t it? Watching a tiny piece of stem transform into a whole new plant is incredibly rewarding. Be patient with your Volutaria bollei cuttings, trust the process, and enjoy the journey. Happy propagating!
Resource: