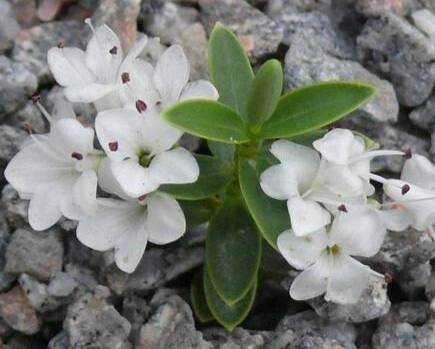
Oh, Veronica elliptica! What a beauty. Those lovely spikes of blue, sometimes pink or white, are such a cheerful addition to any garden border. They dance in the breeze, attracting all sorts of pollinators. And the best part? You can easily have more of them!
Propagating Veronica elliptica is incredibly rewarding. You get to watch a tiny piece of your beloved plant transform into a whole new specimen. For those of you just dipping your toes into the gardening world, I’m happy to tell you that Veronica elliptica is quite forgiving. You’ll likely have success with this one.
The Best Time to Start
The sweet spot for propagating Veronica elliptica is late spring or early summer. This is when the plant is actively growing and buzzing with energy. You want to take cuttings from current year’s growth that is firm but not woody. Think pencil-thick, flexible stems.
Supplies You’ll Need
Gathering your supplies beforehand makes the whole process smoother. Here’s what you’ll want to have on hand:
- Sharp pruning shears or a clean, sharp knife: For taking clean cuttings.
- Rooting hormone (optional but recommended): A little boost can significantly improve success rates.
- Seed starting mix or a well-draining potting mix: A mix of perlite and peat moss works beautifully.
- Small pots or seed trays: Clean ones are essential to prevent disease.
- Plastic bags or domes: To create a humid environment.
- Water: For watering and possibly water propagation.
- Labels and a marker: To keep track of your new plants!
Propagation Methods
I find two methods work wonderfully for Veronica elliptica: stem cuttings and division. Let’s dive in.
Stem Cuttings
This is my go-to for Veronica elliptica. You can get quite a few new plants from just one!
- Take Your Cuttings: Using your clean shears, take stem cuttings that are about 4-6 inches long. Look for healthy, non-flowering stems if possible. Make your cut just below a leaf node (where the leaves attach to the stem).
- Prepare the Cuttings: Gently remove the lower leaves from the cutting, leaving just the top two sets. This prevents them from rotting in the soil and encourages the plant to focus its energy on root development.
- Apply Rooting Hormone (Optional): Dip the cut end of each stem into your rooting hormone product. Tap off any excess.
- Pot Them Up: Fill your small pots with your well-draining potting mix. Make a small hole in the center of the soil with your finger or a pencil.
- Insert the Cuttings: Place the prepared cutting into the hole, ensuring the leaf nodes are buried. Gently firm the soil around the base of the cutting.
- Water Them In: Water the soil gently but thoroughly to settle it around the cuttings.
- Create Humidity: Cover the pots loosely with a plastic bag or place them in a small propagator with a lid. This keeps the humidity high, which is crucial for cuttings to root.
Division
This method is perfect when your Veronica elliptica has grown into a lovely clump.
- Dig Up the Plant: In early spring, before it really takes off, carefully dig up your entire Veronica elliptica clump.
- Loosen the Soil: Gently shake or brush away as much soil as you can from the roots.
- Separate the Sections: You can usually pull the clump apart with your hands. If it’s a bit stubborn, a clean trowel or two sharp knives can help you gently divide the root ball. Aim for sections that have healthy roots and at least a few stems.
- Replant Immediately: Replant your new divisions into their new homes, whether that’s back in the garden or into pots for now. Water them in well.
The “Secret Sauce”
Here are a couple of things I’ve learned over the years that really make a difference:
- The “No Touching” Rule: If you’re doing water propagation for any reason (though I find soil cuttings more reliable for Veronica elliptica), make sure absolutely no leaves are submerged in the water. Leaves rot very quickly and will infect the entire cutting.
- Bottom Heat is Your Friend: For stem cuttings, placing your pots on a gentle heat mat can dramatically speed up root formation. It mimics the warmth of spring soil and gives those roots a real nudge to start growing. You don’t need it scorching hot, just a gentle warmth.
Aftercare & Troubleshooting
Once your cuttings have been in their humid environment for a few weeks, you might start to see roots! You can test for this by gently tugging on a cutting; if there’s resistance, roots have formed. As soon as you see good root development, it’s time to acclimate them to normal humidity. Gradually lift the plastic bag for a few hours each day over a week.
Once they are well-rooted and have a decent amount of top growth, you can pot them into slightly larger pots with fresh potting mix or plant them directly into their garden spots. Keep them watered, especially during dry spells.
The main issue you might encounter is rot. This usually happens if the cuttings are kept too wet or their environment is not well-ventilated. If you see a cutting becoming mushy and brown, sadly, it’s probably best to discard it to prevent it from spreading.
A Encouraging Closing
Don’t be discouraged if your first few attempts aren’t perfect. Gardening is all about learning and experimenting! Be patient with your little Veronica cuttings. Watch them, care for them, and soon you’ll have a whole garden full of these delightful blooms. Happy propagating!
Resource:
https://identify.plantnet.org/k-world-flora/species/Veronica%20elliptica%20G.Forst./data