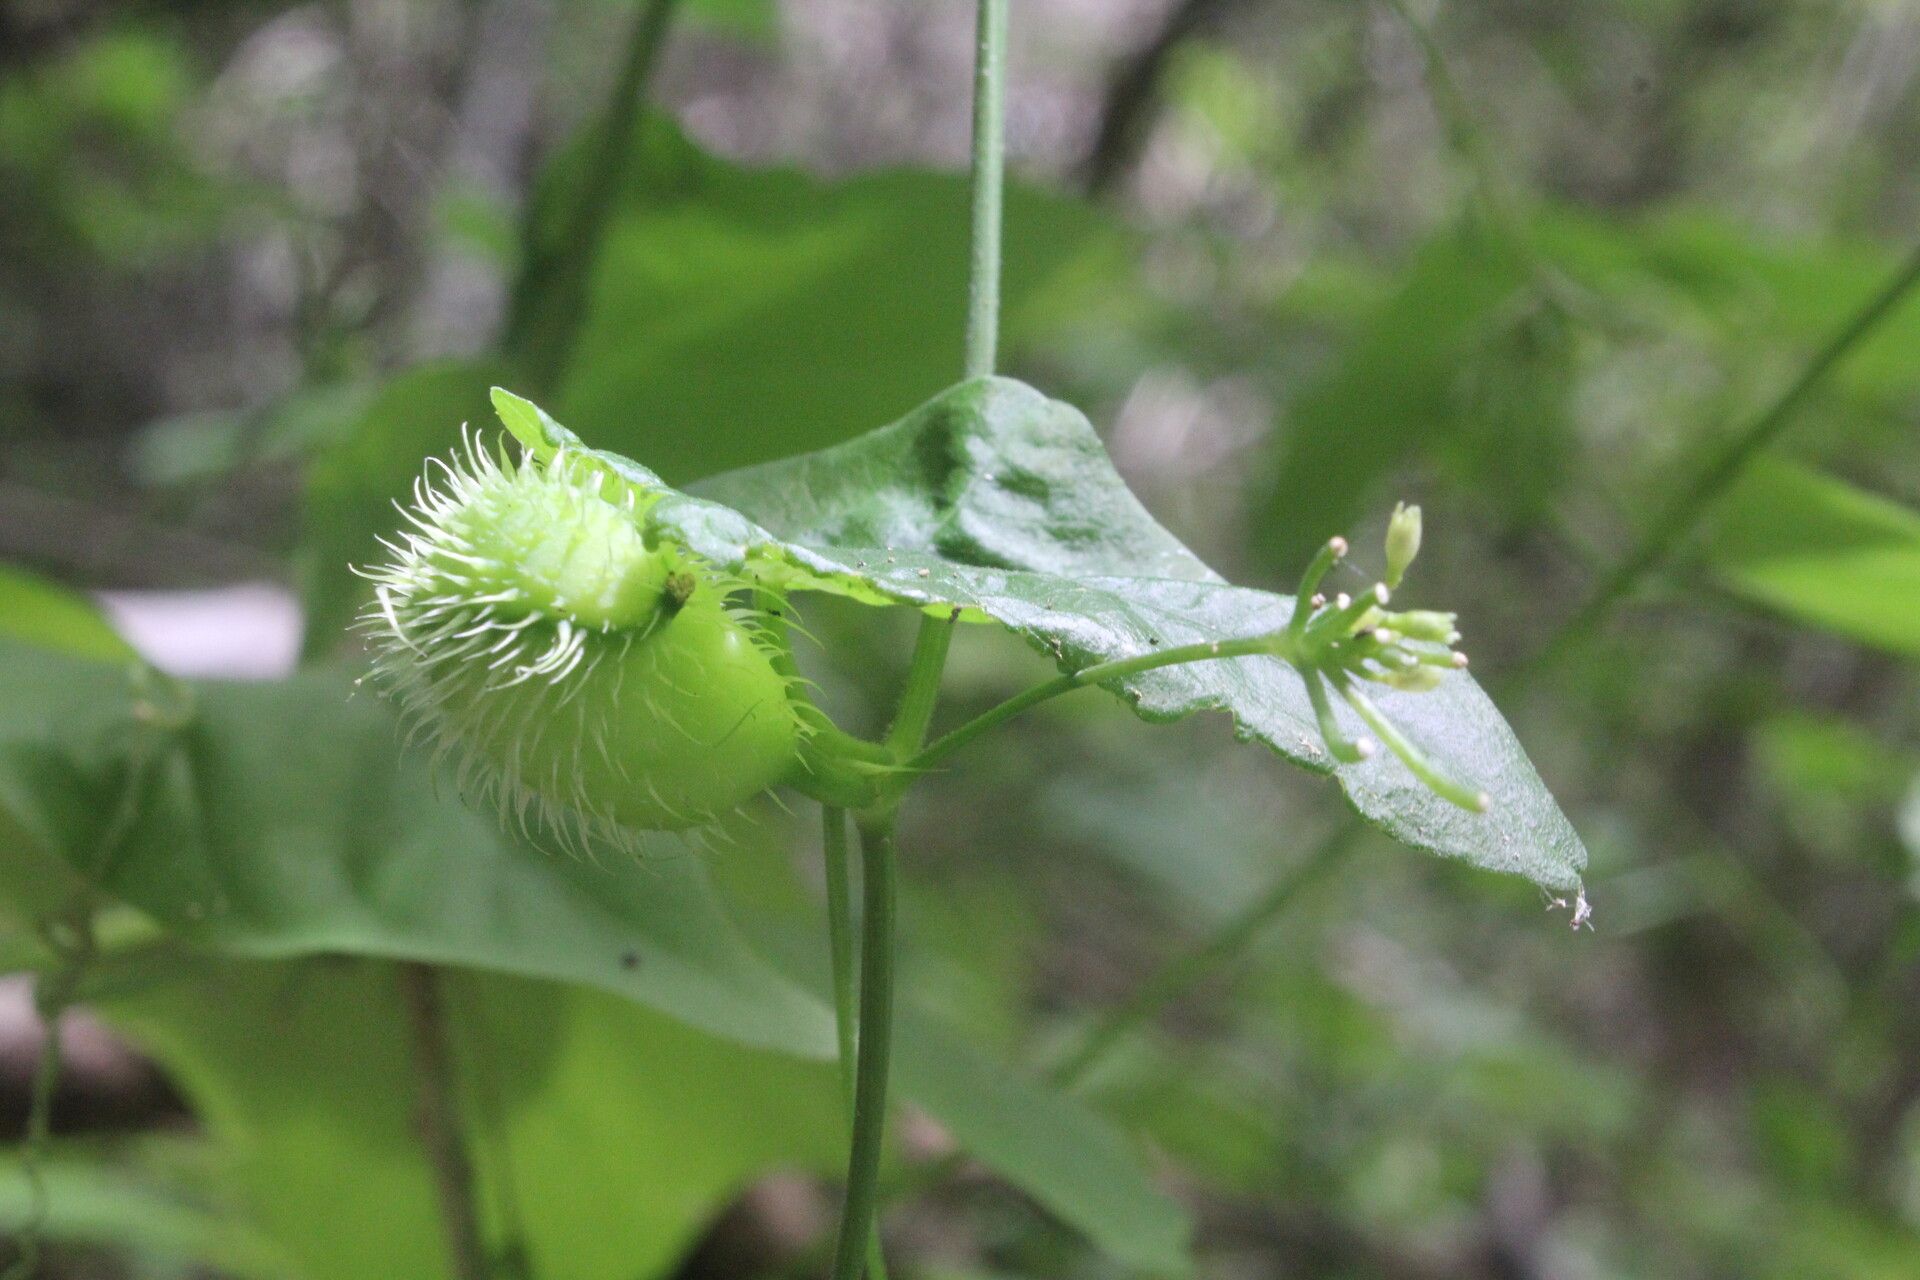
Hello there, fellow plant lovers! Today, I want to chat about a truly fascinating plant that I’ve had the joy of growing for years: Cyclanthera carthagenensis. You might know it by its common name, the “Lantern Cucumber,” and oh, what a charmer it is! It’s a vigorous climber, producing these peculiar, lantern-shaped fruits that are not only an eye-catcher but also edible! Their slightly fuzzy texture and mild, cucumber-like flavor make them a unique addition to salads and other dishes.
Propagating Cyclanthera carthagenensis is incredibly rewarding. It’s a fantastic way to share this unusual plant with friends or simply to ensure you have a steady supply for your own garden. And the good news? If you’re new to the propagation game, you’re in luck! This plant is generally quite forgiving and relatively easy to start.
The Best Time to Start
For the absolute best success rates, I always recommend starting your Cyclanthera carthagenensis propagation in late spring or early summer. This is when the plant is in its active growing phase, full of vigor, and will have the most energy to put into developing new roots. Starting from seeds or taking cuttings at this time gives them the longest growing season to establish themselves before cooler weather arrives.
Supplies You’ll Need
Here’s what you’ll want to have on hand before you get started:
- Clean, sharp pruning shears or a sharp knife: For taking clean cuts.
- Small pots or seed starting trays: With drainage holes, of course!
- Well-draining potting mix: A good quality seed starting mix or a blend of peat moss and perlite works beautifully.
- Optional: Rooting hormone: A light dusting can give cuttings a little extra boost.
- Optional: Small plastic bags or a propagator lid: To create a humid environment for cuttings.
- Watering can or spray bottle: For gentle watering.
- Labels and a marker: To keep track of what you’ve planted and when.
Propagation Methods
There are a couple of straightforward ways to get more Cyclanthera carthagenensis plants.
From Seed
This is often the simplest method.
- Gather your seeds: You can collect them from ripe fruits or purchase them from reputable suppliers. Make sure the seeds are clean and dry.
- Prepare your pots: Fill your small pots or trays with your well-draining mix.
- Sow the seeds: Plant the seeds about 1-2 cm deep. You can plant 2-3 seeds per pot, just in case not all of them germinate.
- Water gently: Moisten the soil thoroughly but avoid making it waterlogged. A misting bottle is excellent for this.
- Provide warmth and light: Place the pots in a warm spot, ideally around 20-25°C. A sunny windowsill is perfect.
- Germination: Seeds usually germinate within 7-14 days. Once you see sprouts, ensure they’re getting bright, indirect light.
From Stem Cuttings
This is a fantastic way to get a head start and is my personal favorite for quick results.
- Select healthy stems: Look for young, vigorous stems that are not flowering or fruiting. About 15-20 cm long is a good size.
- Take your cuttings: Using your clean shears or knife, make a clean cut just below a leaf node (where a leaf attaches to the stem).
- Prepare the cutting: Remove the lower leaves from the cutting, leaving just 2-3 sets of leaves at the top. If the upper leaves are very large, you can even cut them in half to reduce water loss.
- Optional: Apply rooting hormone: Dip the cut end of the stem into rooting hormone powder.
- Pot the cuttings: Make a hole in your prepared potting mix with a pencil or your finger and insert the cutting. Gently firm the soil around it.
- Water and cover: Water the potting mix well and then cover the pot with a clear plastic bag or a propagator lid. This creates a mini greenhouse effect.
- Provide bright, indirect light: Place the pots in a location that receives plenty of bright, indirect light. Avoid direct sun, which can scorch the delicate cuttings.
The “Secret Sauce” (Pro Tips)
Over the years, I’ve learned a few tricks that really help these little ones thrive.
- Consistency is key with cuttings: Once you’ve potted your cuttings, try your best to maintain consistent moisture. They can dry out surprisingly quickly in their humid environment, and if they dry completely, they’re usually done for. Check them daily and mist if needed.
- Bottom heat is a game-changer: If you’re serious about propagation, investing in a heat mat can make a huge difference, especially for cuttings. It encourages root development from below, mimicking ideal soil temperatures. Place your pots directly on the mat.
- Don’t rush the roots: When you’ve taken cuttings, it can take anywhere from 3 to 6 weeks before you see significant root development. Don’t be tempted to pull them out to peek too soon! A good sign that roots are forming is when you see new leaf growth.
Aftercare & Troubleshooting
Once your seeds have germinated into little seedlings or your cuttings have started to show new growth and hopefully feel a bit resistant when gently tugged, it’s time for a little extra care.
For Seedlings: Gradually acclimate them to less humid conditions over a week or two by removing the plastic cover for increasing periods. Once they have a few sets of true leaves and are sturdy, you can transplant them into larger pots or their final growing location. Continue to water them consistently, ensuring the soil doesn’t dry out completely.
For Rooted Cuttings: Treat them much like the seedlings. Water them gently and continue to keep them in a bright, warm spot. They’ll be a little more sensitive than established plants, so avoid extreme temperature fluctuations.
Now, what if things aren’t going as planned? The most common issue you’ll face is rot. This usually happens with cuttings due to overwatering or poor drainage, leading to a mushy, black stem. If you see this, it’s best to discard the affected cutting and check your watering and drainage for the others. Sometimes, cuttings simply fail to root – that’s just part of the process, and it’s okay! Don’t be discouraged; just try again.
A Encouraging Closing
Growing new plants is such a wonderful journey, and Cyclanthera carthagenensis is a delightful companion on that path. Be patient with the process, celebrate every little sprout and new leaf, and most importantly, enjoy the satisfaction of bringing these unique plants to life. Happy propagating!
Resource: