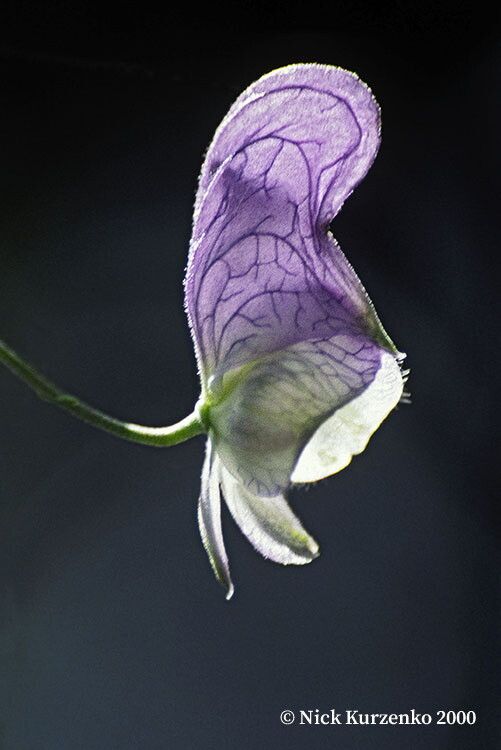
Oh, those gorgeous Aconitum stoloniferum! You know, the ones with those incredible, hooded blossoms, often in shades of deep violet and sapphire. They bring such a touch of drama and elegance to a shady corner. For me, growing them from scratch is one of those deeply satisfying gardening experiences. It’s like coaxing a little bit of magic into existence.
Now, are they a beginner’s plant to propagate? I’d say they’re not trickiest plant out there, but they do appreciate a bit of attention. It might take a tiny bit more finesse than, say, a busy Lizzies, but trust me, it’s entirely achievable and oh-so-worth-it.
The Best Time to Start
For Aconitum stoloniferum, the sweet spot is definitely late spring to early summer. This is when the plant is actively growing, but before it gets too stressed by the summer heat. Look for vigorous new shoots emerging from the base of the plant. These are your best bet for successful propagation.
Supplies You’ll Need
Here’s what I always have on hand when I go about this:
- Sharp pruning shears or a clean, sharp knife: For making precise cuts.
- Potting mix: I prefer a light, well-draining mix. A good blend of peat moss, perlite, and a little compost works wonders.
- Small pots or seed trays: Clean ones are a must to prevent disease.
- Rooting hormone (optional but recommended): A powder or gel can give your cuttings a real boost.
- Watering can with a fine rose: Gentleness is key.
- Plastic bags or a humidity dome: To keep things nice and humid.
- Labels: So you don’t forget what you planted where!
Propagation Methods
The most reliable way to propagate Aconitum stoloniferum for me is through stem cuttings.
Step-by-Step Stem Cuttings:
- Select Your Cuttings: In late spring or early summer, choose healthy, non-flowering shoots that are about 4-6 inches long. They should be firm but still a little flexible.
- Make Your Cut: Using your sharp pruners or knife, make a clean cut just below a leaf node. A leaf node is where a leaf attaches to the stem.
- Prepare the Cutting: Gently remove the lower leaves from the cutting. You want to leave just one or two pairs of leaves at the top. This helps reduce water loss. If the remaining leaves are quite large, you can even cut them in half horizontally.
- Apply Rooting Hormone (Optional): If you’re using rooting hormone, dip the cut end of the stem into the powder or gel. Tap off any excess.
- Plant Your Cuttings: Fill your small pots or trays with your prepared potting mix. Moisten the mix thoroughly but not so much that it’s waterlogged. Insert the cuttings into the soil, making sure the part where you removed the leaves is buried. Gently firm the soil around the base of the cutting.
- Provide Humidity: Water gently again. This is crucial: cover the pots with a clear plastic bag or a humidity dome. This creates a mini-greenhouse effect, keeping the humidity high around your cuttings, which they absolutely love. You can prop the bag up with a few skewers so it doesn’t touch the leaves.
- Find the Right Spot: Place the pots in a bright location with indirect light. Avoid direct sun, as this can scorch the delicate cuttings. A north-facing windowsill is often perfect.
The “Secret Sauce” (Pro Tips)
Here are a few little tricks I’ve picked up over the years:
- Don’t Let the Leaves Touch the Water: When you mist or water your cuttings, make sure no leaves are sitting wet. This is a fast track to rot. If you’re using a plastic bag, I often tie it loosely so any condensation drips back into the soil rather than pooling on the leaves.
- Bottom Heat is Your Friend: If you have a greenhouse or a warm spot indoors, a little bottom heat can really speed things up. A seedling heat mat, placed under the pots, will encourage root development nicely. Just make sure it’s not too hot – think of it as a gentle warming rather than cooking!
- Patience is a Virtue: Aconitum can be a little slow to root. Don’t get discouraged if you don’t see results immediately. It can take several weeks, sometimes even a couple of months, for them to establish a good root system.
Aftercare & Troubleshooting
Once you start seeing new leaf growth on your cuttings, that’s a fantastic sign! It means roots are forming.
- Gradual Acclimatization: Slowly start to remove the plastic bag or dome over a week or so. This helps the new plants get used to the ambient humidity.
- Gentle Watering: Continue to water consistently, keeping the soil moist but not soggy.
- Potting Up: When the new plants have a decent amount of new growth and you can feel a bit of resistance when you gently tug them (indicating roots are holding them), it’s time to pot them up into slightly larger containers.
Now, what if things go wrong? The most common culprit is rot. If your cutting turns mushy, black, or just seems to wilt and die completely, it’s likely too much moisture combined with not enough air circulation. That’s why that well-draining mix and good airflow are so important. Sometimes, a cutting just doesn’t take – and that’s okay too! Nature has its ways, and not every attempt is successful, but that’s part of the learning curve.
So there you have it! Aconitum stoloniferum propagation. It’s a little bit of patience, a touch of care, and a whole lot of reward. Don’t be afraid to give it a go. Enjoy the process of nurturing these beautiful plants from tiny cuttings into something truly special for your garden. Happy gardening!
Resource:
https://identify.plantnet.org/k-world-flora/species/Aconitum%20stoloniferum%20Vorosch./data