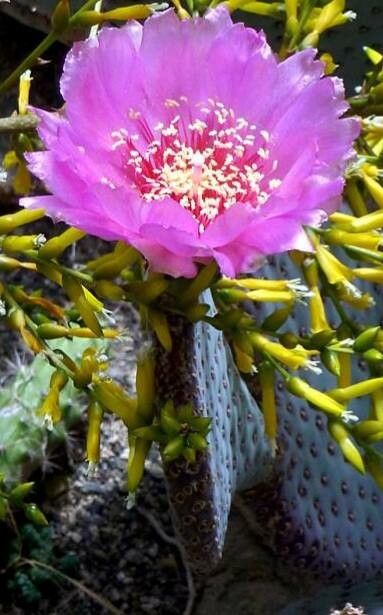
Hello, fellow garden enthusiasts! Today, I want to talk about one of my absolute favorites: Opuntia basilaris, often called the Beavertail Cactus. Isn’t it just charming with those flattened, paddle-like segments? Its vibrant magenta flowers in spring are truly a treat. Propagating these beauties is incredibly rewarding, and guess what? For a cactus, they’re surprisingly forgiving! You’ll find it’s a really satisfying project for beginners and seasoned gardeners alike.
The Best Time to Start
The absolute best time to start propagating your Beavertail Cactus is when things are really starting to wake up in the spring, or early summer. This is when the plant is actively growing and has the most energy to put into developing new roots. Waiting until the weather is reliably warm but not overwhelmingly hot makes a big difference.
Supplies You’ll Need
Here’s a handy list of what you’ll need to get started:
- Clean, sharp pruning shears or a knife. This is crucial for making clean cuts.
- Rooting hormone (optional, but helpful). It gives your cuttings a little boost.
- A well-draining potting mix. A cactus or succulent mix is ideal. You can also mix in some perlite or pumice for extra drainage.
- Pots or trays with drainage holes. Don’t skip the drainage!
- Gloves. Prickly pears have tiny spines called glochids that can be quite irritating.
- A watering can with a fine rose or a spray bottle.
Propagation Methods
The most common and easiest way to propagate Opuntia basilaris is by stem cuttings. It’s almost as simple as breaking off a piece and waiting for it to root.
Stem Cuttings:
- Select a healthy pad. Look for a mature, firm pad on your existing Beavertail Cactus. Avoid any that look mushy or damaged.
- Make the cut. Using your clean shears or knife, carefully cut the pad away from the main plant. It’s best to make the cut right where the pad connects to the one below it.
- Let it callous. This is a vital step! Place the cut pad in a dry, airy location for several days to a week. You want the cut end to dry out and form a callous. This prevents rot when you plant it. Think of it like a scab forming on a wound.
- Plant the cutting. Once the cut end is dry and calloused, you can plant it. You can either dip the calloused end into rooting hormone (if using) or plant it directly.
- Position the cutting. Gently insert the calloused end about 1-2 inches deep into your prepared potting mix. You can prop it up with a small stick or stone if it’s wobbly.
- Wait for roots. Now comes the patience part! Do not water at this stage. Wait for about 2-3 weeks before giving it its first light watering. You can gently tug on the pad after a few weeks; if you feel resistance, it means roots have formed.
The “Secret Sauce” (Pro Tips)
Here are a couple of things I’ve learned over the years that can really help your cuttings thrive:
- Don’t overwater the initial planting. This is probably the most common mistake. That calloused cutting is vulnerable, and too much moisture will invite rot like a bad house guest. Let the soil stay mostly dry until you see clear signs of rooting.
- Bottom heat can be a game-changer. If you’re propagating in early spring and it’s still a bit cool, placing your pot on a heat mat designed for seedlings can speed up root development significantly. It mimics the warmth of summer.
Aftercare & Troubleshooting
Once your Beavertail cuttings have successfully rooted (you’ll feel that gentle tug!), you can start treating them like a mature Opuntia.
- Watering: Water thoroughly when the potting mix is completely dry. This might be every few weeks for established plants, less often for very small ones.
- Sunlight: Place them in a bright, sunny location. They absolutely love sunshine!
- Signs of trouble: The biggest culprit is rot. If a pad starts to look mushy, discolored, or overly soft, it’s likely rot. This usually means it was too wet. You might be able to salvage a healthy part of the pad, let it callous, and try again. Another sign of failure is the cutting simply shriveling up without forming roots; this can sometimes be due to not callousing long enough or an unfavorable environment.
A Little Encouragement
Propagating Opuntia basilaris is a wonderful way to multiply these captivating plants and share them with friends. Be patient with your new cuttings; they have their own little timeline. Enjoy the process of nurturing something new from a simple pad, and before you know it, you’ll have a whole collection of Beavertail Cacti! Happy gardening!
Resource: